A Step-by-Step Guide to Creating a Google Vault Export #
GAT Flow helps Google Workspace Admins with many tasks and responsibilities as it is an ‘all in one solution for managing the Google Workspace domain. The admins can set up many automated actions to be taken on one or bulk users at once.
GAT Flow allows managing Google Vault users with the below actions:
- Setting Google Vault users on hold
- Removing users from Google Vault hold
- Creating Google Vault export
In this post, we’ll outline the process of creating a Google Vault export.
Select action #
The action Create Google Vault export can be performed either on a one-off regular workflow (Create workflow), Event workflow, or Recurring workflow.
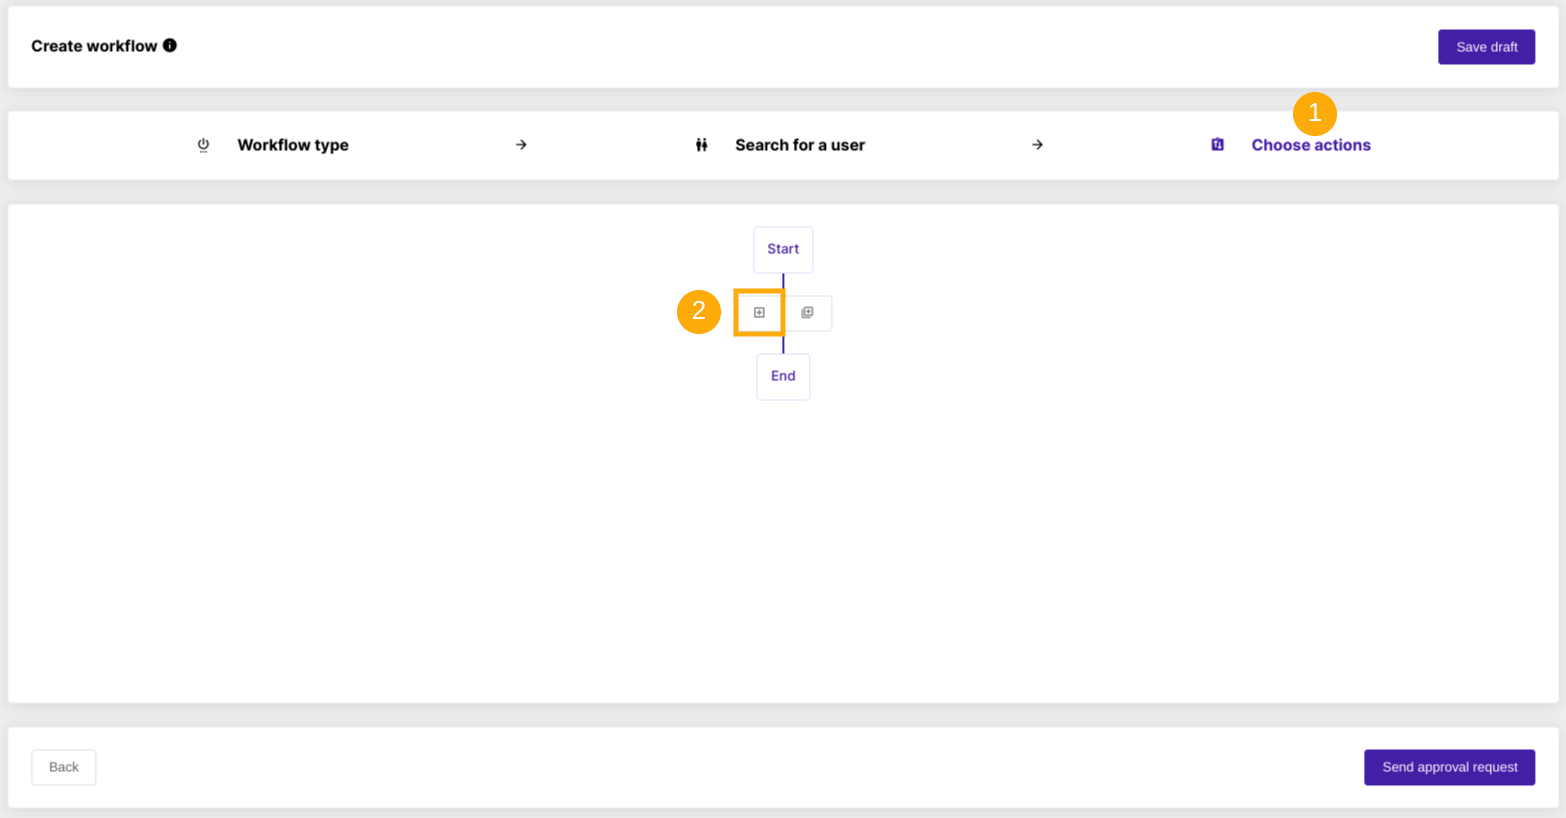
To create a workflow that creates user(s) Google Vault export, add the relevant action into it by clicking on the ‘Add action’ + button (left side of the graph).

The available actions will be displayed by default.
Search and select Remove user from hold action.

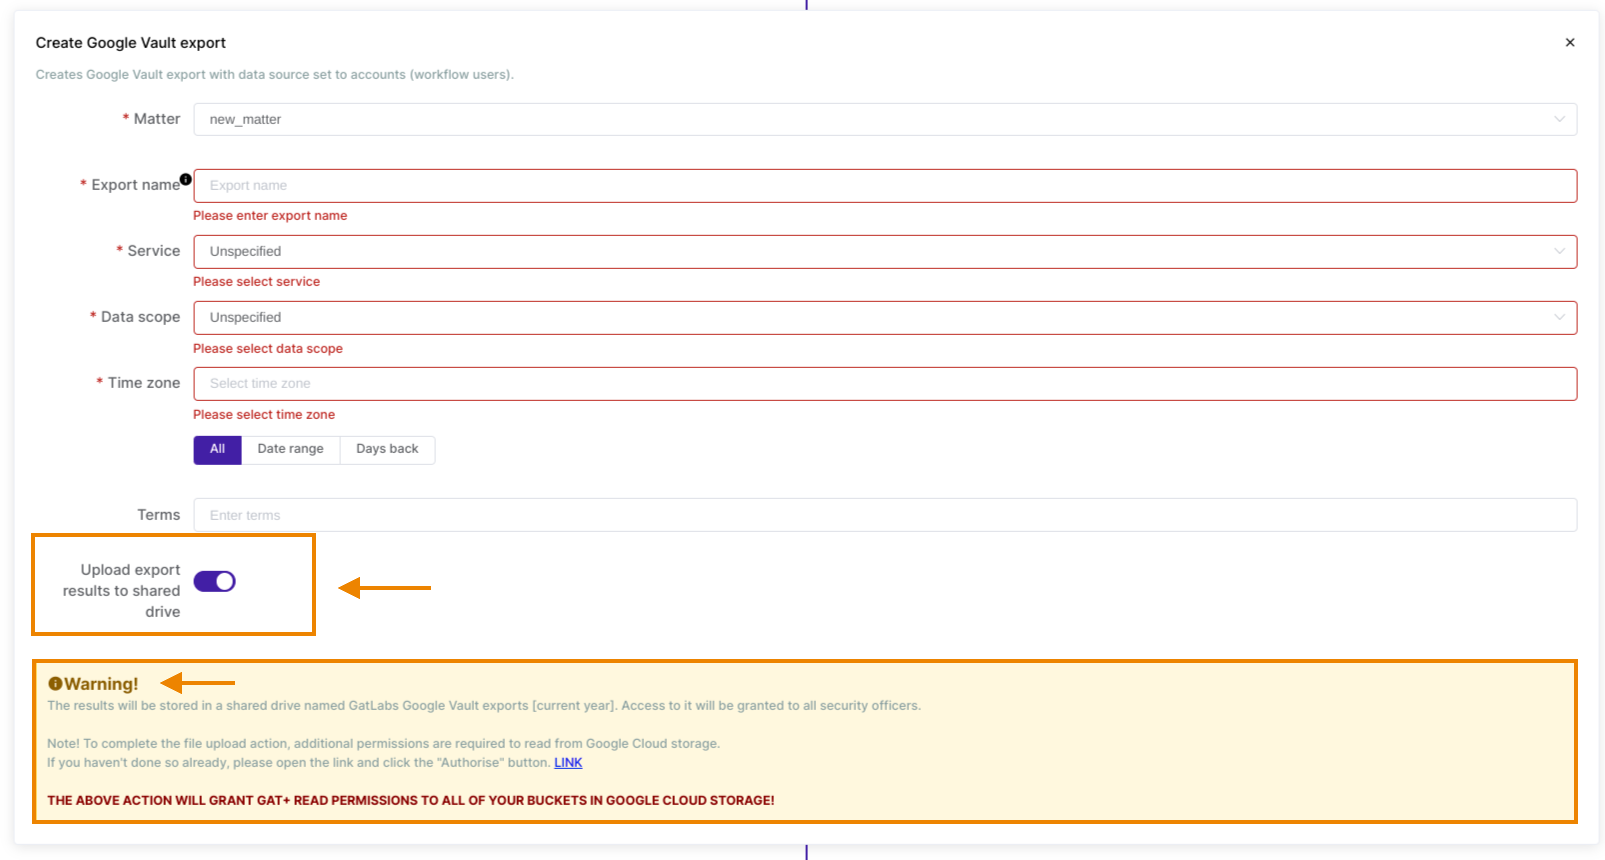
When the action is selected fill in the required details.
- Matter – Select the name of the existing Google Vault Matter that the export will refer to;
- Export name – Type the name of this export that will be displayed in Google Vault under the particular Matter’s export tab;
- Service – Choose the relevant service from the pop-up list:
- Drive
- Hangout chat
- Export format – if Mail service is selected, choose the export format from:
- MBOX
- PST
- Data scope
- All data
- Held data
- Unprocessed data
- Time zone – Select the time zone
- All / Date range / Days back – define from which time period the data should be exported (select the date range or the number of days back from which data should be exported if not All selected);
- Terms – Enter a particular term for exporting data;
- Depending on the Service type selected:
- If Drive service is selected, the option to Include shared drives can be toggled
- If Mail service is selected, additional options can be toggled:
- Exclude email drafts
- Export linked drive files
- If the Hangout chat service is selected, the option to Include messages from the chat space can be toggled
- When the workflow is ready click on Send approval request.

Upload export results to shared drive #
GAT Flow allows to upload of exported Vault data to Shared Drive to retain them. If you wish to upload the export to a shared drive, please follow these steps first.

Even when a retention rule is set to purge data, the background process that removes permanently deleted or expired data from Google systems keeps data available to Vault for approximately 30 days before it is fully purged.
For example:
-
Gmail messages that were deleted more than 30 days before the retention coverage expires are immediately purged at the end of the retention period, and you can’t retrieve them.
- Drive items can take up to 15 days to be removed from Drive after all retention rules expire. If an item is removed from Drive and is not covered by retention rules or holds, it is immediately unavailable to Vault.
Results #
The workflow needs to be approved by the Security Officer.
Once the request is approved, the workflow will execute, and the Google Vault export will be created.
To check the results, navigate to the Workflow section and select the workflow that refers to the creation of Google Vault export. Click on the ‘eye’ icon on the right side of the workflow log to view the Result details (shown in the below screenshot).

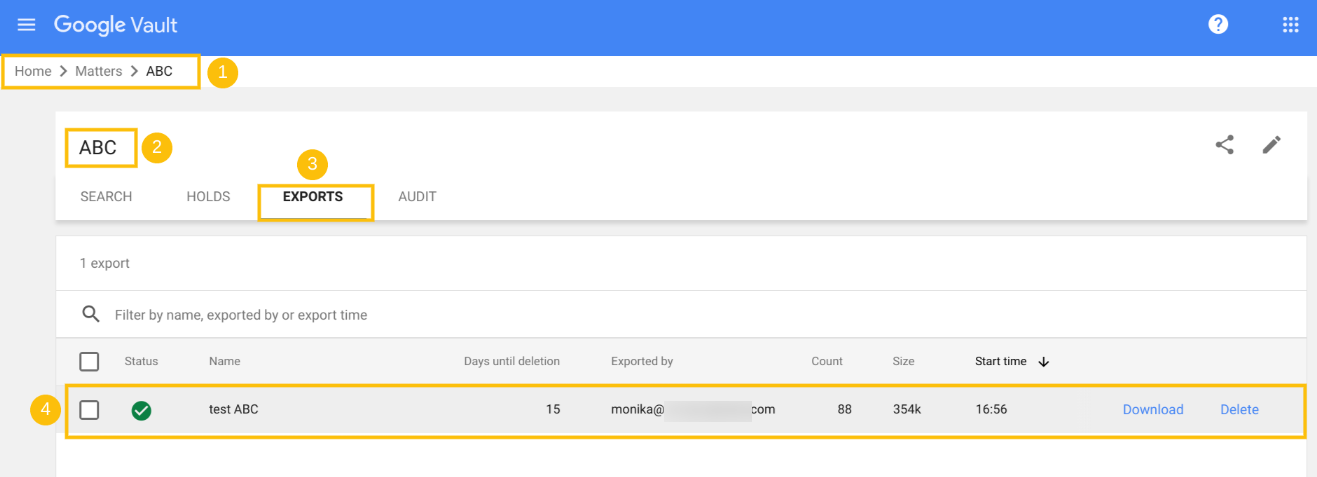
In Google Vault navigate to the Matters (2), select the relevant Matter from the list of existing ones (2), and go to the Exports tab (3). The Export Status, Name, Days until deletion, and Exported by will appear there, along with the Count, Size, and Start time (4).

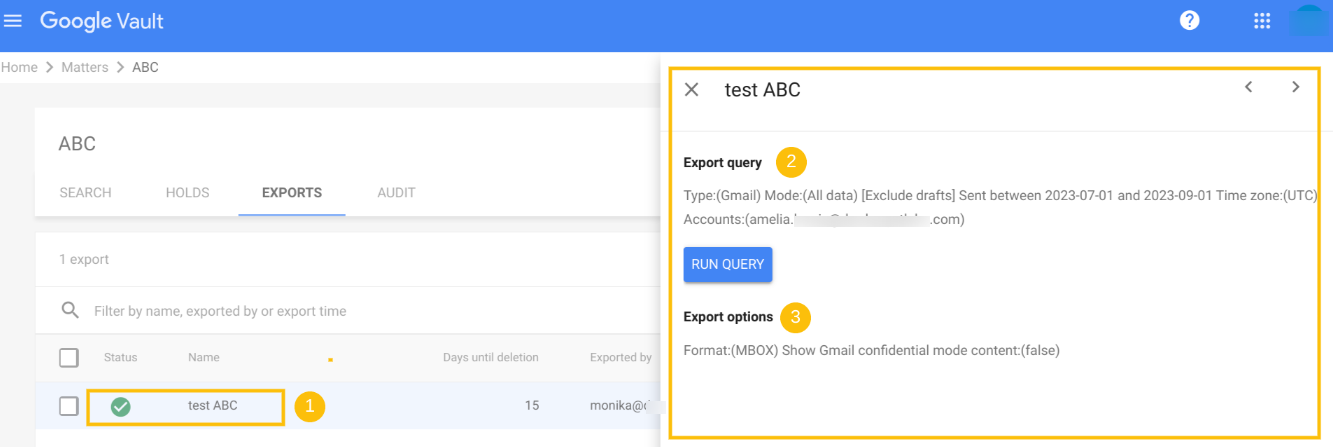
Clicking on the status or name of the export (1) displays the Export query (2) and Export options (3) in a new window on the right side.

Hovering your mouse over the right side of the area reveals the Download or Delete Export option.

Finally, the Download option downloads data to the Admin’s device (the user who initiated the export).


