The GAT Flow tool is designed to reduce Google Workspace Admin Tasks significantly. It is useful in managing user characteristics in the domain and more importantly, helps the admin achieve this in an automated manner. This is the purpose of event-triggered workflows, that allow for users to be managed dynamically. In this post, we will look at the example of a workflow that will trigger when a user disables or enables 2FA.
Creating event workflow for a user who disables 2FA #
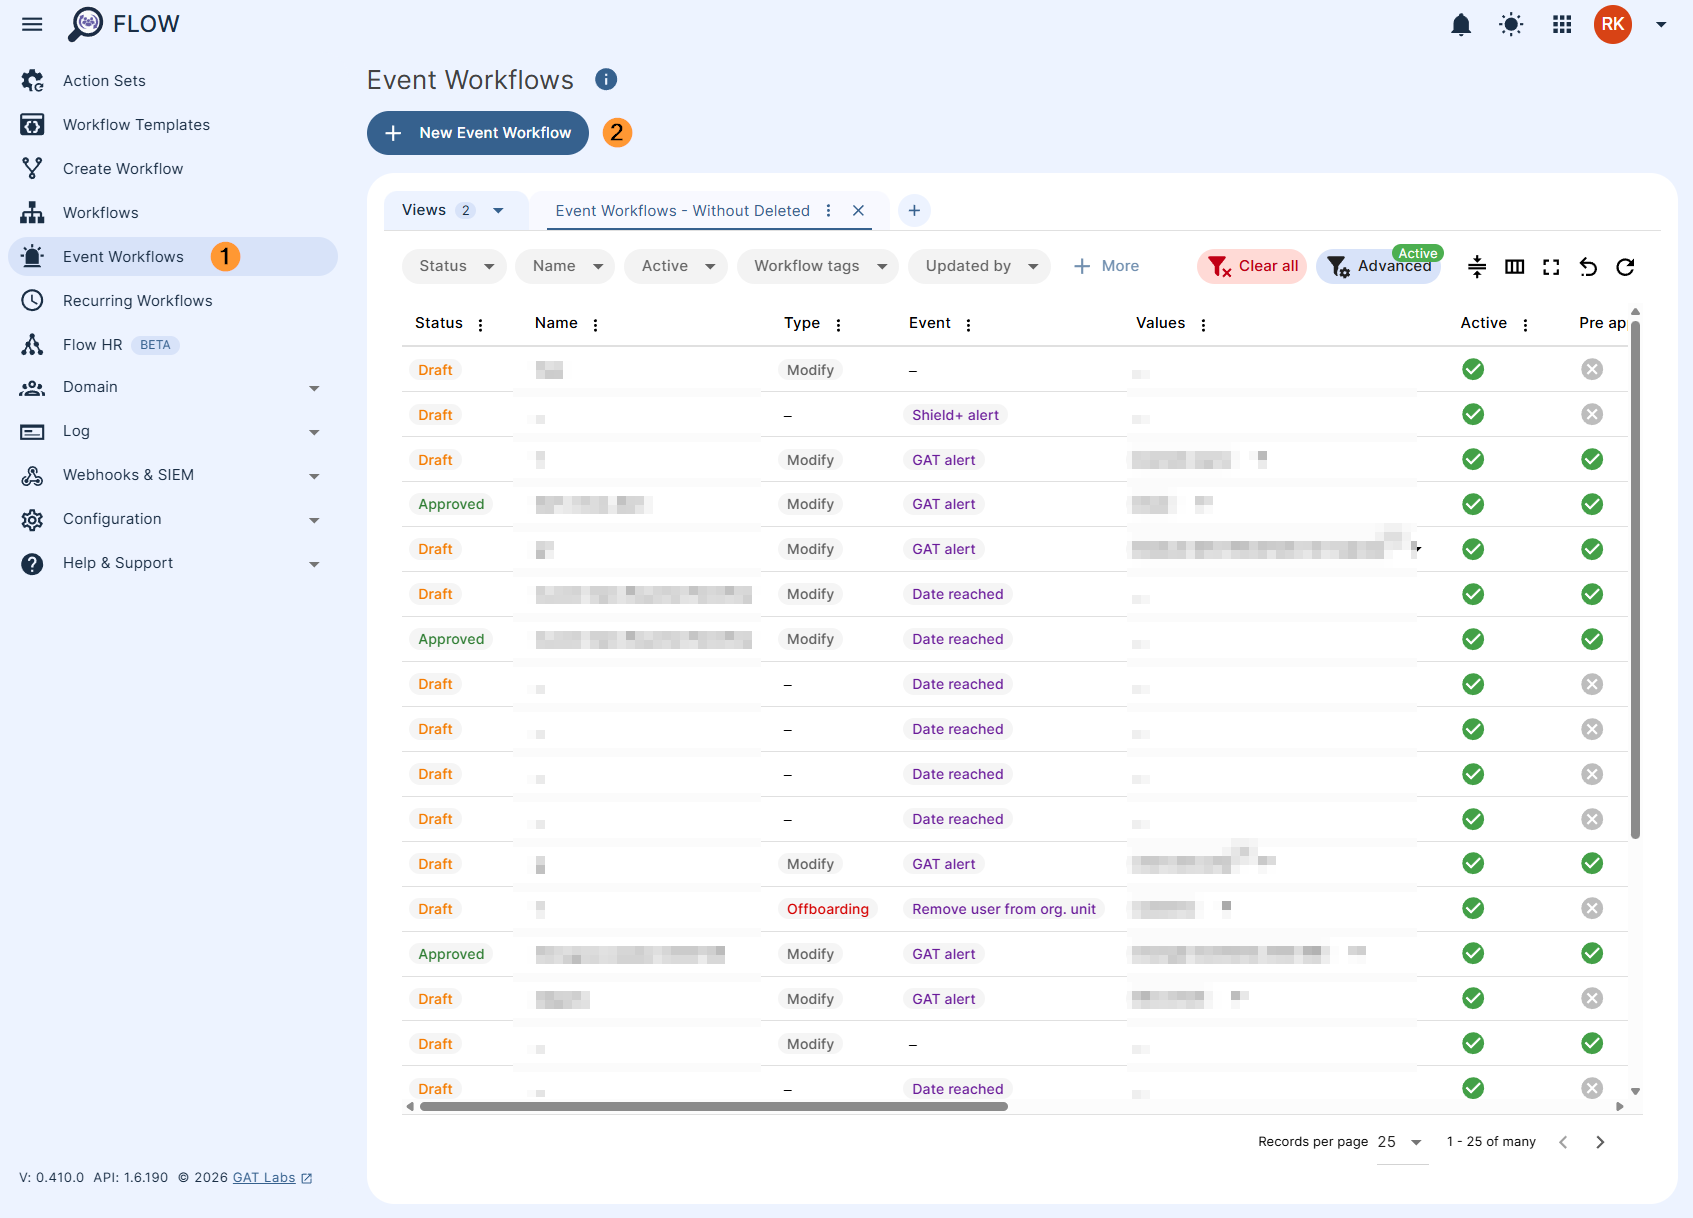
Navigate to GAT Flow > Event Workflow (1) and select ‘+ New Event Workflow‘ (2) at the top left-hand corner of the view.
There are 2 events available for 2FA,
- User 2FA enabled.
- User 2FA disabled.
For this example ‘User 2FA disabled’ is the event. Build the workflow by following the steps below,
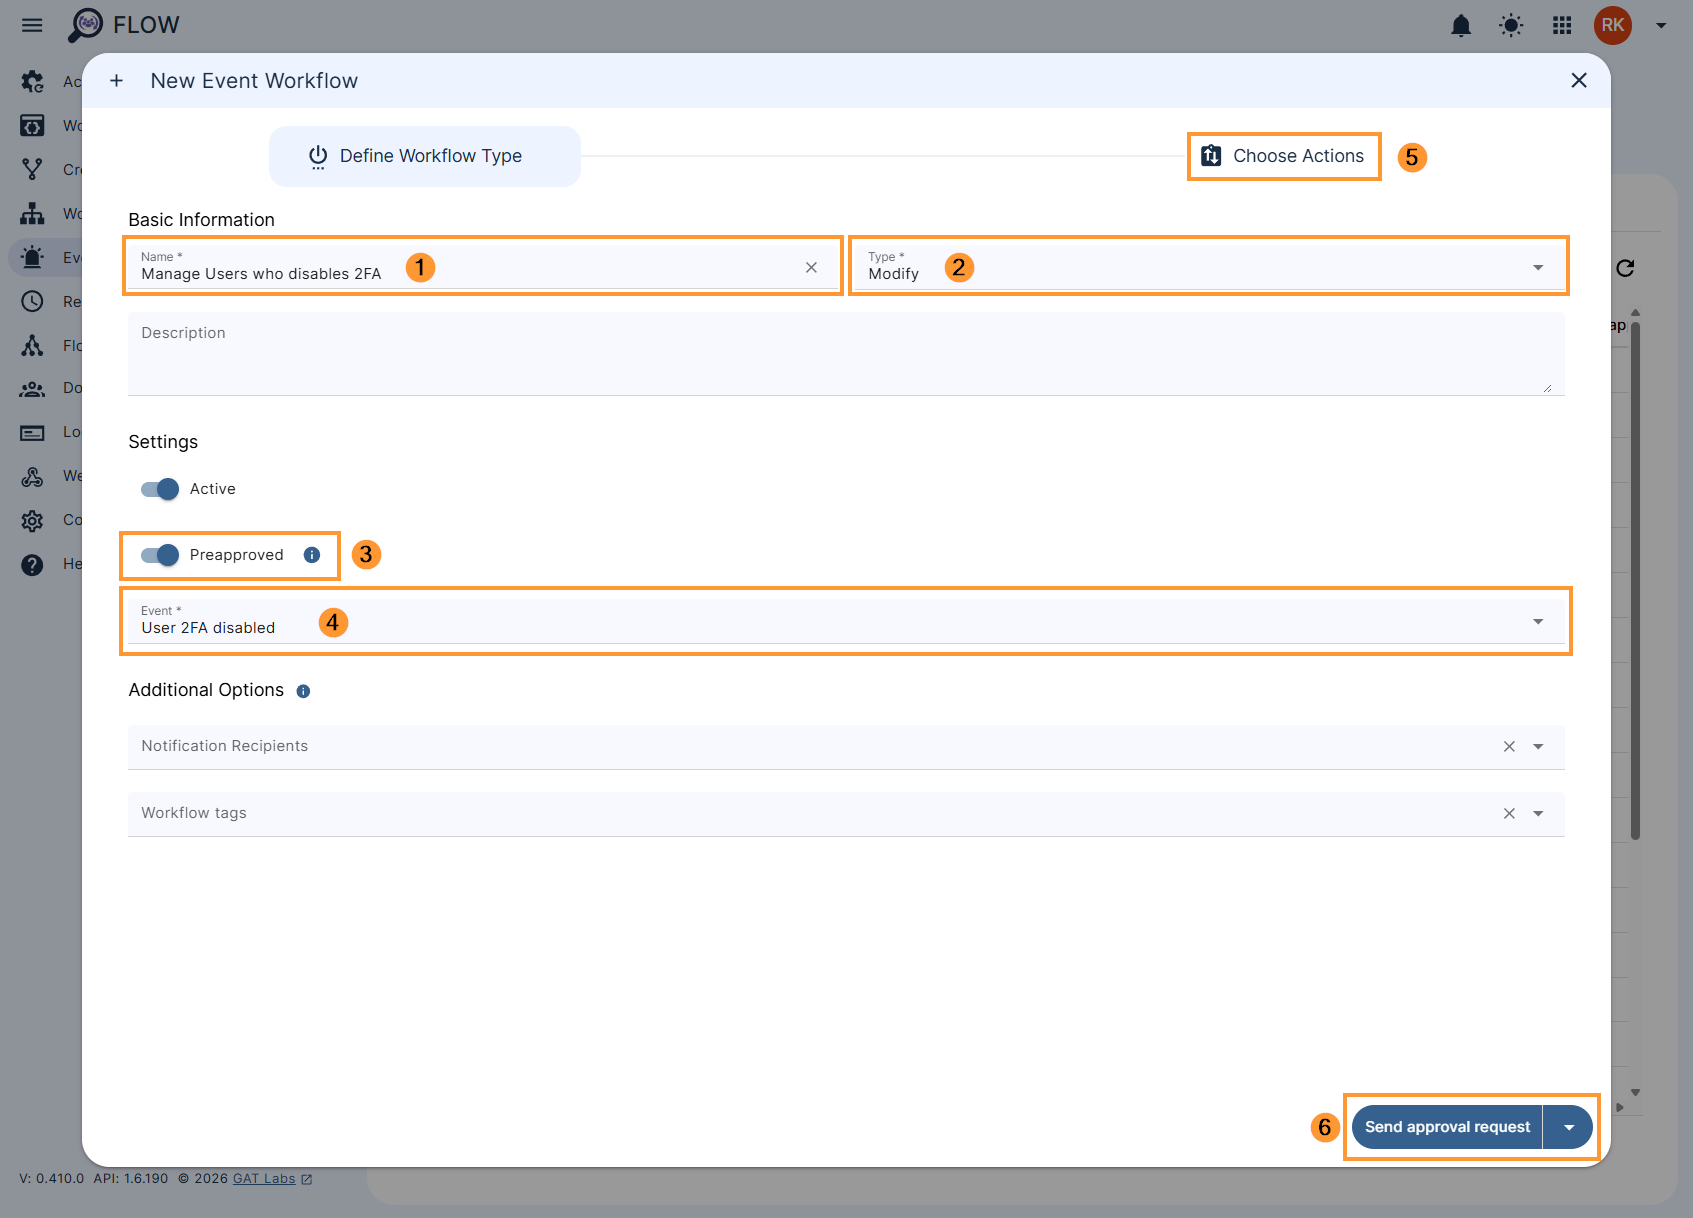
Pre-approved is selected to avoid needing the Security Officer approval everyime the event is triggered, only initial approval is required when selected.
Click ‘Choose Actions‘ (5) or ‘Send approval request‘ (6) to move to the next tab where the actions you choose will be executed when the event is triggered. There are dozens of actions to choose from depending on how your organization wishes to treat such cases from a security perspective.
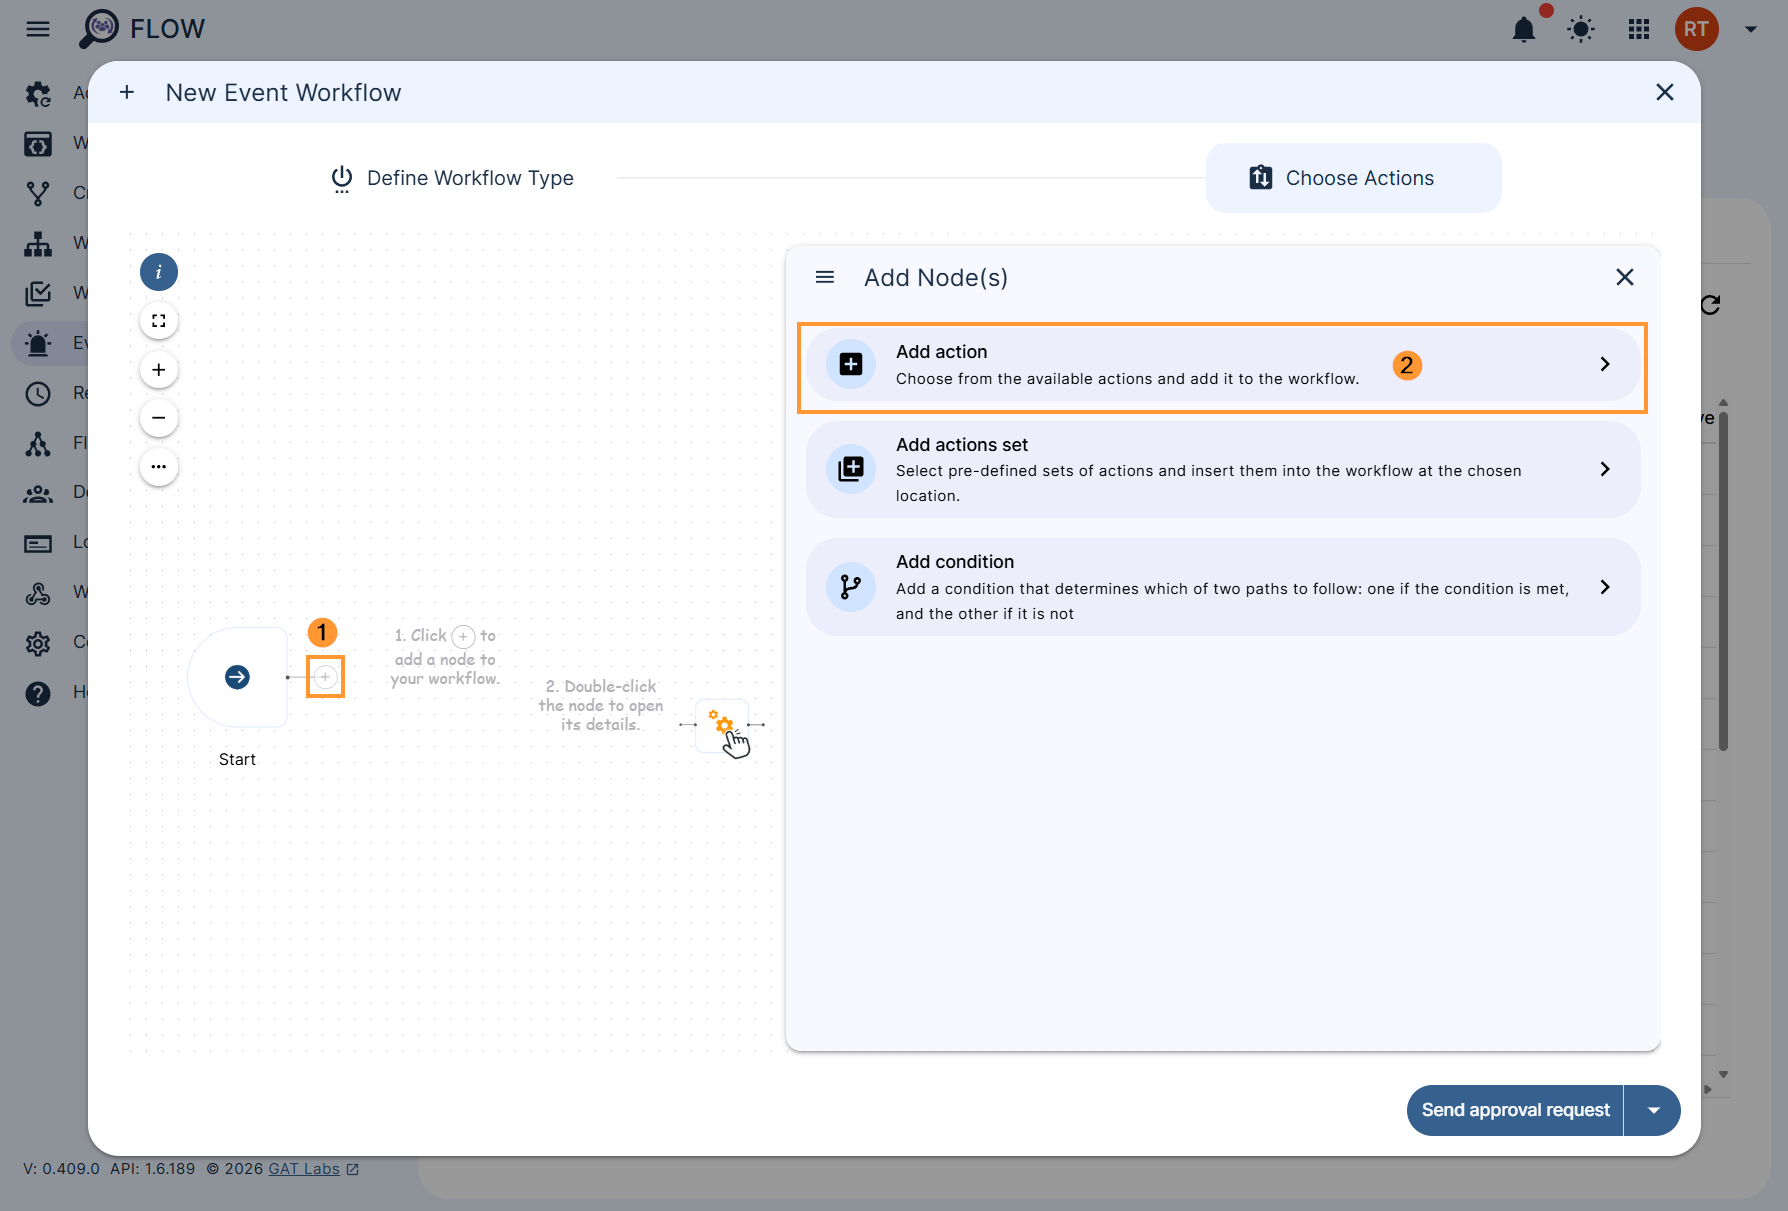
In the Choose Actions click on the (+) button (1) and then click the Add action button (2)
For this example, we are sending a warning email to the user who disabled their 2FA, A follow-up action could be perhaps to add the user to a group for users who don’t have 2FA enabled. Once you’ve selected the ‘Send email’ action (1), double click the action node (2) to configure the email.
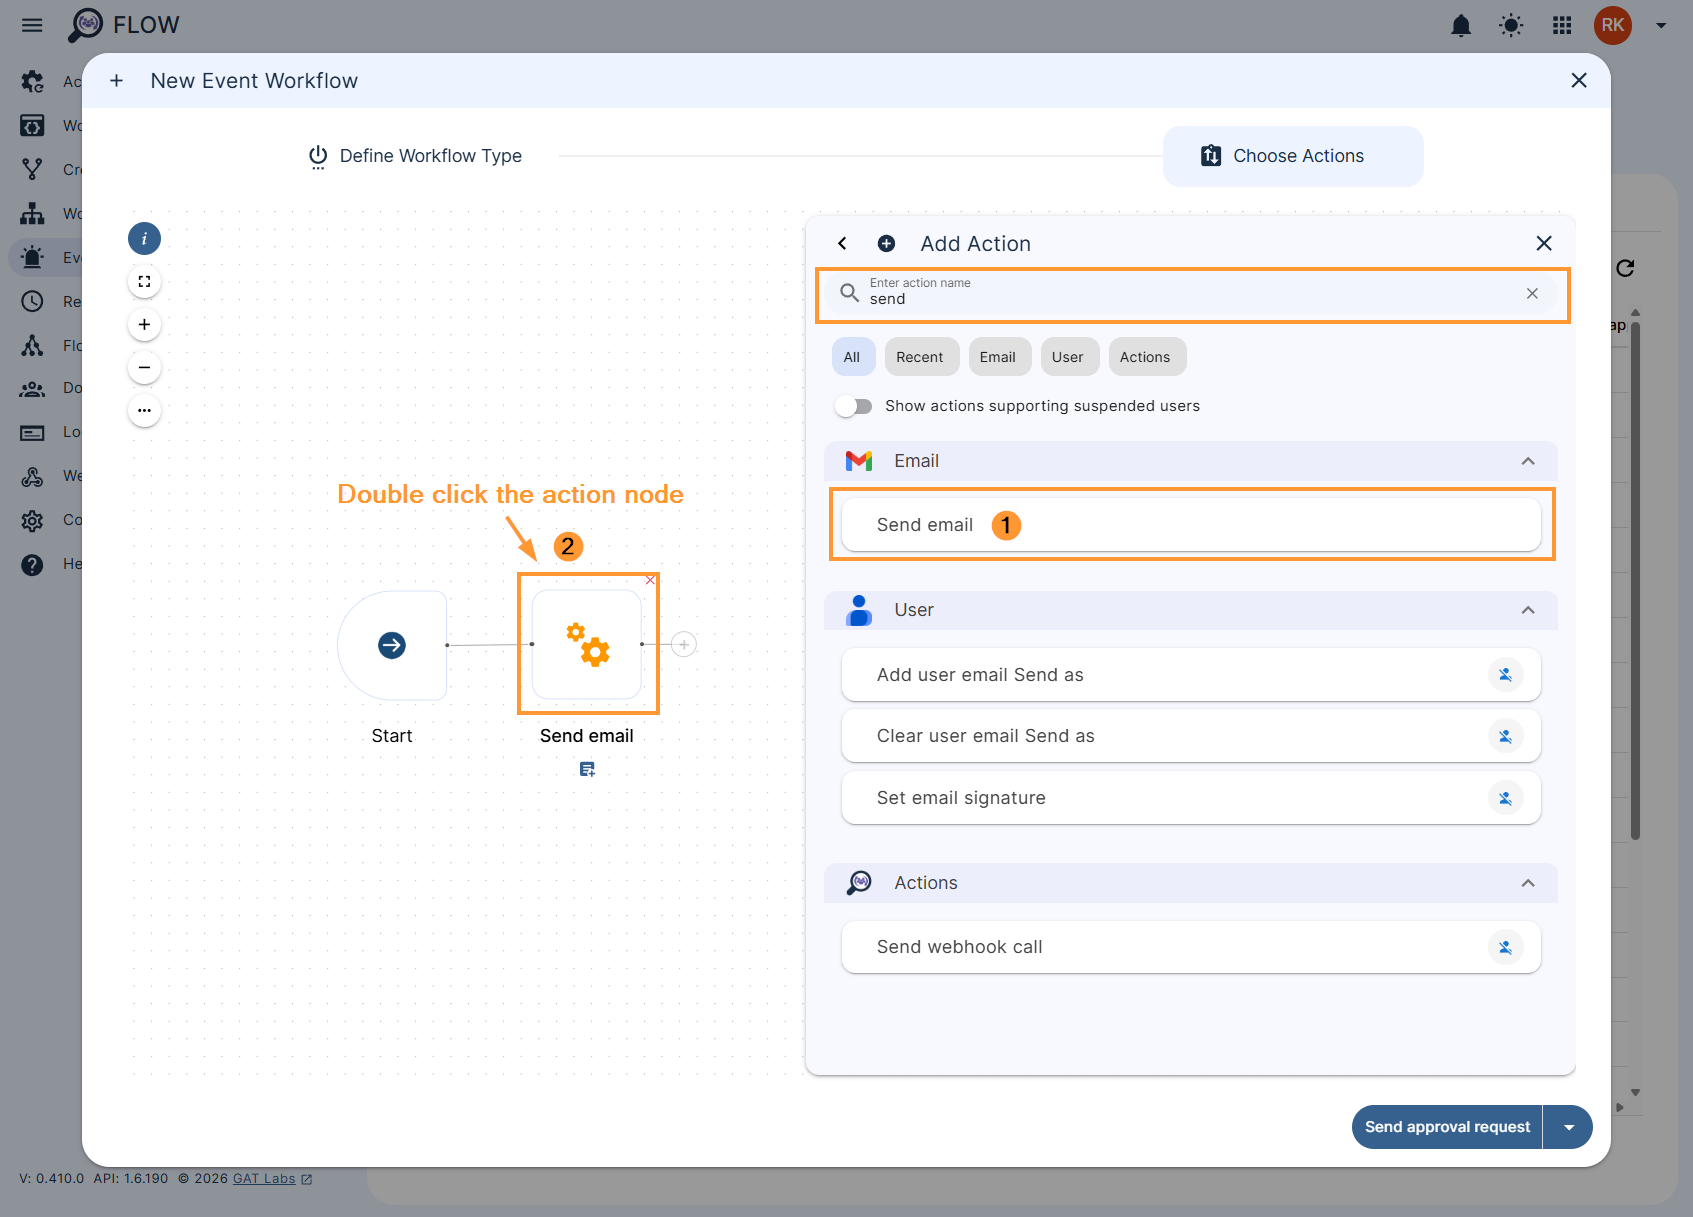
Adding the user to a group action and more can be selected the same way the ‘send email‘ action was selected above.
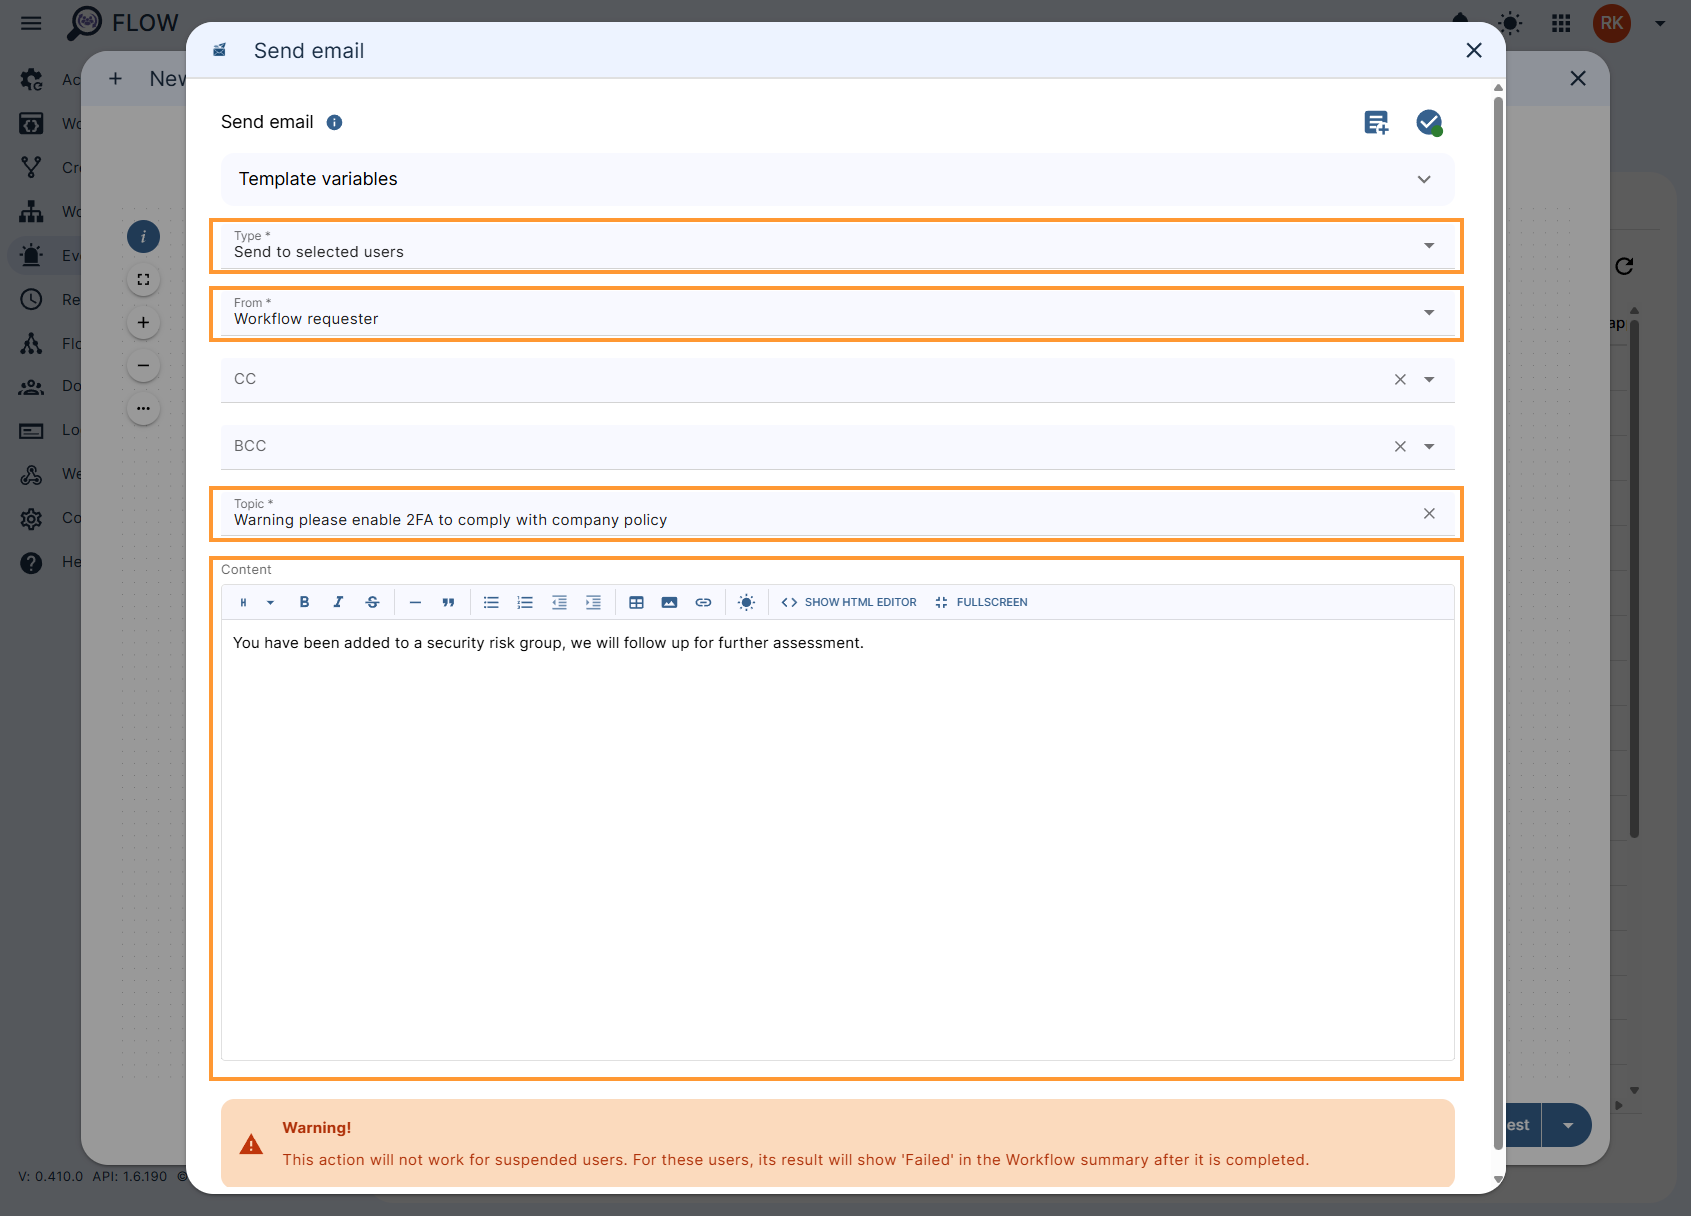
Changes made to the ‘Send email’ action are saved automatically, to finish click outside of the ‘Send email’ pop-up box or click the X in the top right then click the ‘Send approval request‘
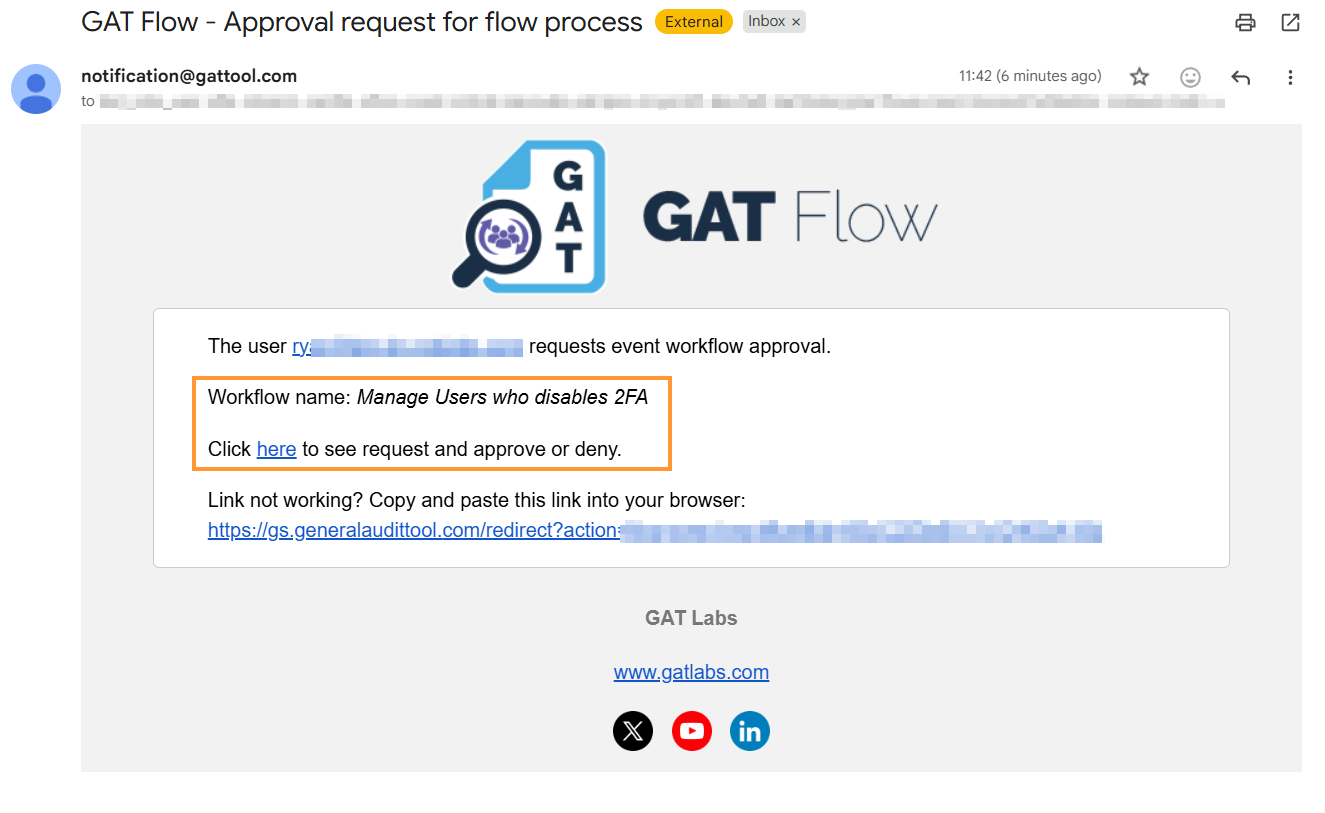
Security officer approval #
The security officer will be notified via email to approve the request.
Results #
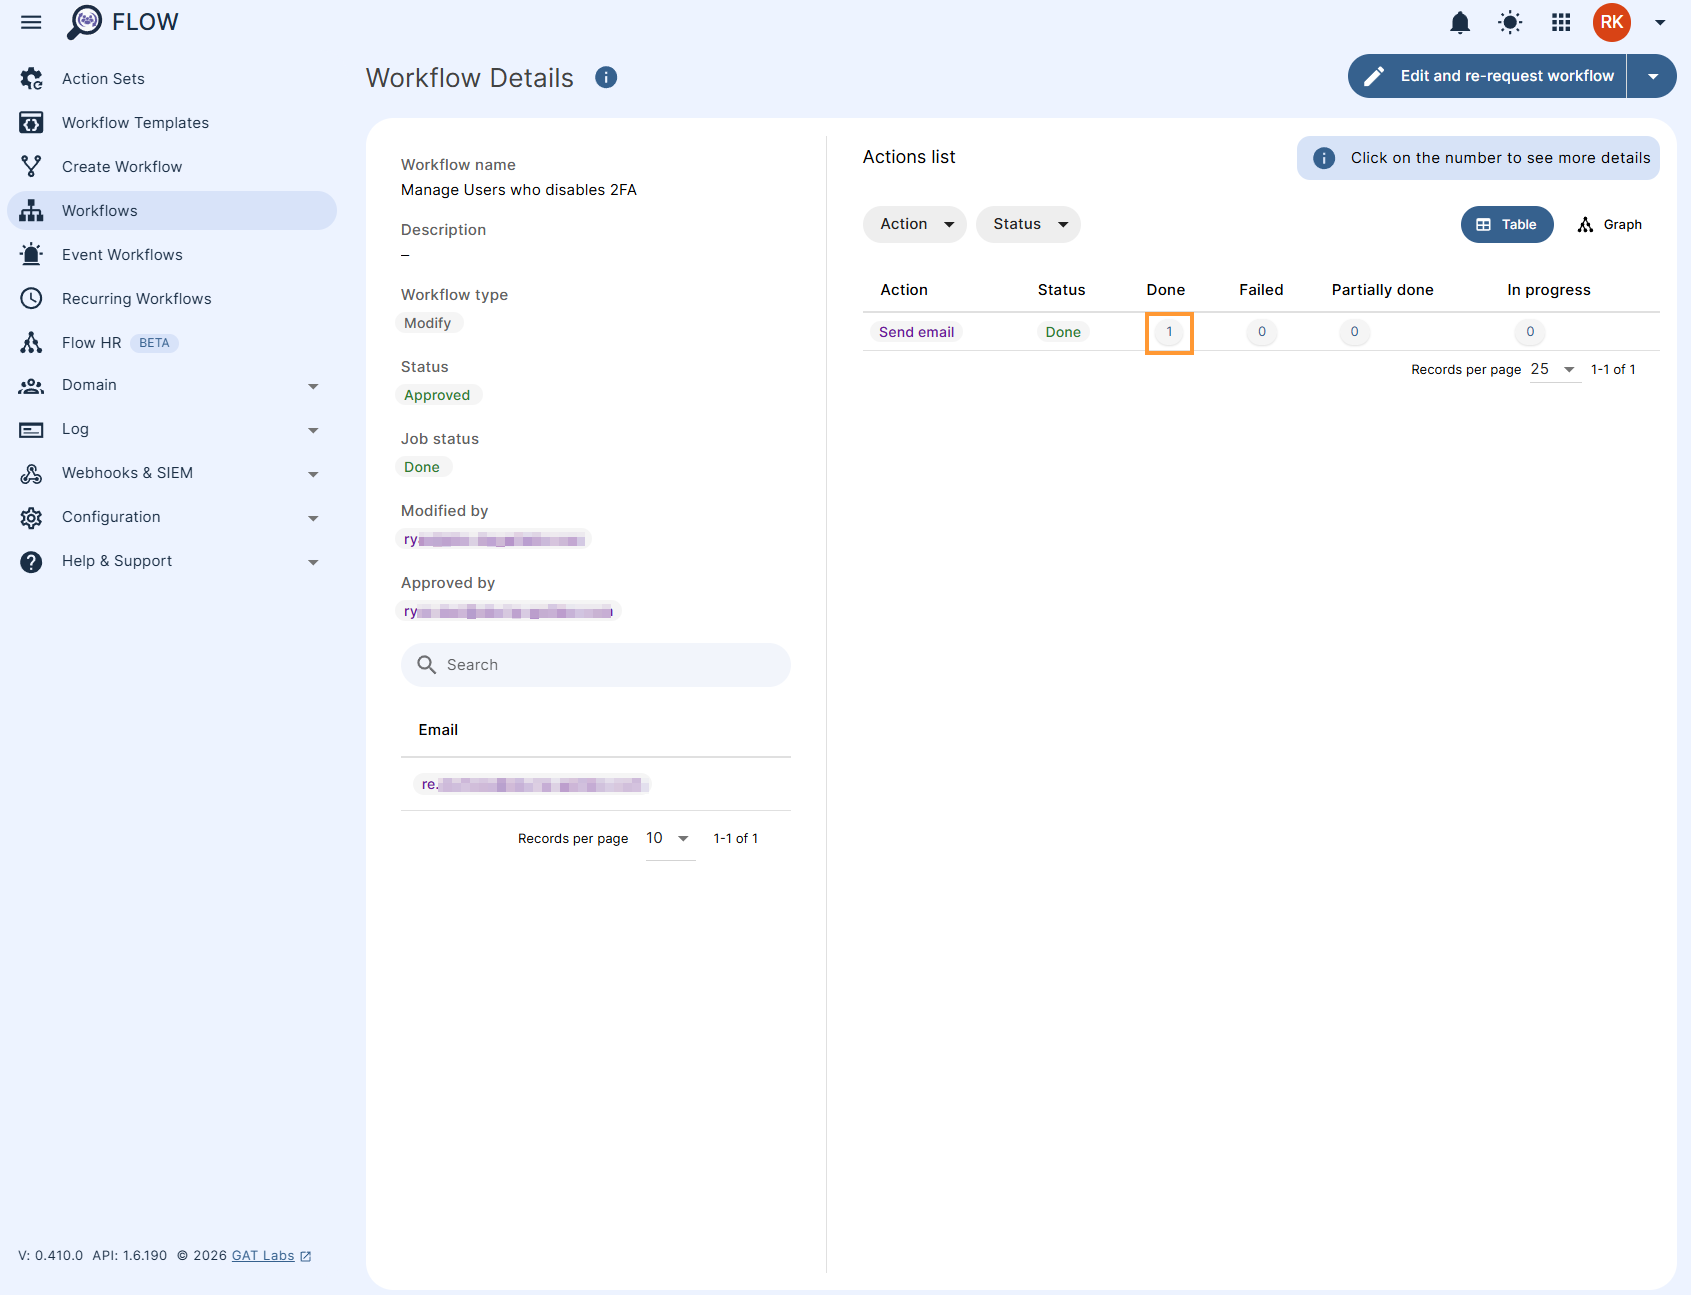
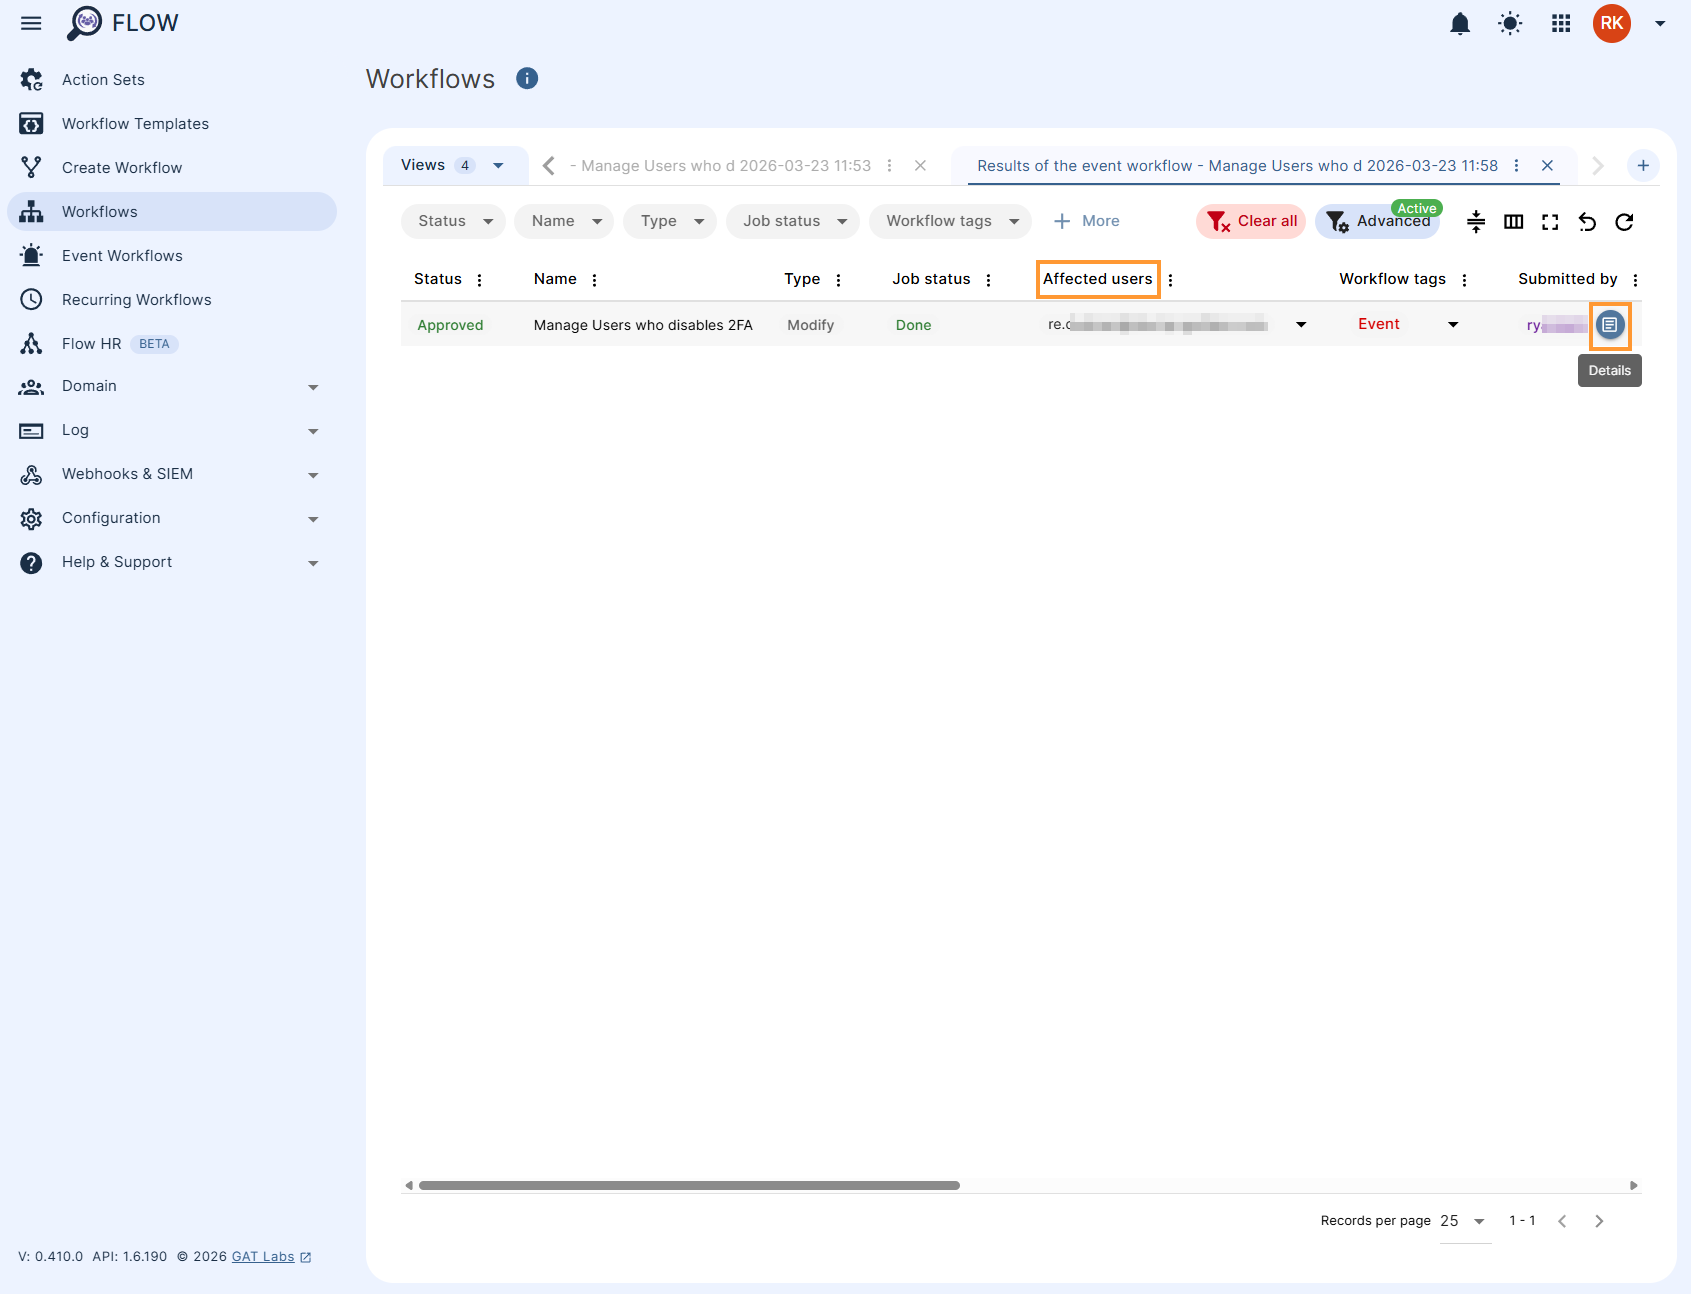
To check on the results, find the workflow in the ‘Event workflow‘ module by filtering by name, then select the results icon as shown below,
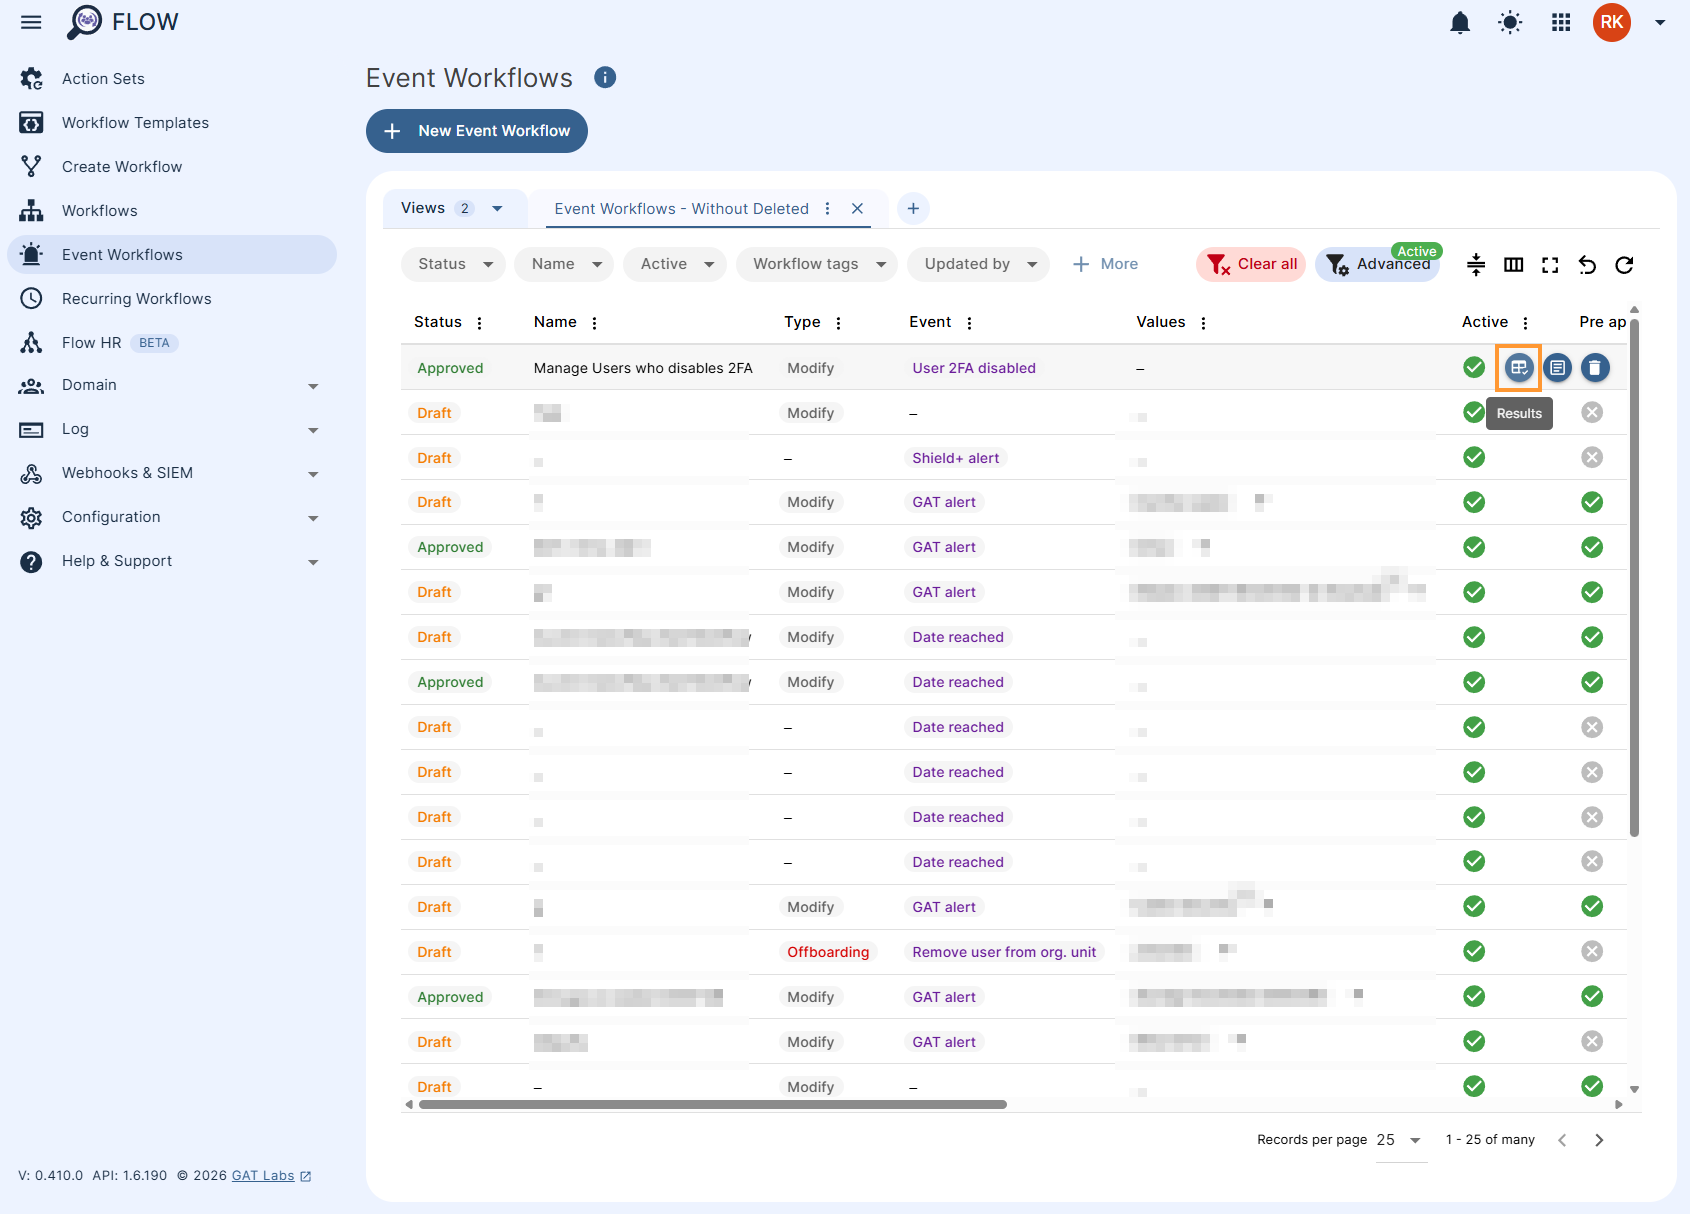
Here, each event triggered is displayed in rows, selecting the ‘page‘ icon will show more details about the actions taken.
More details about the action can be observed when selecting the numbers under the headers.