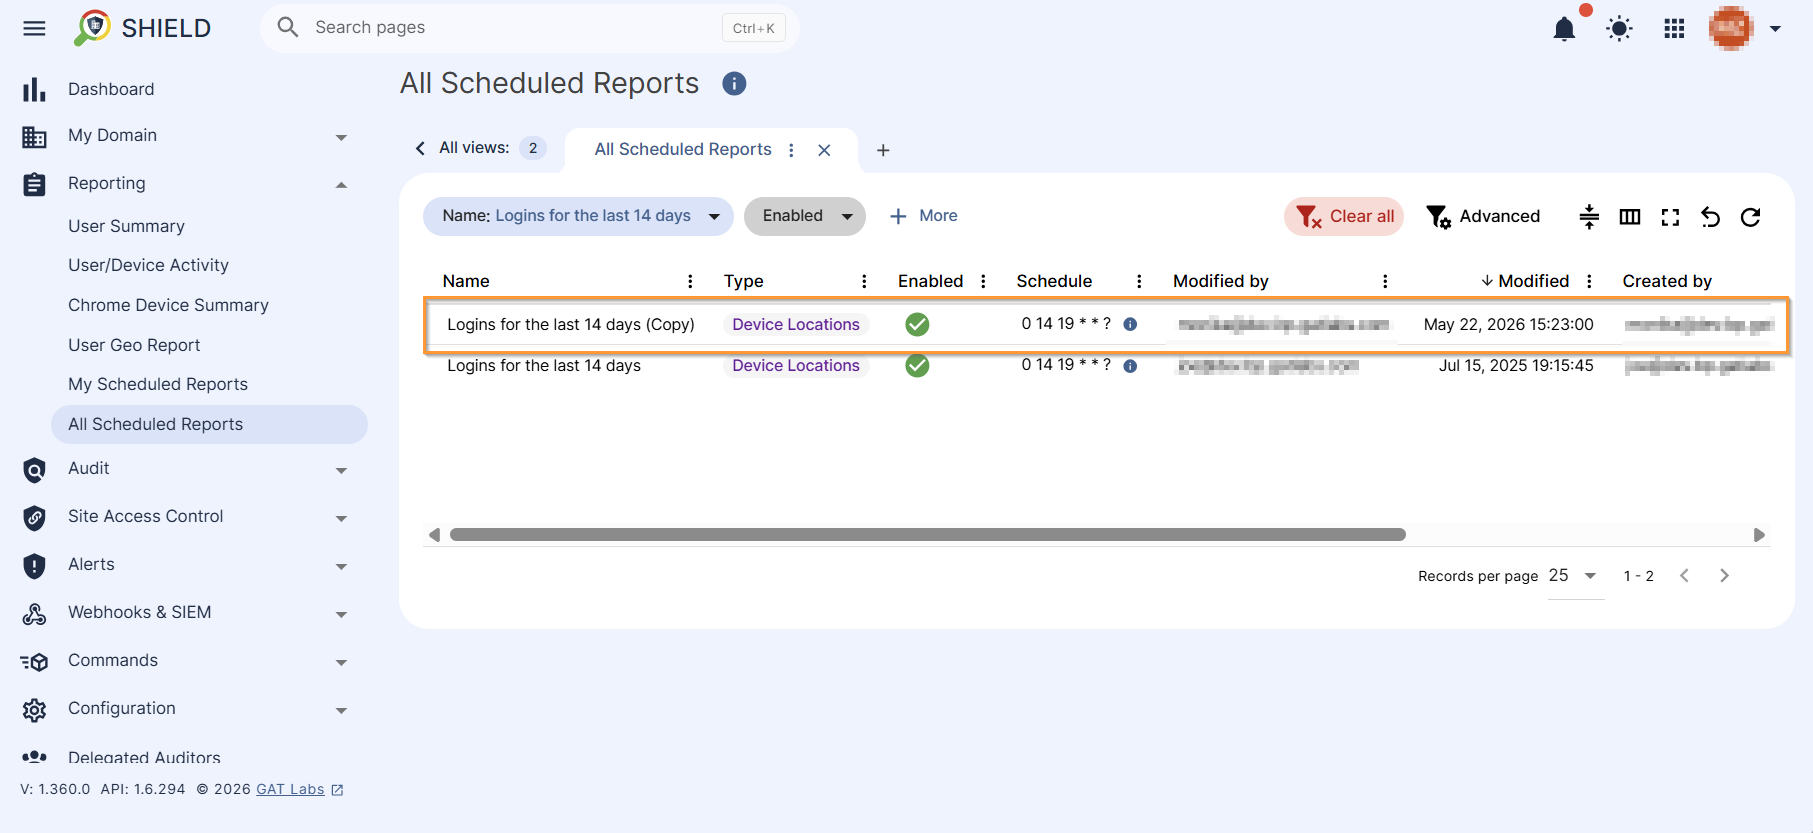

GAT Shield’s copying feature will help you work efficiently and effectively with minimal effort. With the copying schedule report creation feature, you can create a new report on the fly with a single click. This creates a template based on an existing schedule report, which can be further customized to meet your needs.
This feature saves time and effort, which is especially useful in urgent emergencies, but it’s also incredibly valuable in everyday work by reducing administrative tasks. It allows you to work smarter, not harder.
Create a Copy #
Navigate to GAT Shield (1) > Reporting (2)> All Scheduled Reports (3) or My Scheduled Reports (4).
Search for the report you are interested in using the Advanced filter (6).
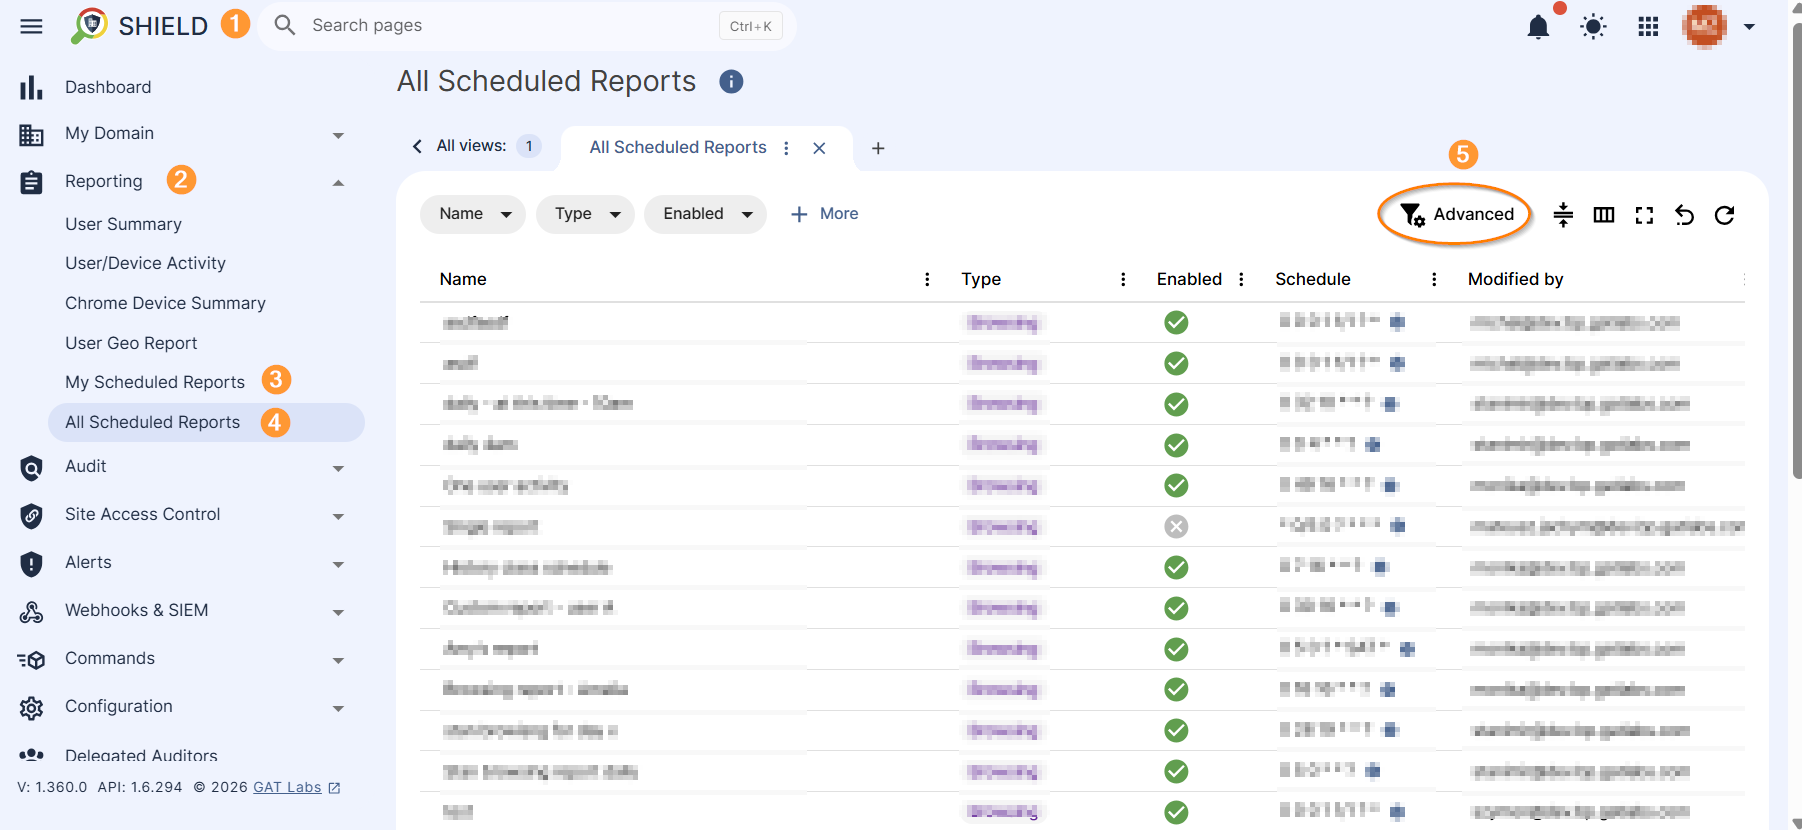
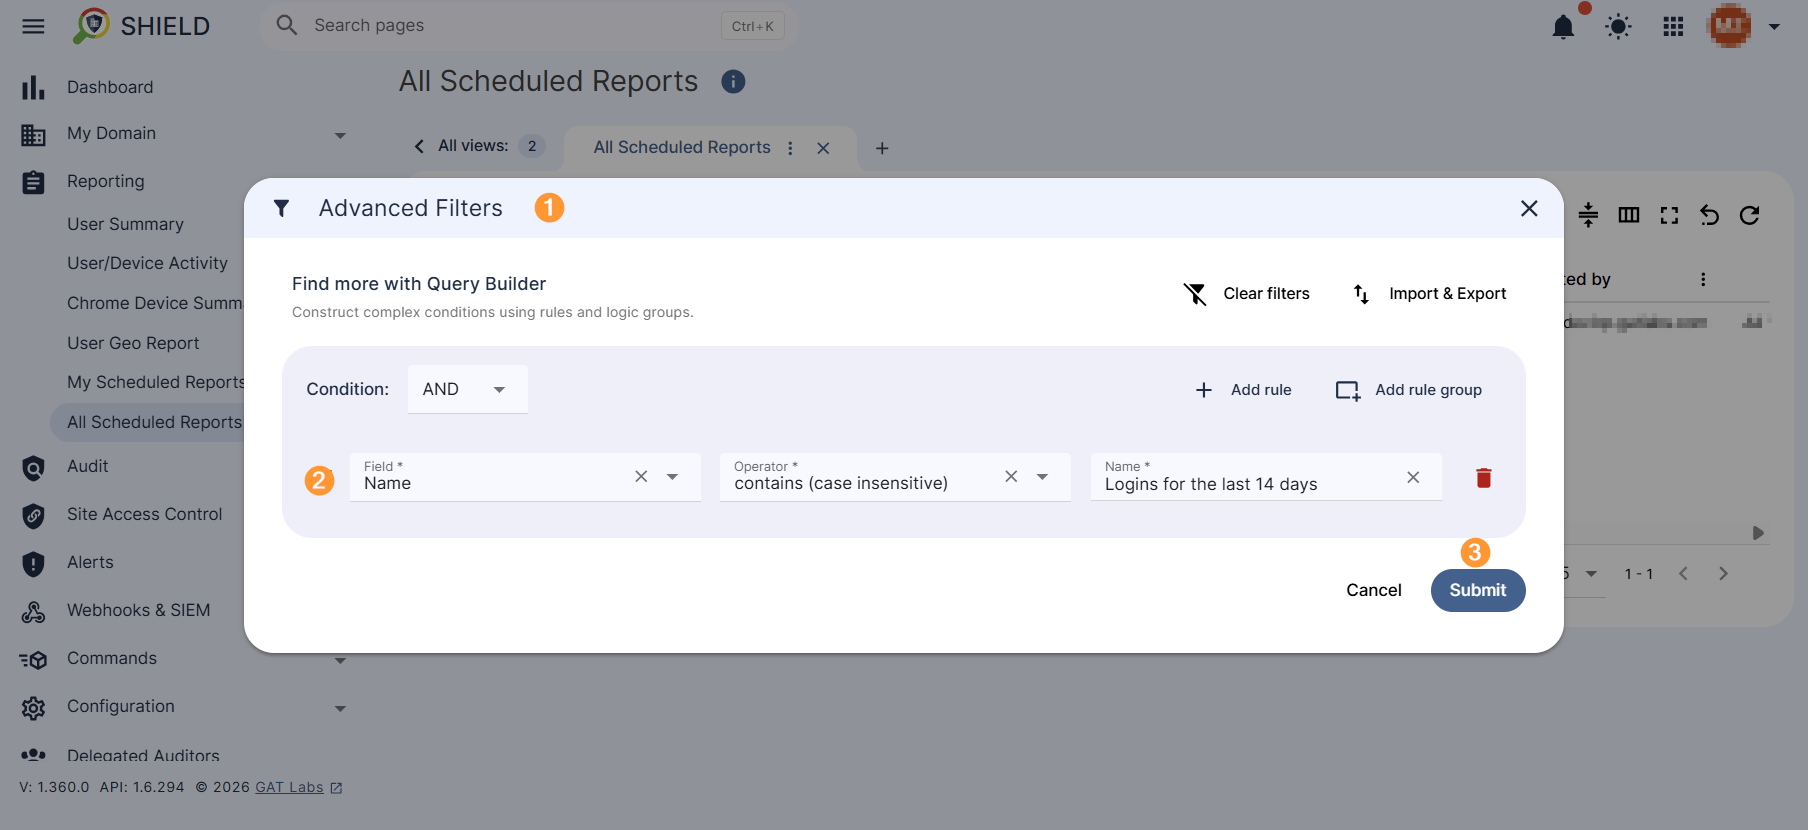
You can use various filtering options. Below is an example of filtering options (1) by report name (2). Submit (3) the filter so that the tool returns the appropriate record.
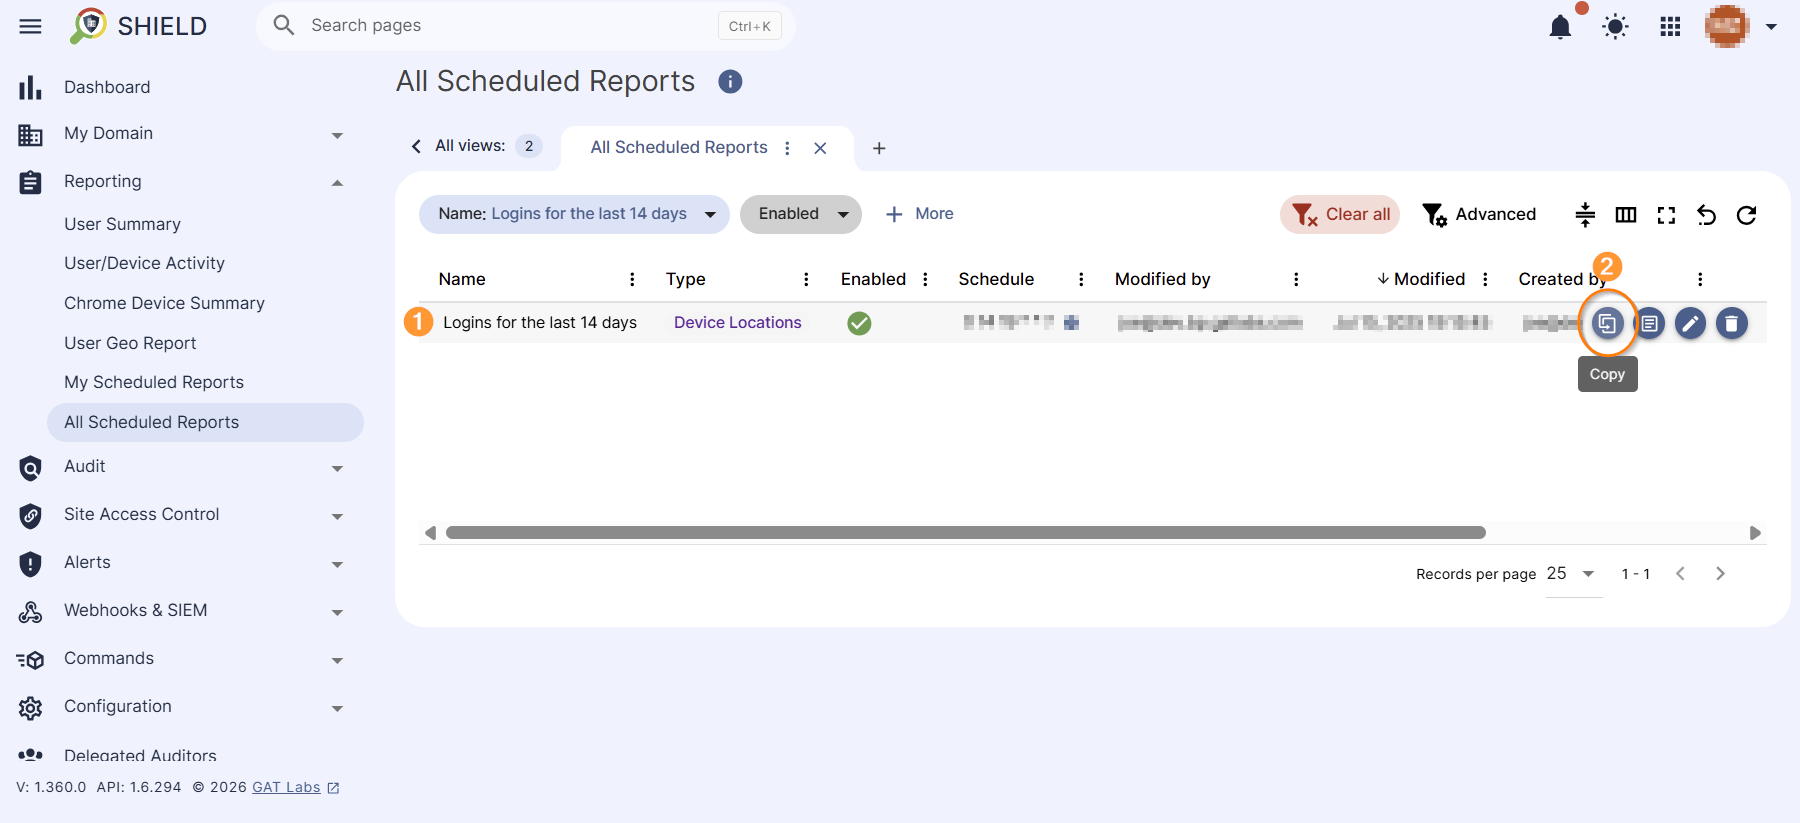
The appropriate report defined by the filter is displayed (1). Hover your cursor over to the right side of its record to display more options. Click on the Copy (2) option to create a duplicate of this report and be able to further customize it to suit your needs.
Further Define the Copied Report #
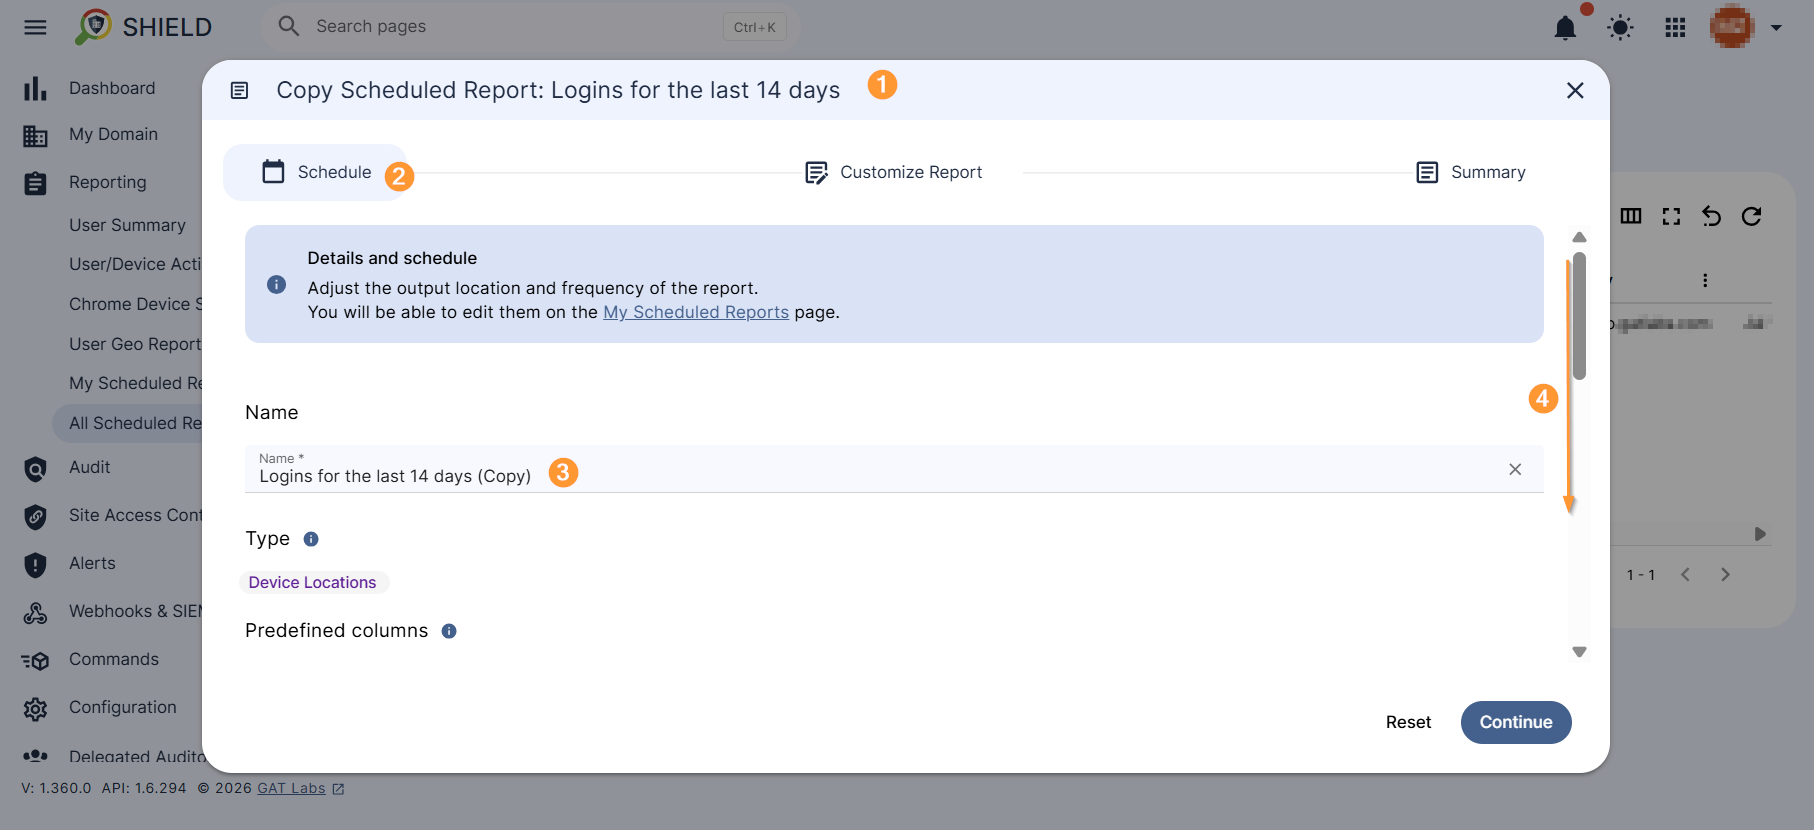
The copied scheduled report (1) is displayed, where you can review its details (2) and customize it to your needs. An input you can modify is the Report Name (3). Scroll down to view more settings (4).
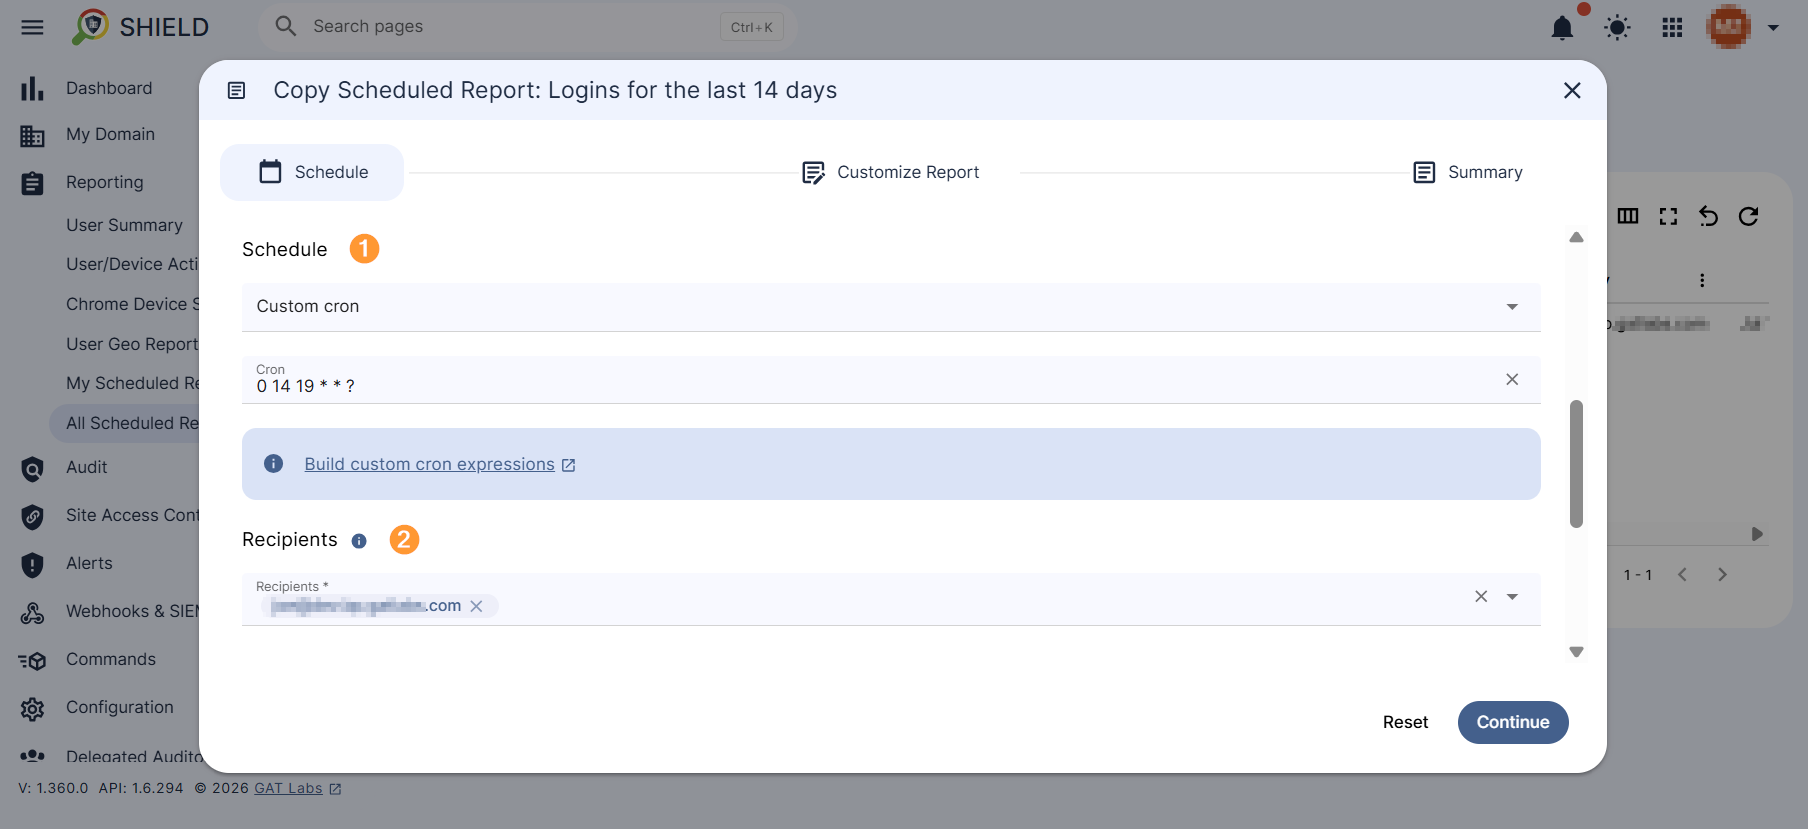
You can modify the schedule report frequency (1) and report Recipients (2).
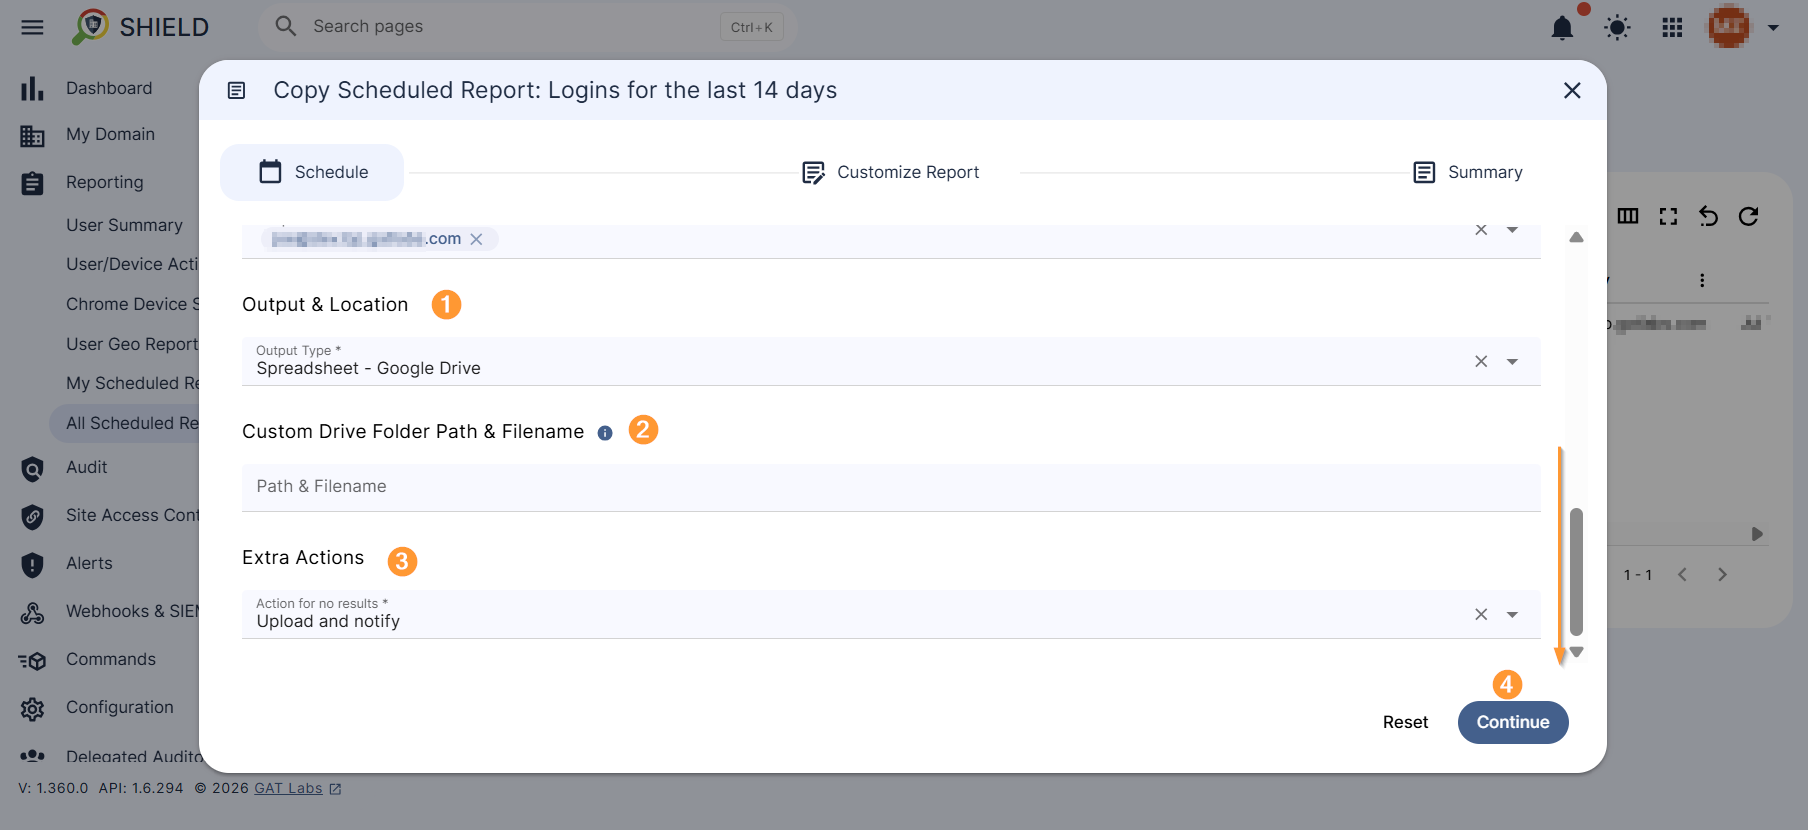
By scrolling down to the configuration window button, you can further define the copied report settings by changing the Output & Location (1), Custom Drive Folder Path & Filename (2), and, if applicable, Extra Actions (3). Click Continue (4).
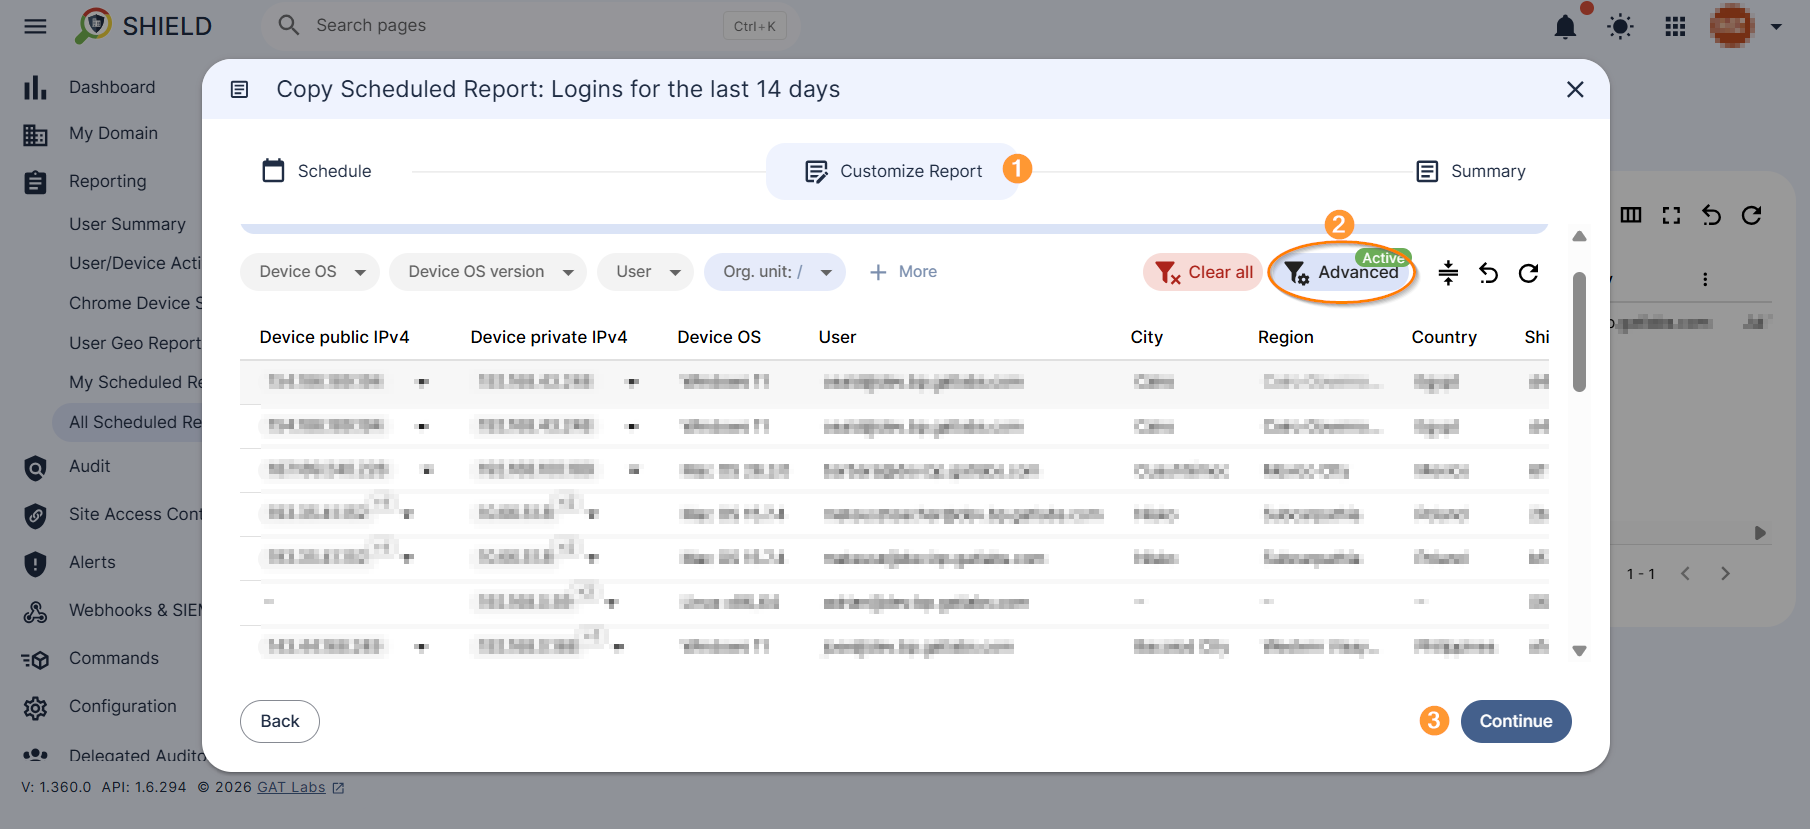
Next, you can further customize your report (1) by reviewing and adjusting the filtering settings (2). Once ready, click Continue (3) to proceed.
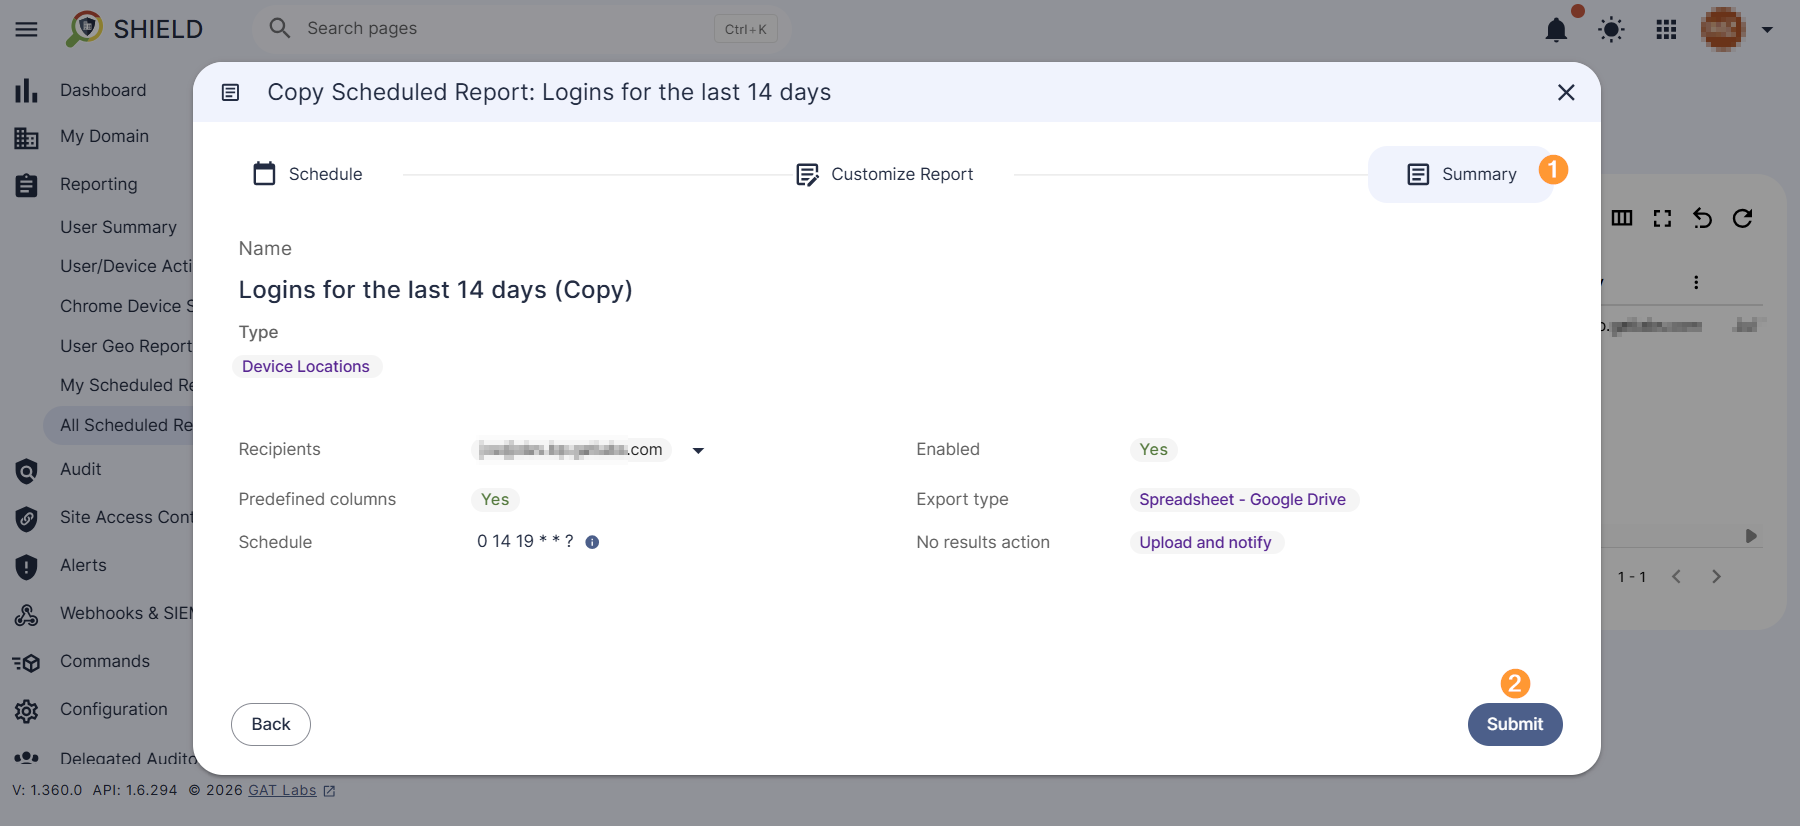
Final check the copied report settings (1) and Submit (2).
Results #
The copied scheduled report has been created.