How to onboard a Google Workspace user #
GAT Flow is a user management tool within the GAT Labs toolset and runs on top of GAT+.
GAT Flow allows the Google Admins to:
- Onboard and create new users for the domain
- Modify existing users
- Offboard and delete users from the domain
How to onboard a user #
The steps below will show how to create and onboard a user to the domain.
Log in to GAT Flow, and on the menu on the left, click on Create workflow
Define workflow type #
In the Define workflow type, fill in the basic information.
- Workflow name – enter name
- Type – select onboarding
- Workflow description – optional description for the workflow
- Run immediately after approval – set when the workflow should run, now or at a future time.
- Additional options –
- Add Notification recipients to notify users and groups when the workflow ends.
- Select tags in Workflow Tags to help with workflow categorisation. Tags can be created in the settings module
- Next – click to proceed and customize onboarding

Customize onboarding #
- Domain – select the domain you want to use, if you have sub-domains.
- Select email elements – Select an email template option to add it to the template below.
- Customize selected email elements – select and adjust the elements you want for how the email address of the user looks

- Example preview – When customizing the email elements, the preview will automatically show how it will look
- Password settings – You can enable automatic password generation for new users here. Passwords can be sent to the specified email address
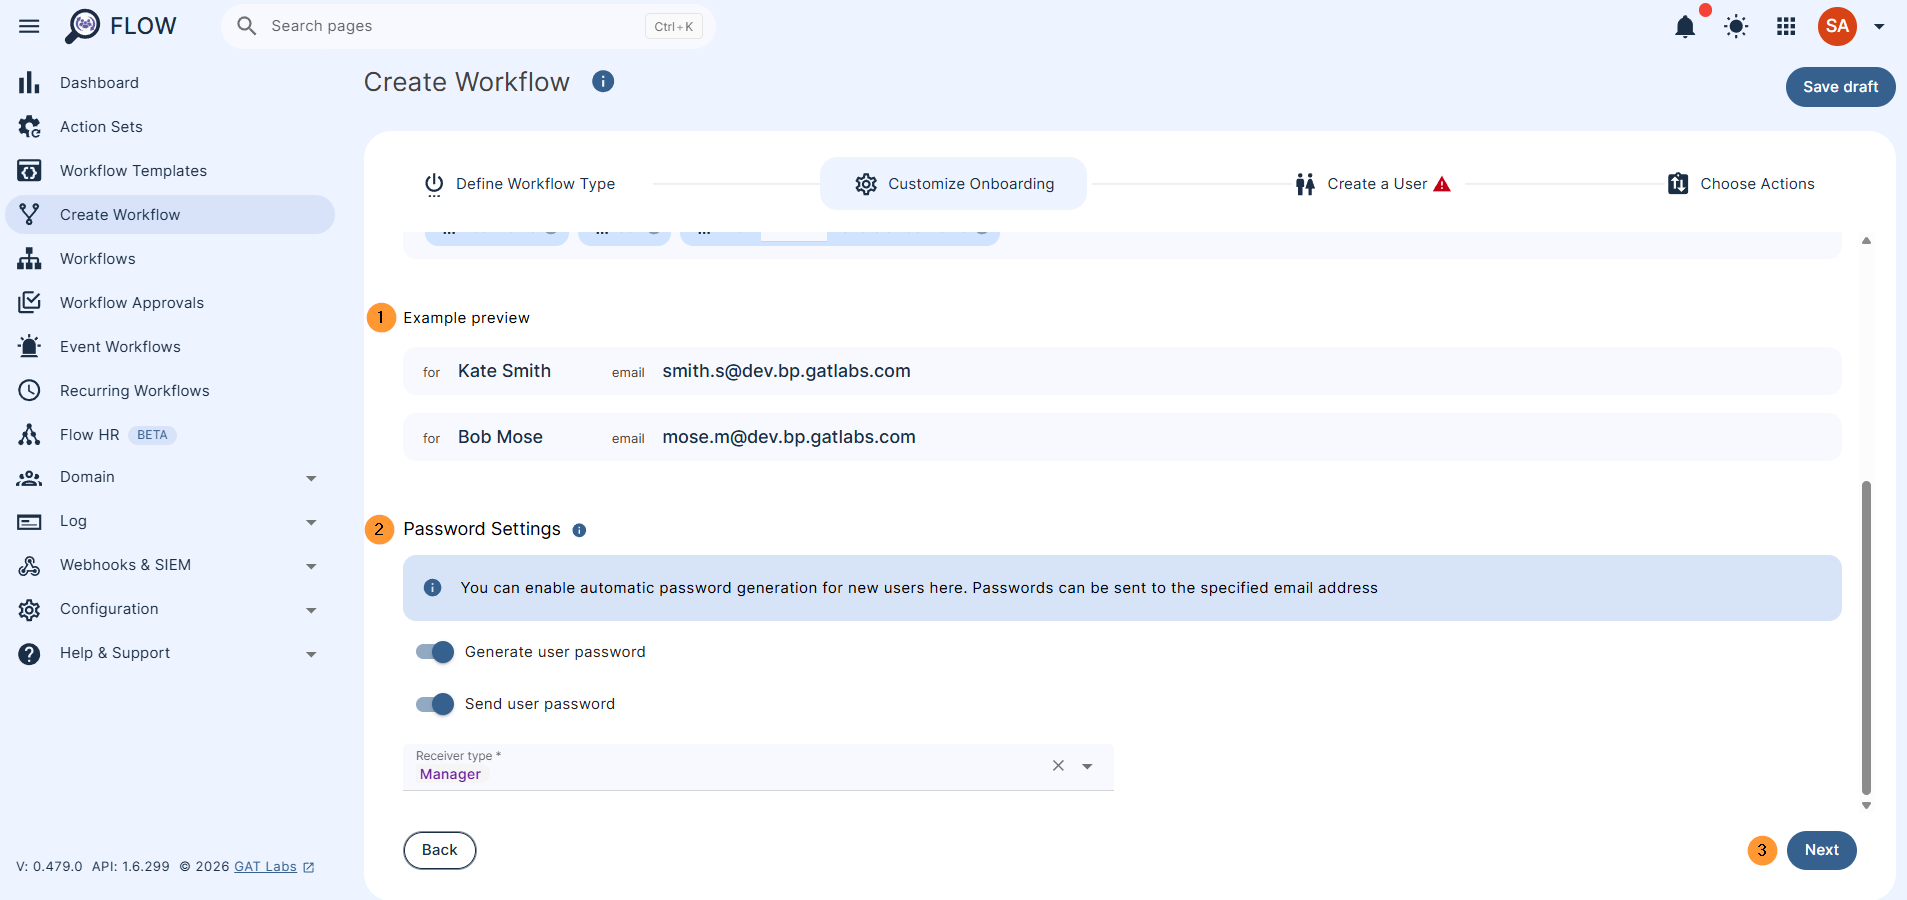
Click on Next to proceed
Create a user #
In the Create a user tab, click on the Add new user button on the left side.
You can also import users via a spreadsheet
Fill in the details for the new user.
- Name – enter the user name
- Password – enter or generate the password
- Email – will be filled in based on the selected email elements
- Additional user field – expand the menu and fill in all required information
- Display name
- Alias
- Manager
- Private email
- Recovery email
- Job title
- Department
- Employee type
- Cost center
- Work address
- Work phone
- Mobile phone
- Recovery phone
- Employee ID
- Building ID
- Org. Unit
- Address me as
- Gender
- Change password at next login – toggle button to turn on/off this option
When the fields are filled in, click on Next
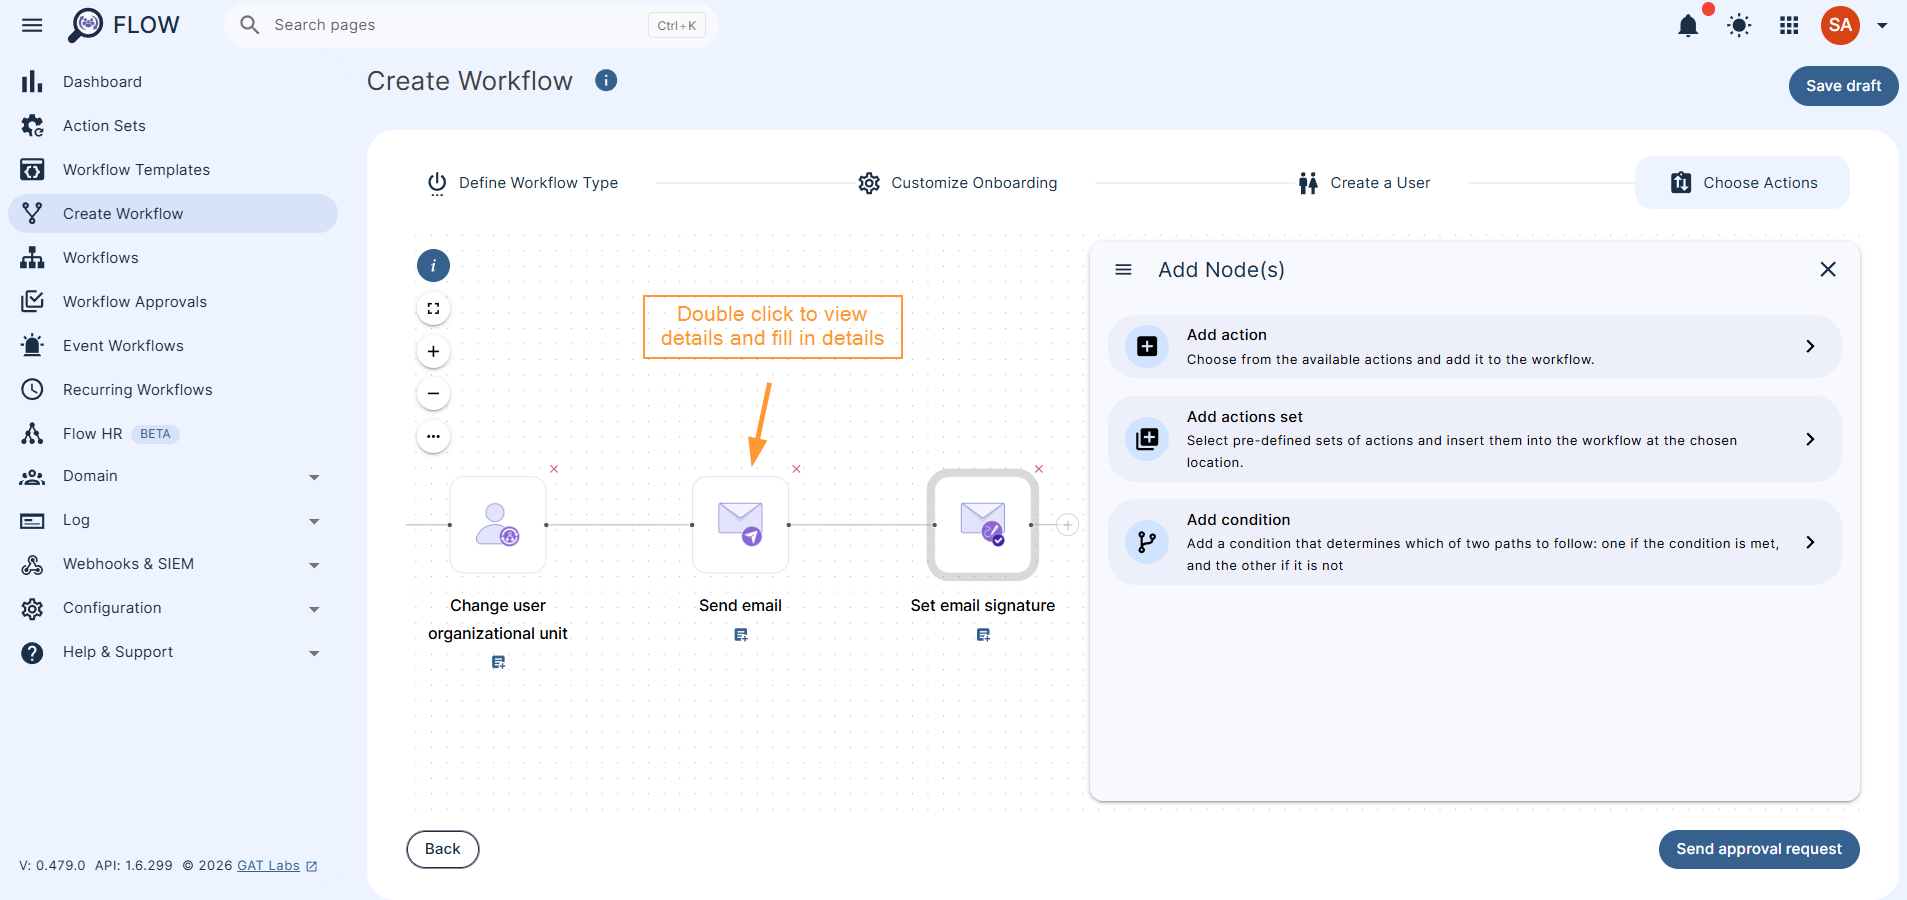
Choose Actions #
Under the Choose Actions section (1), click on the “+” button to “Add action” and search for the particular action (2).
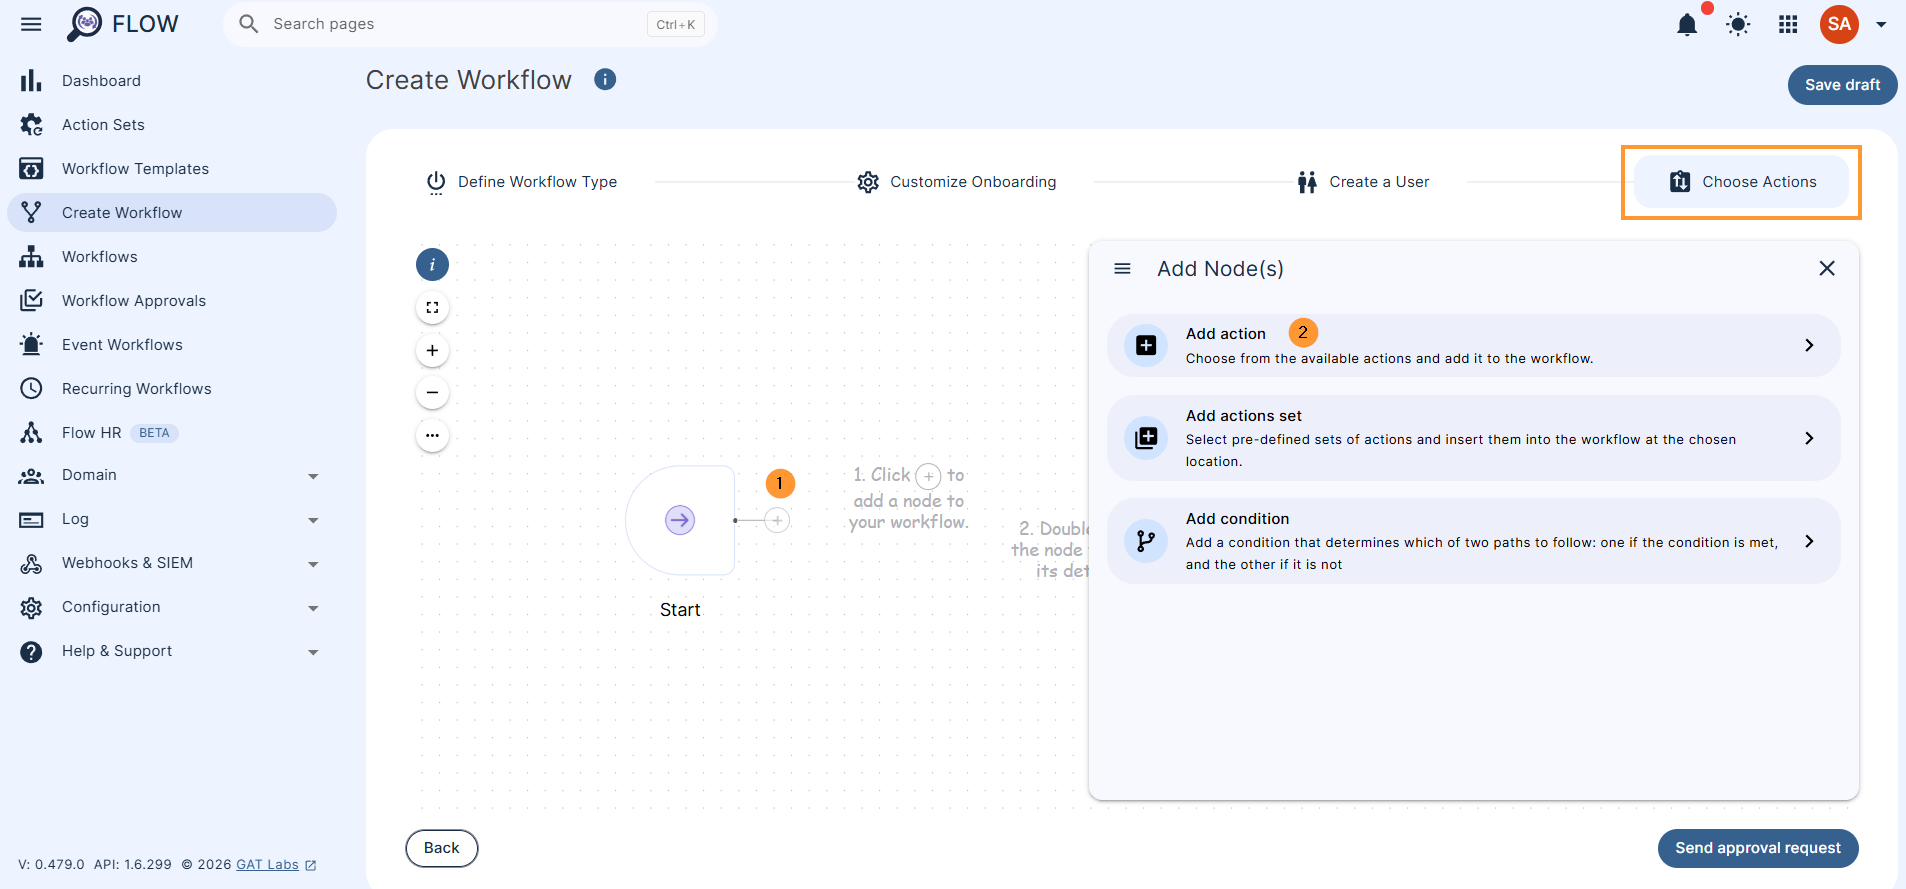
Search for any action.
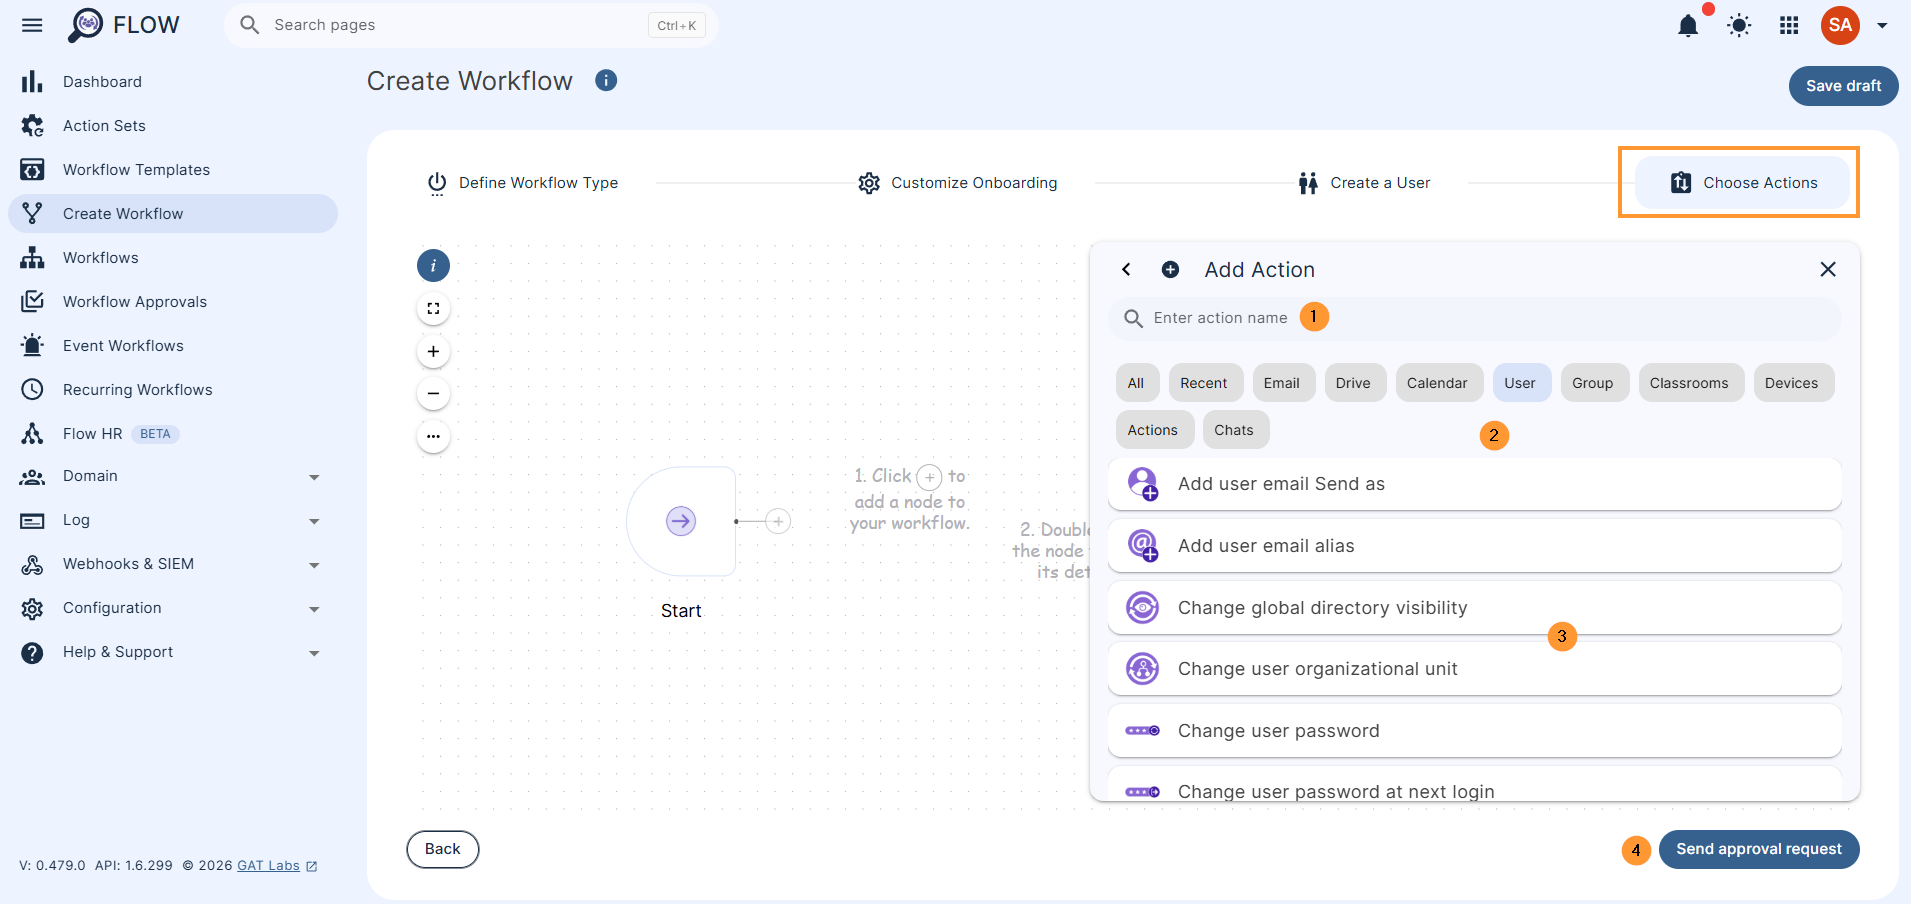
Selecting an action will show it, double-click on it to edit, and fill in the required details.
When the actions are selected and details filled in, click on Send approval request.
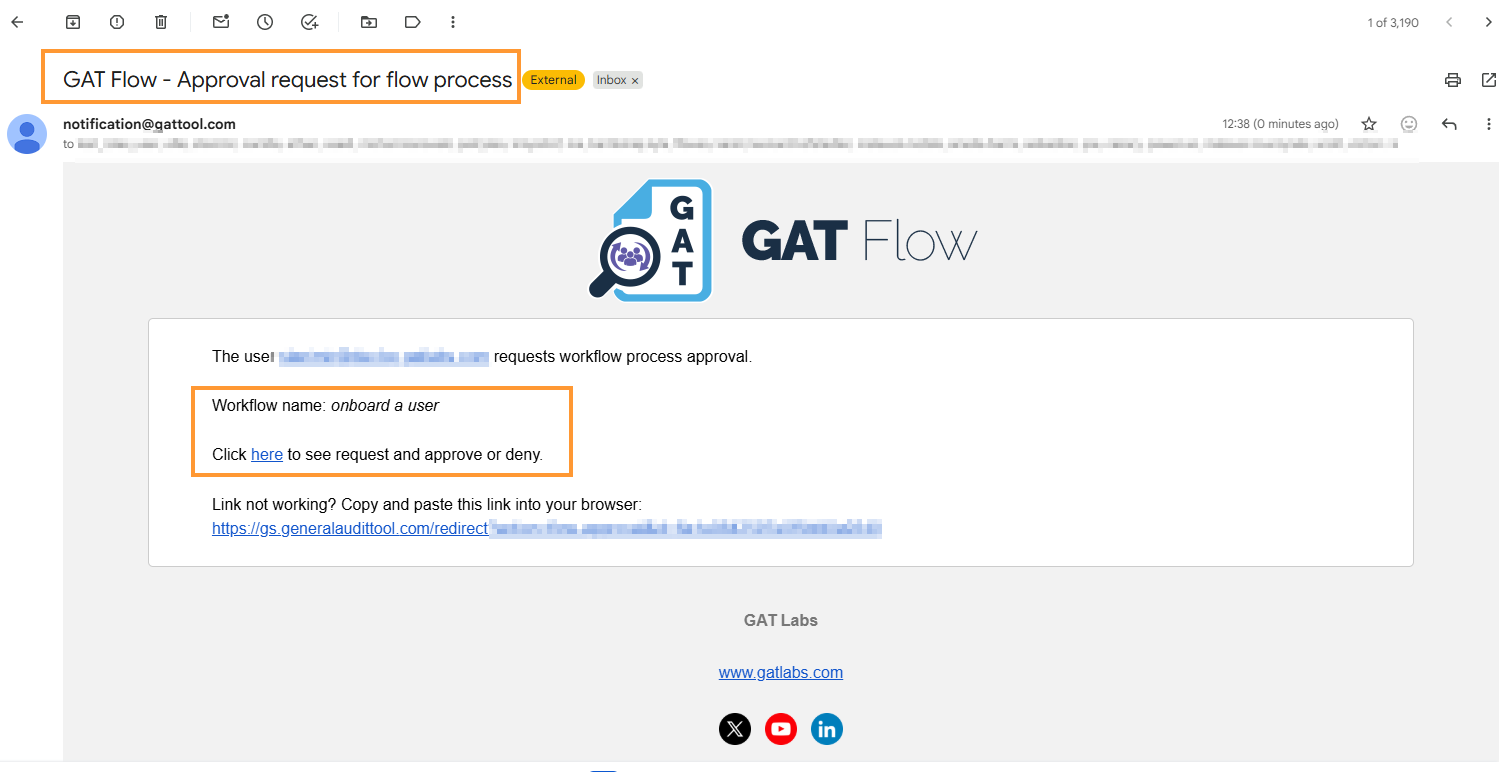
Send Approval Request #
Once ready with the selected actions, click on Send approval request on the bottom left.
A pop-up window will be displayed to confirm.
Click Yes to send the request to the Security Officer for approval. They will receive an email notification for Approval of the request.
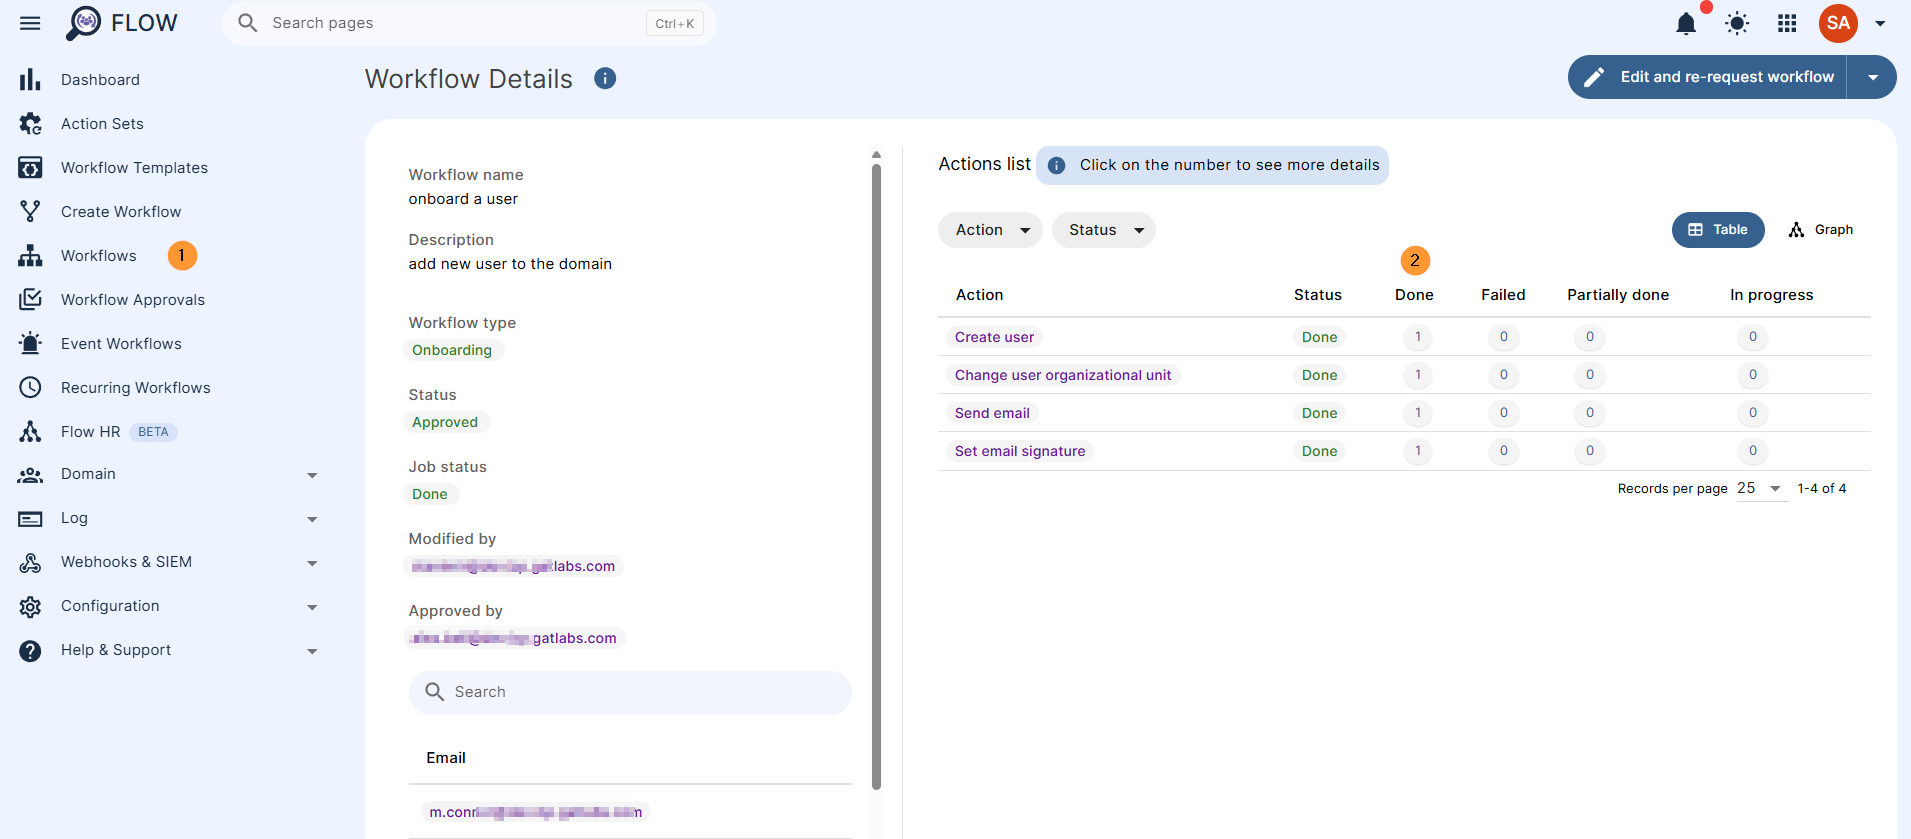
Workflow result #
When the workflow is approved, the user will be onboarded (created) and added to your domain, alongside all the actions selected in the above workflow.
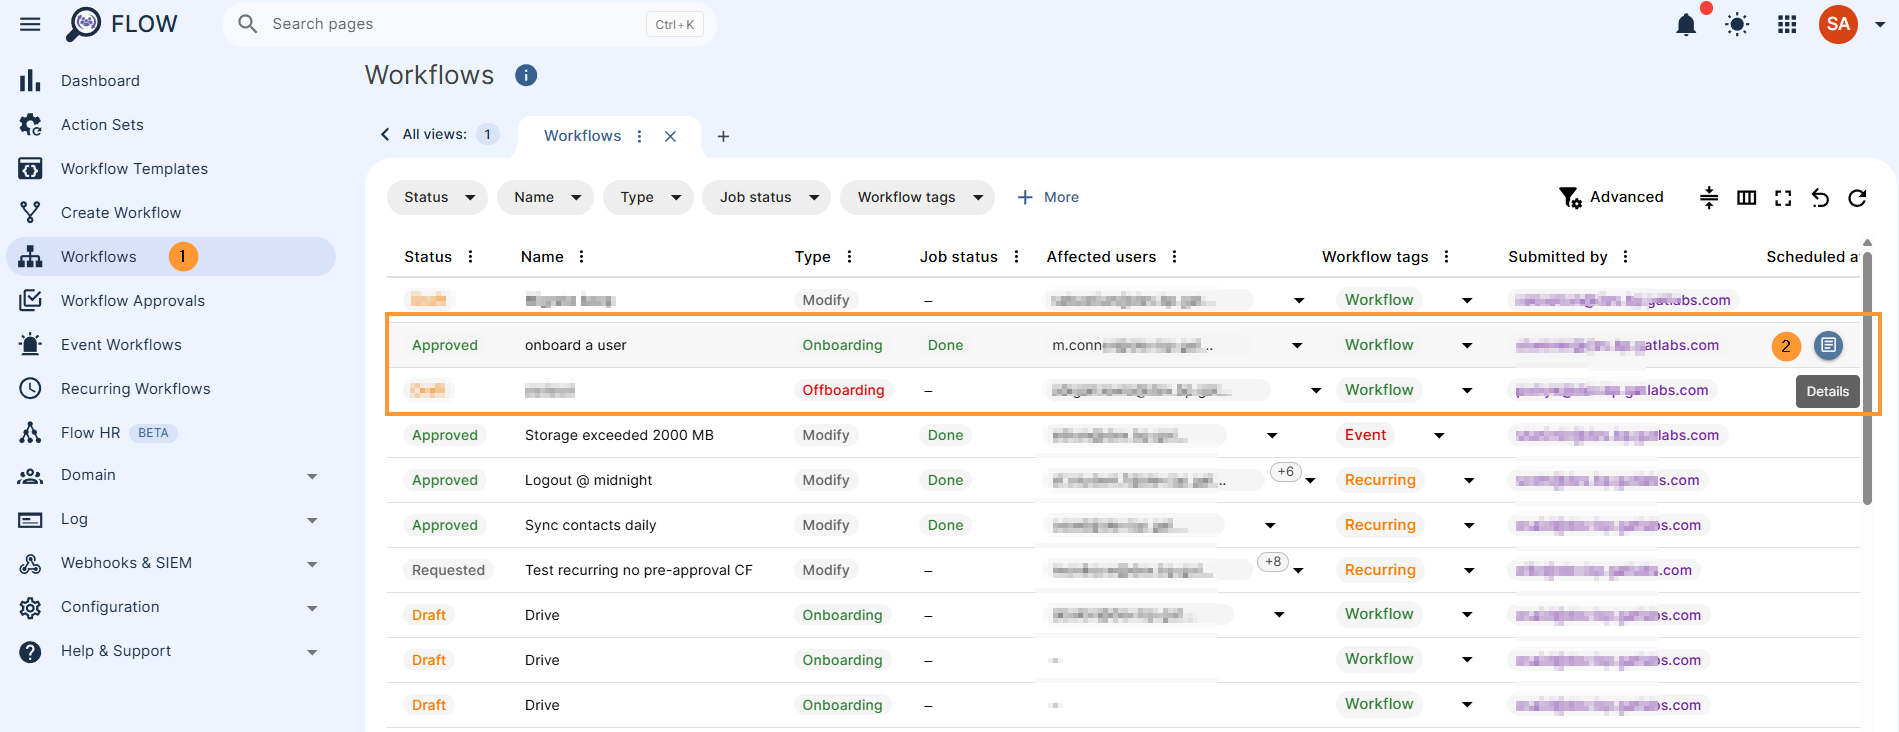
The result can be seen in GAT Flow > Workflows > find the workflow and see details