What are webhooks? #
A webhook is a way for one application to deliver data to another app in real time.
Most modern platforms support webhooks, or at least similar architectural approaches, such as Github, Trello, Confluence, Facebook, Stripe, and Google Calendar.
Some real-world examples of webhooks include: Automatically receiving an email every morning about your first meeting in case you forget to check your calendar.
Webhooks are basically user-defined HTTP callbacks (or small code snippets linked to a web application) that are triggered by specific events. Whenever that trigger event occurs in the source site, the webhook sees the event, collects the data, and sends it to the URL specified by you in the form of an HTTP request.
Shield Alerts and Webhooks #
GAT Shield offers webhook notifications for Alert rules. This means that anytime an alert rule is triggered, the alert will be sent to the webhook URL that is added in the Shield configuration. This allows for a more practical assessment of the alert triggers, where Alerts will be tied to specific webhooks and will not be overwhelming email inboxes.
How to configure webhooks for Shield Alerts #
At the moment we support webhooks for Google chat.
Manage webhooks #
To set up your webhook URL:
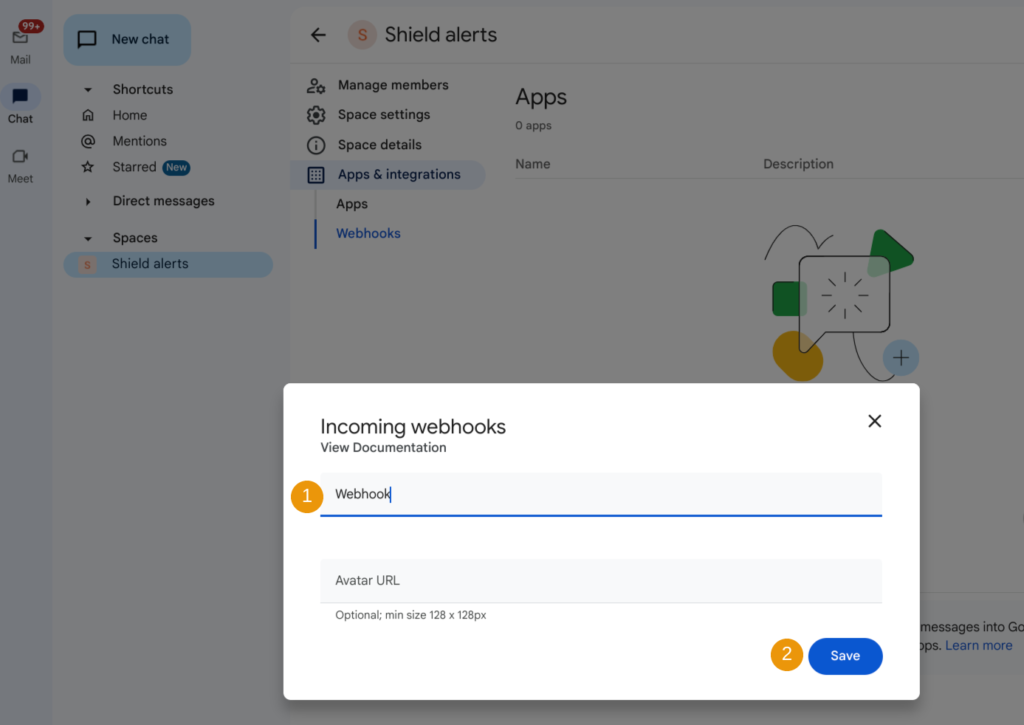
Under the Google Chat (1) navigate to the Spaces section (2) or the Gmail app and create a new space, e.g. ‘Shield alerts’ (3). Once created select the dropdown menu (3) and go to Apps & integrations (4).

Under the Apps & integrations section (1), navigate to Webhook (2), and click on the Add webhook (3).

In the next window, name your webhook (1) and select Save (2).
A URL for the webhook will be generated (1). Navigate to tree dots (2) and Copy link (3) to copy the Webhook URL.

This URL will be used to connect Shield Alerts to the webhook space.
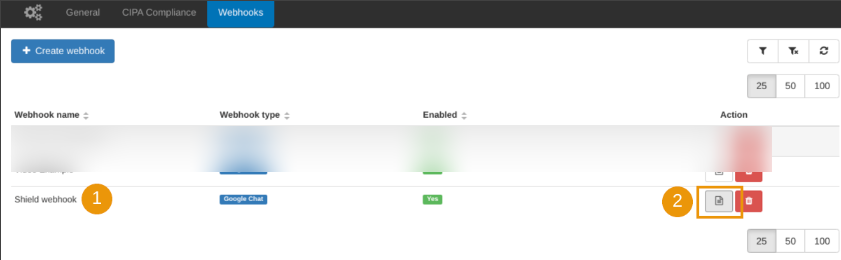
Add webhook in Shield #
Navigate to GAT Shield (1) > Configuration (2) > General & CIPA (3) > Webhooks (4) > Create Webhook (5)

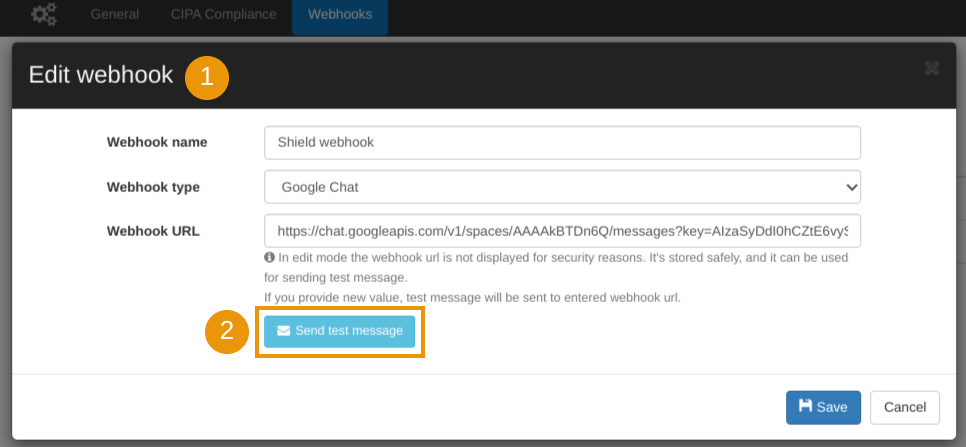
The new Add webhook window is displayed and can add a webhook to the tool.
- Webhook name – enter the name for the webhook (1)
- Webhook type – select the type – Google Chat (2)
- Webhook URL – paste the previously copied webhook URL (3)
- Save – click to save the webhook (4)

Test webhook #
Once the new Webhook is integrated with the tool (1), you can quickly test the URL. Navigate to the ‘Show and edit webhook’ section (2).
Under the Edit webhook window (1), click on the ‘Send test message‘ button (2). This should send a generated message to the URL where your webhook resides.
Now that you have added the webhook to the Shield tool, it can be used throughout the Shield Alert rules configuration.

Summary #
Anytime an alert rule is triggered, the alert will be sent to the webhook URL that you have selected.
If this fails then the alert will be sent to the recipient email by default.
Note: When webhook is used, the Email notification will be ignored and not sent.
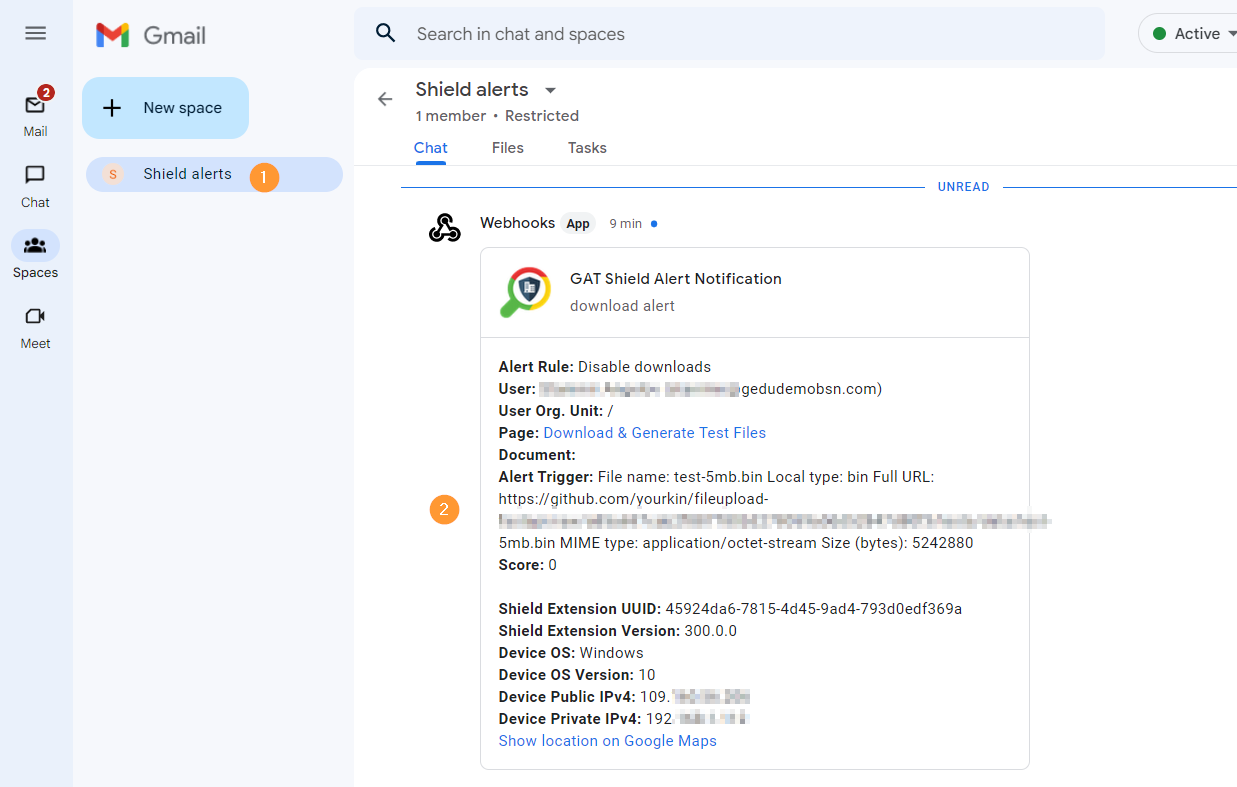
The Alert webhook should look like the one below.