
What is Site Access Control #
GAT Shield is an extension for Google Workspace Admins to monitor and manage user browsing. With it, admins can track what users are doing online and even control access to certain websites.
One useful feature of GAT Shield is its web filtering tool called Site Access Control. This lets Google Workspace admins create rules to block users from visiting specific websites.
So, in short, GAT Shield helps admins keep an eye on browsing activity and restrict access to certain sites using Site Access Control.
Migrate to Site Access Control – New #
In order to migrate to the latest version of Site Access Control, navigate to GAT Shield > Site Access Control and refer to the information shown at the top of this section in the dashboard.
Click on the Run migration to new Site Access Control to trigger the migration process.

NOTE: You can switch back to the current version of Site Access Control by contacting the support team.
Use of Site Access Control – NEW UI version #
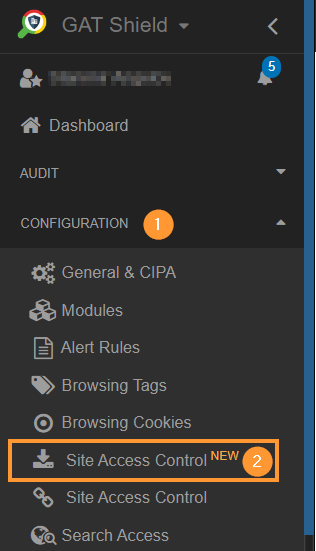
Navigate to GAT Shield > Configuration > Site Access Control (New)
When select a new tab will be opened with the Site Access Control (New).
User-defined categories #
In “User-defined categories,” you can make a list of sites you want to either block or allow.
Once you’ve created your categories, you can activate them as rules to either block or allow the category.
To upload custom categories, admins can simply upload a spreadsheet containing multiple websites to be either blocked or allowed.
To do this, just go to Shield > Site Access Control (NEW) > User defined categories > Upload custom category.

Select Upload custom category and a pop-up window will be displayed.
Fill in the details
To set up a category:
- Enter a name for the category.
- Add a description for the rule.
Then, choose from the following options:
- Create a new spreadsheet: Click to create a spreadsheet with the provided name and description.
- Generate from recent browsing: Click to create a spreadsheet using recent browsing records, with the provided name and description. This generates a CSV file filled with domains from the Browsing section from the last 7 days.
From the buttons on the side:
- Edit spreadsheet: Use the pen icon to open the Google sheet and edit or add sites.
- Open and create the spreadsheet: Use the checkmark icon to open and create the spreadsheet.

The spreadsheet will be opened, fill in the URLs (websites) you want to block.

Close the sheet and click on the Create (checkmark) button.
The Custom category will be added to User-defined categories.
Click on the + button to create the rule and activate it

Add a new category #
Navigate to User-defined categories > Add a new category
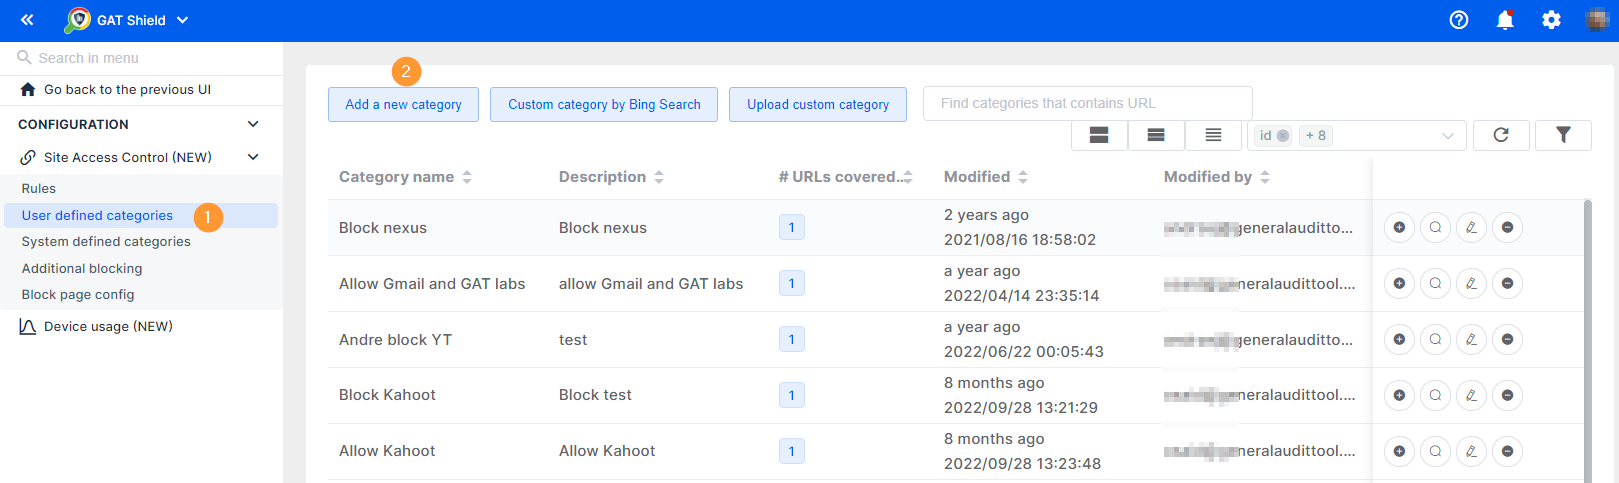
A pop-up window will be displayed.
Fill in the details required
- Category name – enter a name for the category
- Description – enter a description for the category
- Site list – enter the sites you want to add to the category
- Match type – select the match type of the URL
- Contains – enter part of a string that is contained within the URL
- Starts with – enter a URL that starts with the typed URL
- Equals – enter the URL that equals the one added
- Match type – select the match type of the URL
- Add a new URL – click to add more URLs to the category

- Create – click when the list is ready and you want to create the category
Activate the created category #
To activate the category and create a rule click on the + button > Create a rule (2)

A pop-up window will be displayed to add a new rule.
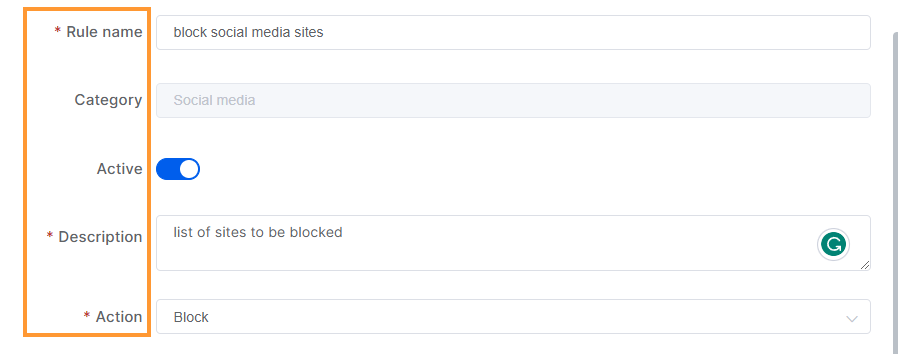
Fill in the details
- Rule name – enter a rule name
- Category – the selected category will be displayed
- Active – toggle to activate or deactivate the rule
- Description – enter a description for the rule
- Action – select the action to Block or Allow the category
- Redirect URL – enter a URL where the browser will redirect to
- Time restriction – select a time range during which the rule will be active. The default timezone is used.
- You can combine and select one day. The rule can be set up to block from 9:00 to 13:00 and then on the same day from 18:00 to 23:00.
- Scope – select the users for whom the rule will be active for
- User – select individual users
- Group – a select group of users
- Org. Unit – select an organizational unit of users
- Chrome devices only – enable or disable the rule for only Chrome devices
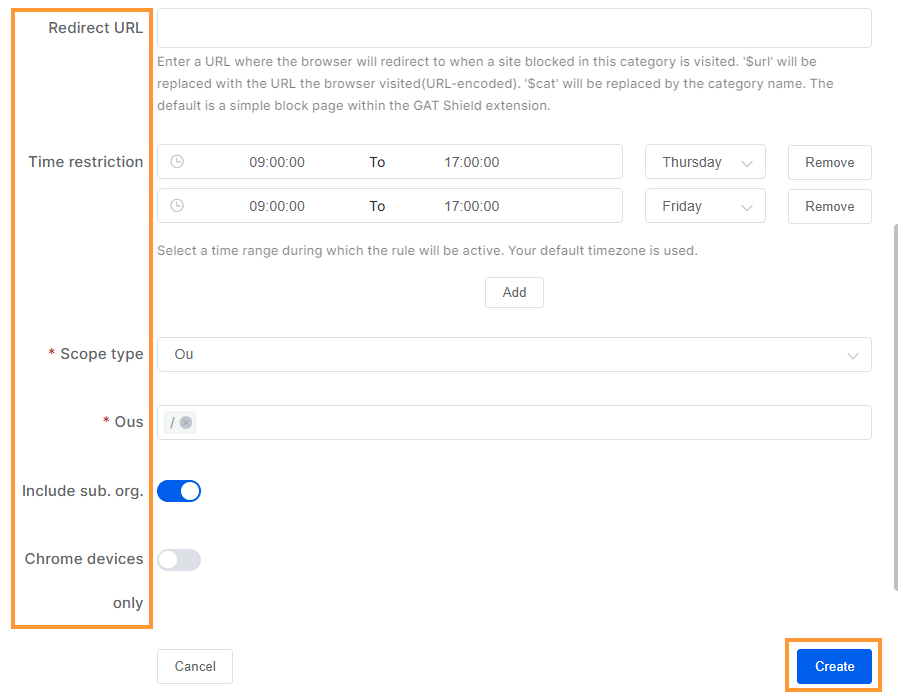
- Create – click to create and activate the rule to block the selected users from all the selected sites in the category.
The rule will be created and saved in the Rules tab.

Result for end-user #
When the users try to visit the selected sites, they will not be allowed and will receive a blocked page message instead.

Rules #
In the Rules tab, you can view all the active rules that are set and add a new rule
Navigate to Rules > Add a new rule

A pop-up window will be displayed to add a new rule.
Fill in the details
- Rule name – enter a rule name
- Category – click and select the category needed
- choose from any of the custom and system categories created
- Active -toggle to activate or deactivate the rule
- Description – enter a description for the rule
- Action – select the action to Block or Allow the category

- Redirect URL – enter a URL where the browser will redirect to
- Time restriction – select a time range during which the rule will be active. The default timezone is used.
- You can combine and select one day. The rule can be set up to block from 9:00 to 13:00 and then on the same day from 18:00 to 23:00.
- Scope – select the users for whom the rule will be active for
- User – select individual users
- Group – a select group of users
- Org. Unit – select an organizational unit of users
- Chrome devices only – enable or disable the rule for only Chrome devices

- Create – click to create and activate the rule to block the selected users from all the selected sites in the category.
The rule will be created and saved in the Rules tab.
The rules can be removed or updated from the buttons on the right side (2)

Result for end-user #
When the users try to visit the selected sites, they will not be allowed and will receive a blocked page message instead.
System defined categories #
System-defined categories are categories that cover thousands of different sites divided into different categories.
Those are set of URLs that are covered and separated by different category sets of URLs
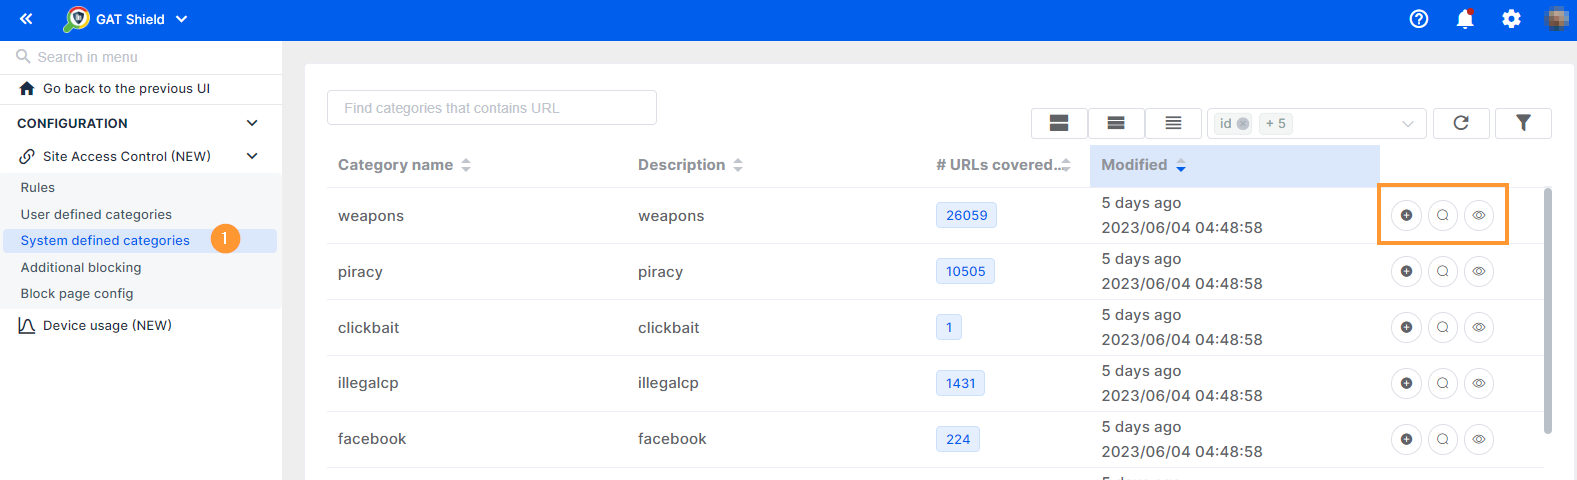
Activate system category #
Pick any of the system categories and click on the + button > Create a rule (right side buttons)
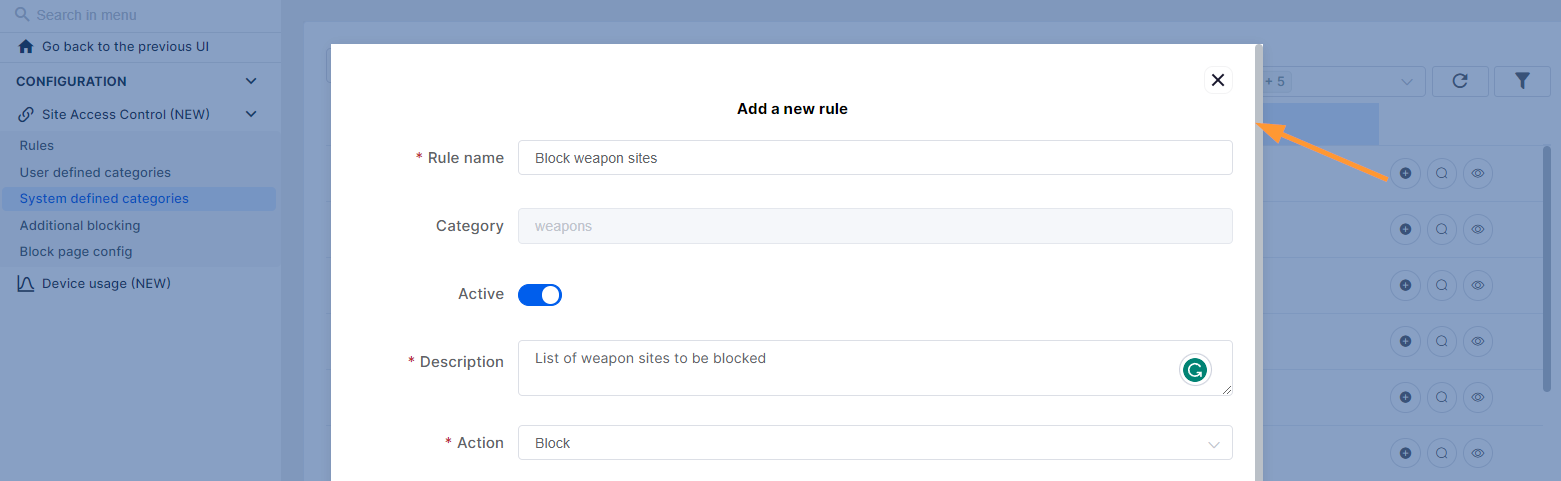
A pop-up window will be displayed to Create the rule
Fill in the details
- Rule name – enter a rule name
- Category – the selected category will be displayed
- Active – toggle to activate or deactivate the rule
- Description – enter a description for the rule
- Action – select the action to Block or Allow the category
- Redirect URL – enter a URL where the browser will redirect to
- Time restriction – select a time range during which the rule will be active. The default timezone is used.
- You can combine and select one day. The rule can be set up to block from 9:00 to 13:00 and then on the same day from 18:00 to 23:00.
- Scope – select the users for whom the rule will be active for
- User – select individual users
- Group – a select group of users
- Org. Unit – select an organizational unit of users
- Chrome devices only – enable or disable the rule for only Chrome devices
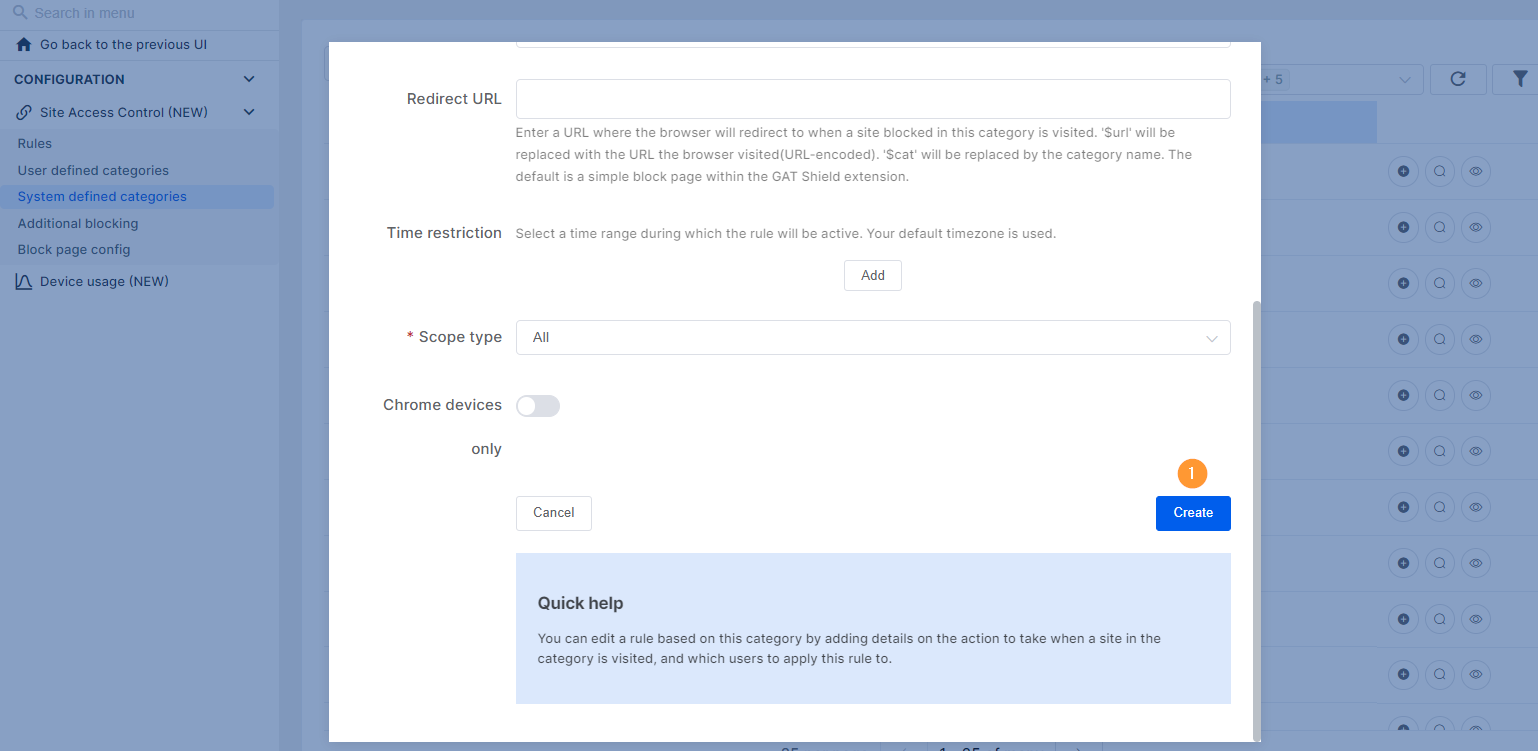
- Create – click to create and activate the rule to block the selected users from all the selected sites in the category.
The rule will be created and saved in the Rules tab.

Category types #
The types can be: (2)
- User-created custom by the user
- Pre-defined – created with a pre-defined and generated list of sites
Result for end-user #
When the users try to visit the selected sites, they will not be allowed and will receive a blocked page message instead

Additional blocking #
Additional Blocking is part of Site Access Control that allows Admins to block URLs that appear as IP addresses.
- Block all URLs that appear as:
- Public IP addresses – toggle on or off to activate or disable the rule
- Private IP addresses – toggle on or off to activate or disable the rule
- Scope type – select the users who will be affected by this rule
- User – enter an individual user
- Group – enter a group of users
- Org. Unit – enter org. unit of users
- Scope type – select the users who will be affected by this rule
- Create – click on to create the rule

Result for end-user #
When the users try to visit the selected sites, they will not be allowed and will receive a blocked page message instead

Block page config #
The section allows configuring a message that would be shown to the user while blocking the page on his device. Displaying categories used for blocking also could be configured.
- Display category details – enable or disable the details to be shown to the end-user
- Custom message – enter a custom message to be displayed to the end-user

Block all URLs for users #
Under the System Defined Categories, we have a special category called ALL
This is a special category that represents ALL URLs.
Meaning it will allow blocking users from accessing any URLs they use while Shield is active on the user account and they are using the Chrome browser.

To block users from all URLs select the special “all” category.
Click on the + button to create a rule (3)
A pop-up window will be displayed to Create the rule
Fill in the details
- Rule name – enter a rule name
- Category – the selected category – ALL – will be displayed
- Active – toggle to activate or deactivate the rule
- Description – enter a description for the rule
- Action – select the action to Block

- Redirect URL – enter a URL where the browser will redirect to
- Time restriction – select a time range during which the rule will be active. The default timezone is used.
- You can combine and select one day. The rule can be set up to block from 9:00 to 13:00 and then on the same day from 18:00 to 23:00.
- Scope – select the users for whom the rule will be active for
- User – select individual users
- Group – a select group of users
- Org. Unit – select an organizational unit of users
- Chrome devices only – enable or disable the rule for only Chrome devices
- Create – click to create and activate the rule to block the selected users from all the selected sites in the category.
The rule will be created and saved in the Rules tab.

Result for end-user #
When the users try to visit any website, they will not be allowed and will receive a blocked page message instead

All the pages the users try to visit will be blocked.
Allow list #
Allow lists to take precedence over the blocklist.
If a site is blocked by a block rule, and there is a rule to allow the same site, the rule where the site is allowed will take precedence
The rules we created above about social media will be blocked. If a similar rule is created but with Action – Allow they will be allowed.

All the social media sites added to the category will be blocked.
If there is an allowed list for one of the sites above, it will take precedence and the site will be allowed.

The site added to the “allow” list will be allowed while the other remains blocked.

In conclusion #
GAT Shield offers Google Admins a powerful solution to monitor and manage user browsing within their organization. Through its intuitive interface and robust features like Site Access Control, admins can effectively track online activities and enforce browsing policies to enhance security and productivity.
Finally, with GAT Shield, admins can rest assured that they have the tools they need to maintain a safe and efficient online environment for their users.


