Introduction #
When a Google Workspace account is suspected of being compromised, security teams must act quickly to determine the scope and impact of the breach. While standard Google alerts provide basic notifications for unusual sign-ins, conducting a thorough forensic investigation requires deeper domain-wide visibility
GAT+ serves as a powerful investigation tool, enabling administrators to trace malicious activity, perform blast-radius analysis, and answer critical incident-response questions. This article covers how to investigate an account compromise using GAT+ across four essential areas:
- Pinpointing the first suspicious login
- Determining the total duration of attacker access
- Tracking key actions performed during the compromise
- Identifying other users, files, or systems that may be affected
Pinpointing the First Suspicious Login #
Identifying the exact moment an attacker gained unauthorized access is crucial for establishing an incident timeline. Attackers often utilize compromised credentials from unexpected geographic locations or via known VPN/proxy networks.
Navigate to GAT+ > Audit & Management > Users Logins.
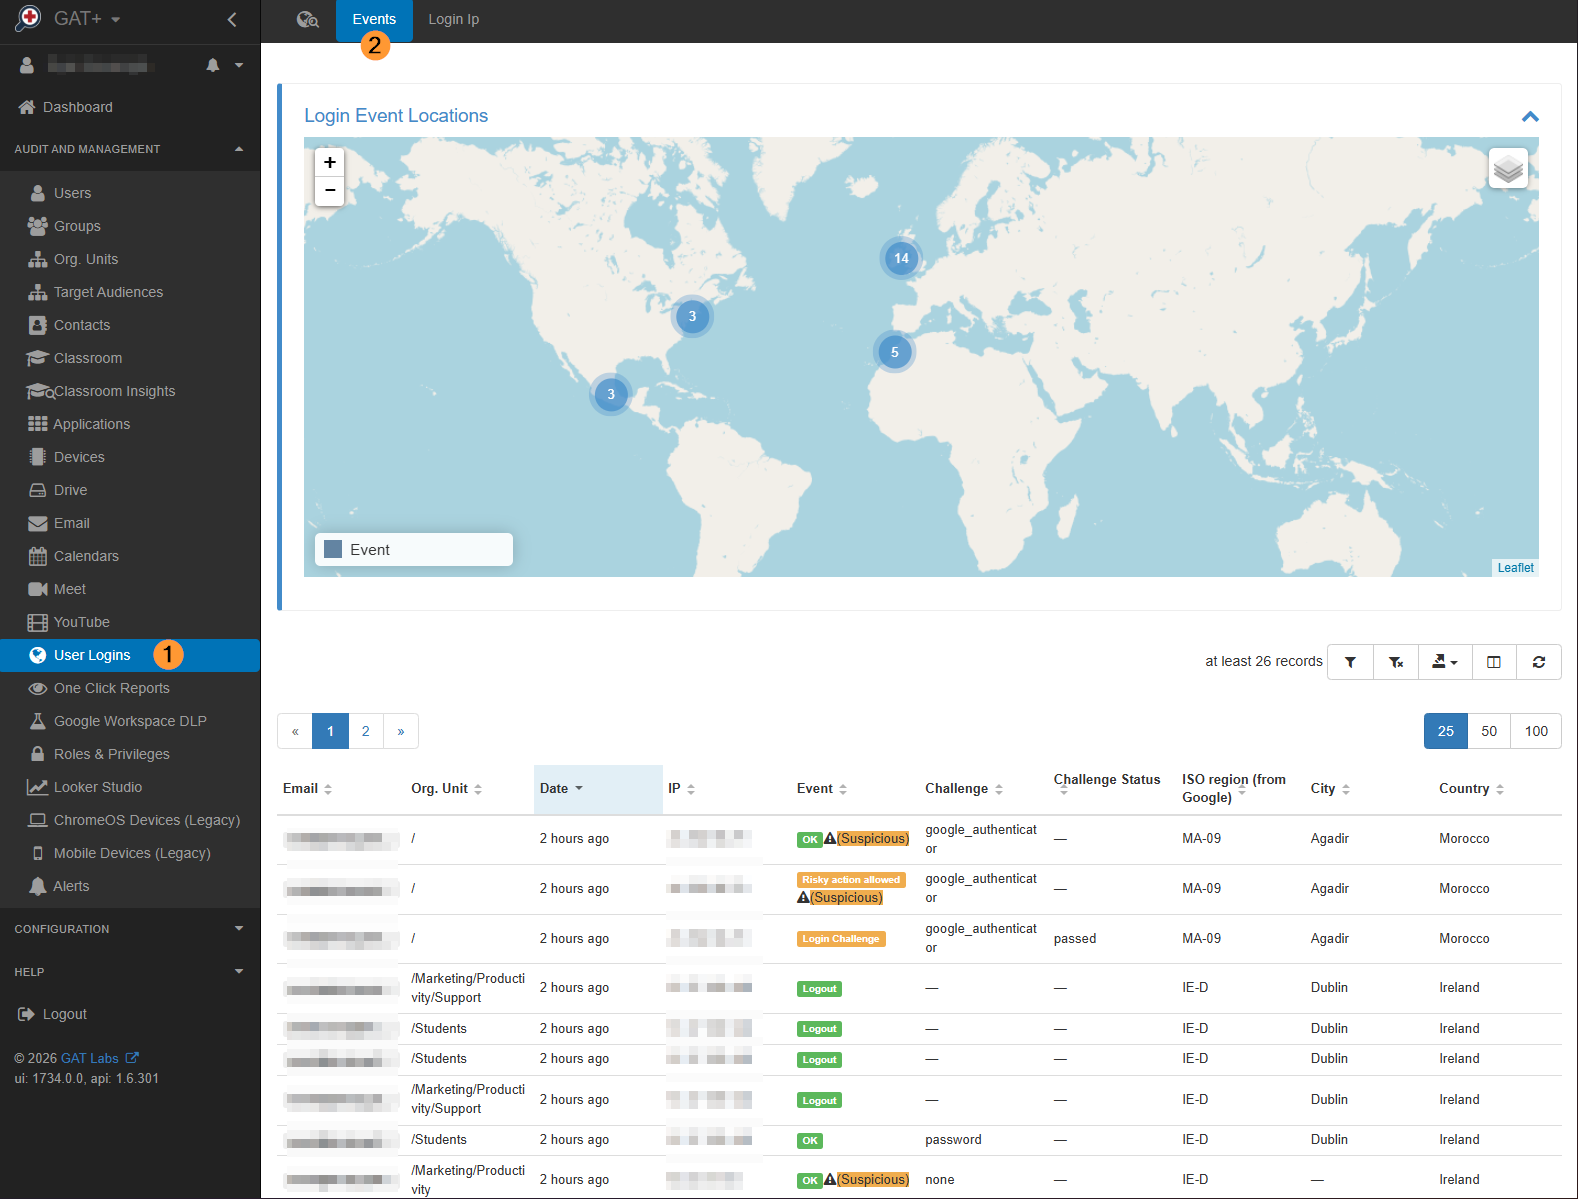
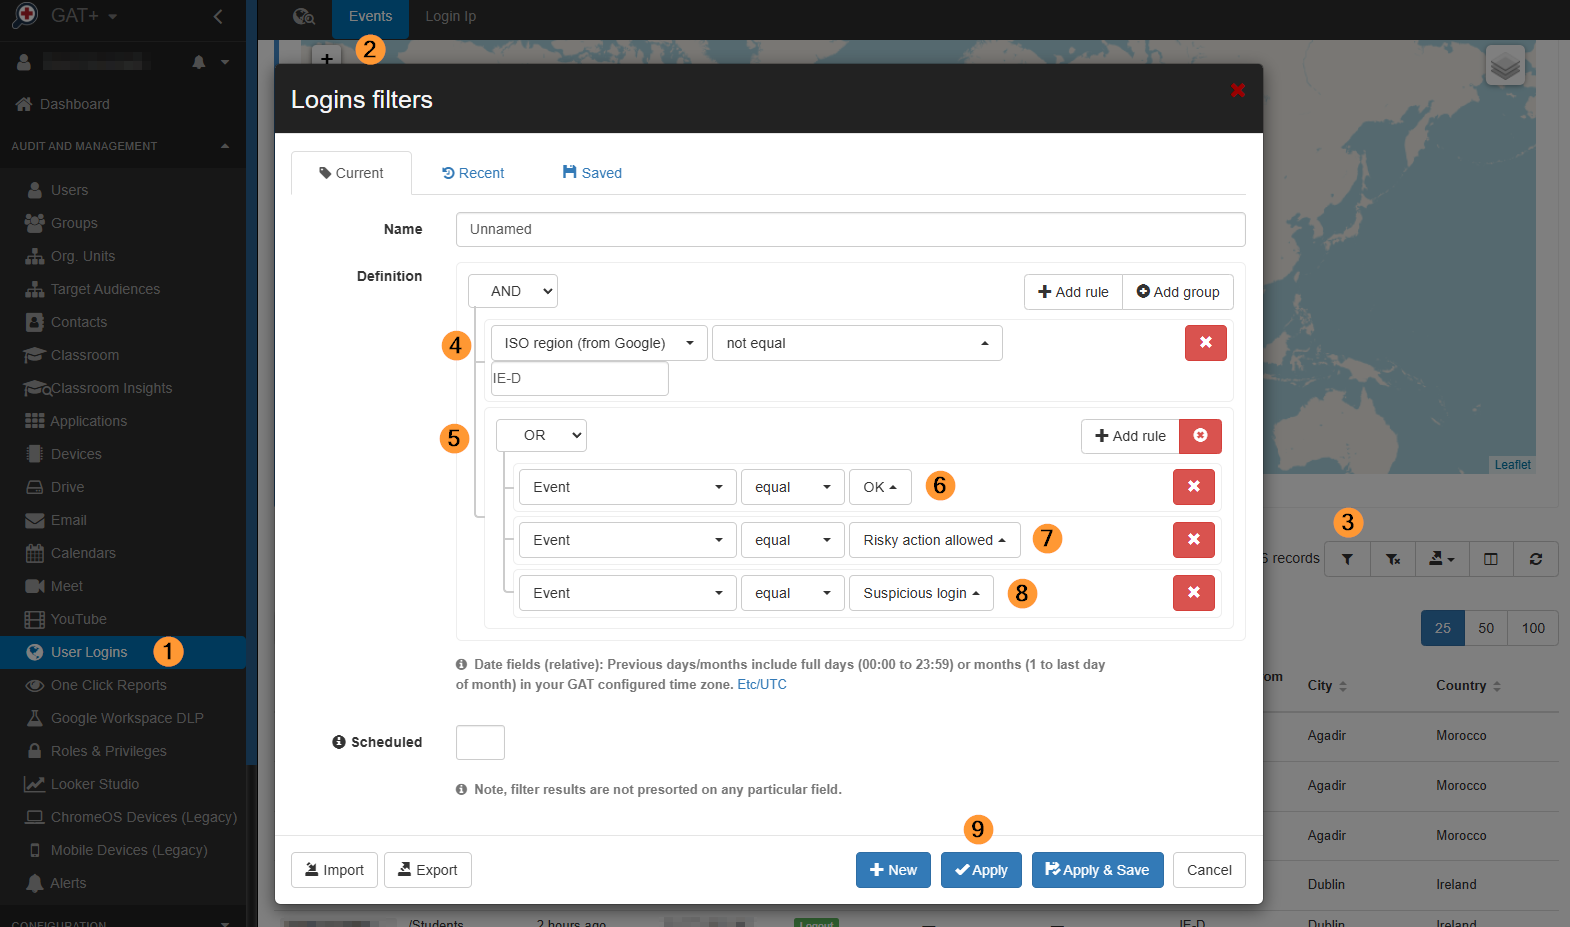
Click the Apply custom filter button to isolate anomalous activity:
- Set a filter such as ‘ISO region (from Google) not equal to (Your ISO Region)’ or ‘Country not equal to (Country name)’.
- Filter by Event equal to ‘OK‘ OR ‘Risky action allowed‘ OR ‘Suspicious login‘ to see successful logins from these anomalous locations.
- Look for a cluster of ‘Login failure‘ events immediately followed by a successful login (Event equal to OK), which frequently indicates a successful brute-force or credential-stuffing attempt.
Note the Date, Time, IP Address, and Location of the earliest unauthorized successful login. This marks the starting point of the compromise.
Determining the Duration of Attacker Access #
To understand how much time the attacker had to exfiltrate data or alter configurations, you must calculate the window of exposure, the time between the initial entry and the final remediation step.
Remaining in GAT+ > Audit & Management > Users Logins, use the Apply custom filter tool to create a filter using the specific malicious IP Address or unique Location identified during the first suspicious login step.
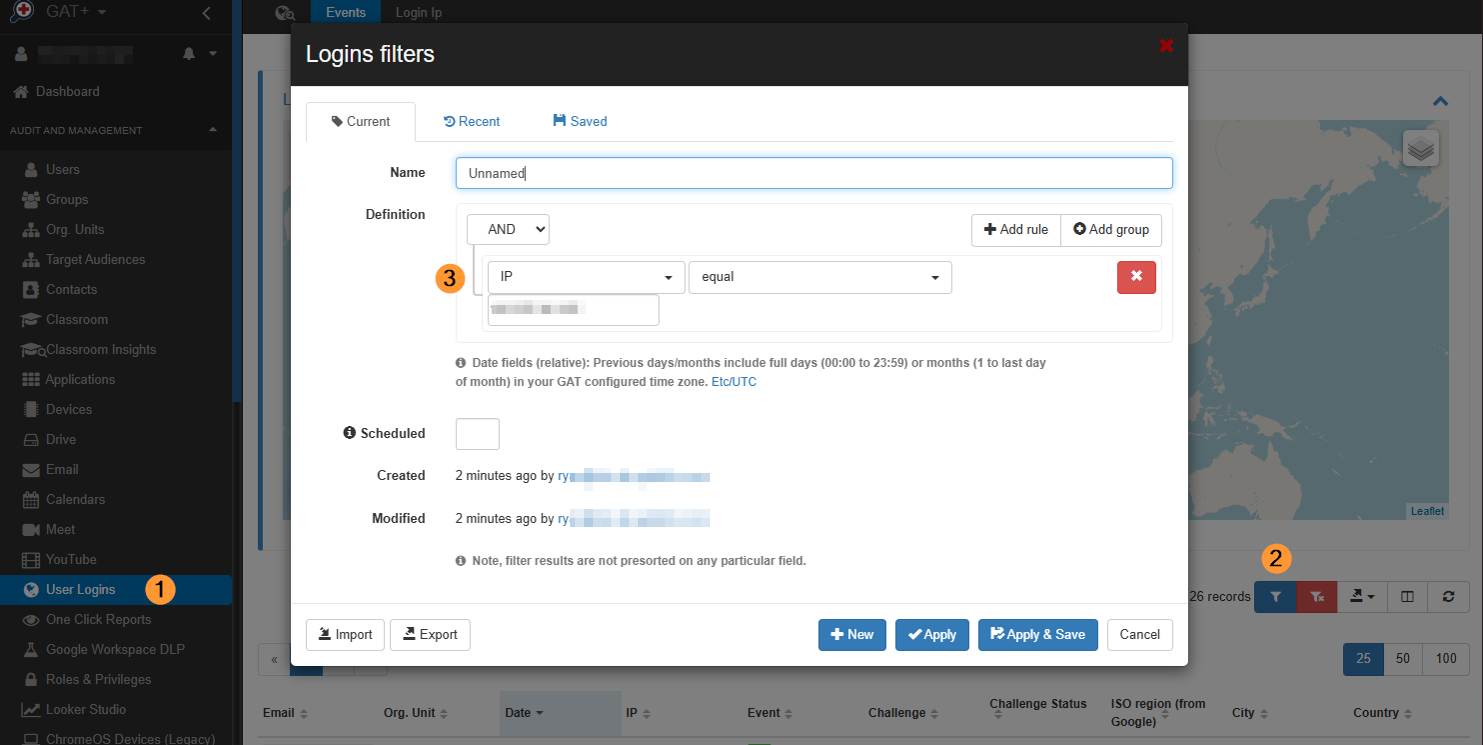
Review the login events to see all subsequent sessions established by the attacker. The duration of access is defined as the time elapsed from the first successful suspicious login timestamp to the final recorded attacker event, such as a logout.

Tracking Key Actions Performed During the Compromise #
Once inside, attackers typically look to exfiltrate data, establish persistence, or move laterally. GAT+ allows you to audit specific actions taken across Google Drive and Gmail during the window of compromise.
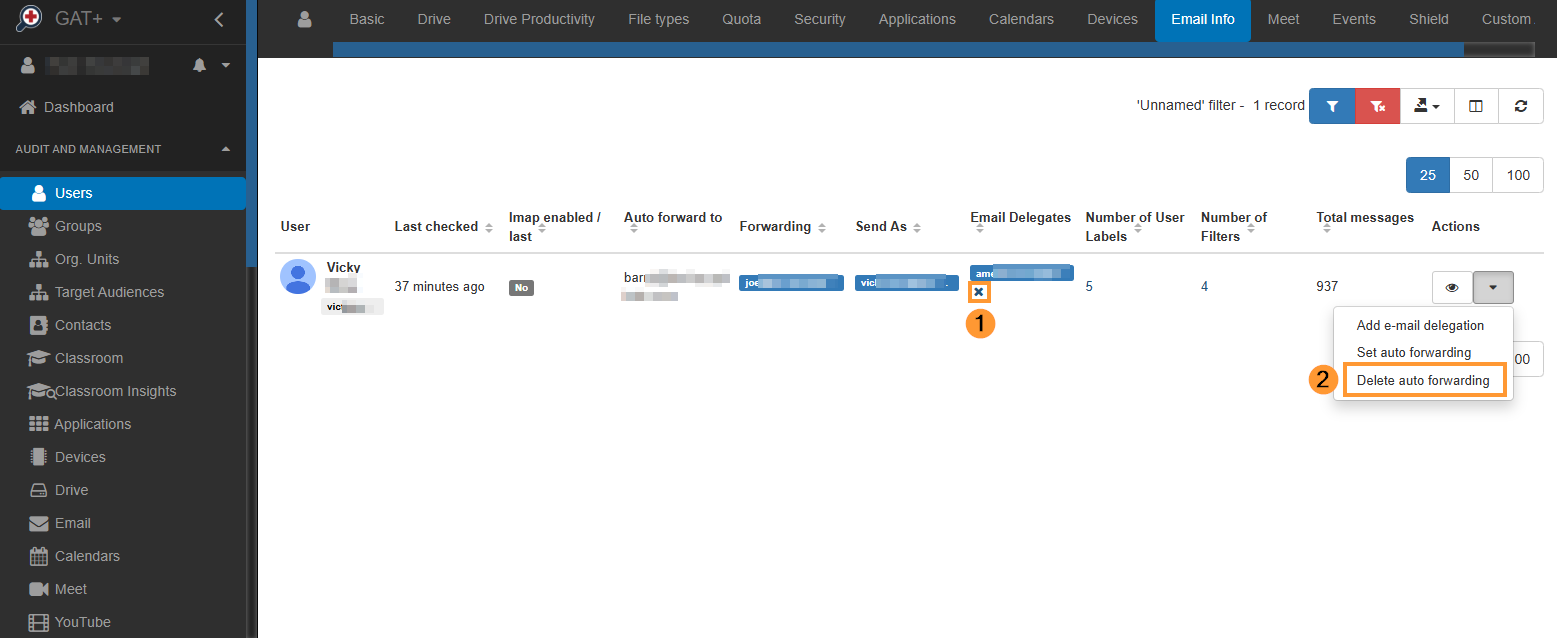
We will first check whether the compromised account has set up any email auto-forwarding or email delegate access. Navigate to GAT+ > Audit & Management > Users > Email Info and filter for that user’s account.
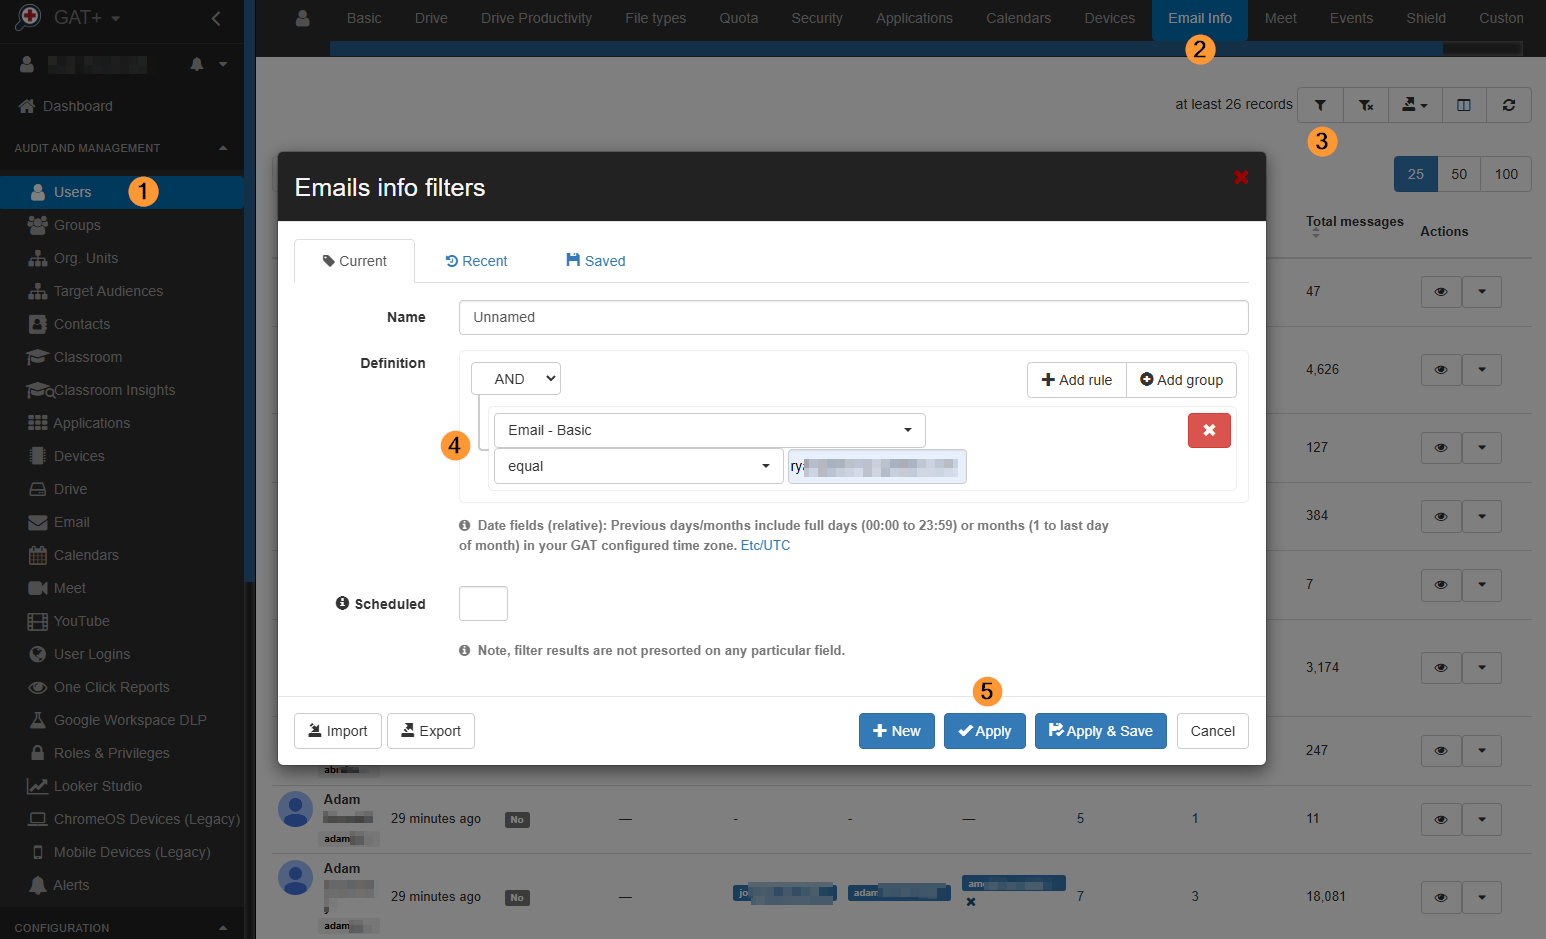
You can then delete the email delegates for any user by clicking the x (1) icon beside the email address. You are also able to delete auto forwarding (2) setup by clicking the dropdown on the right.
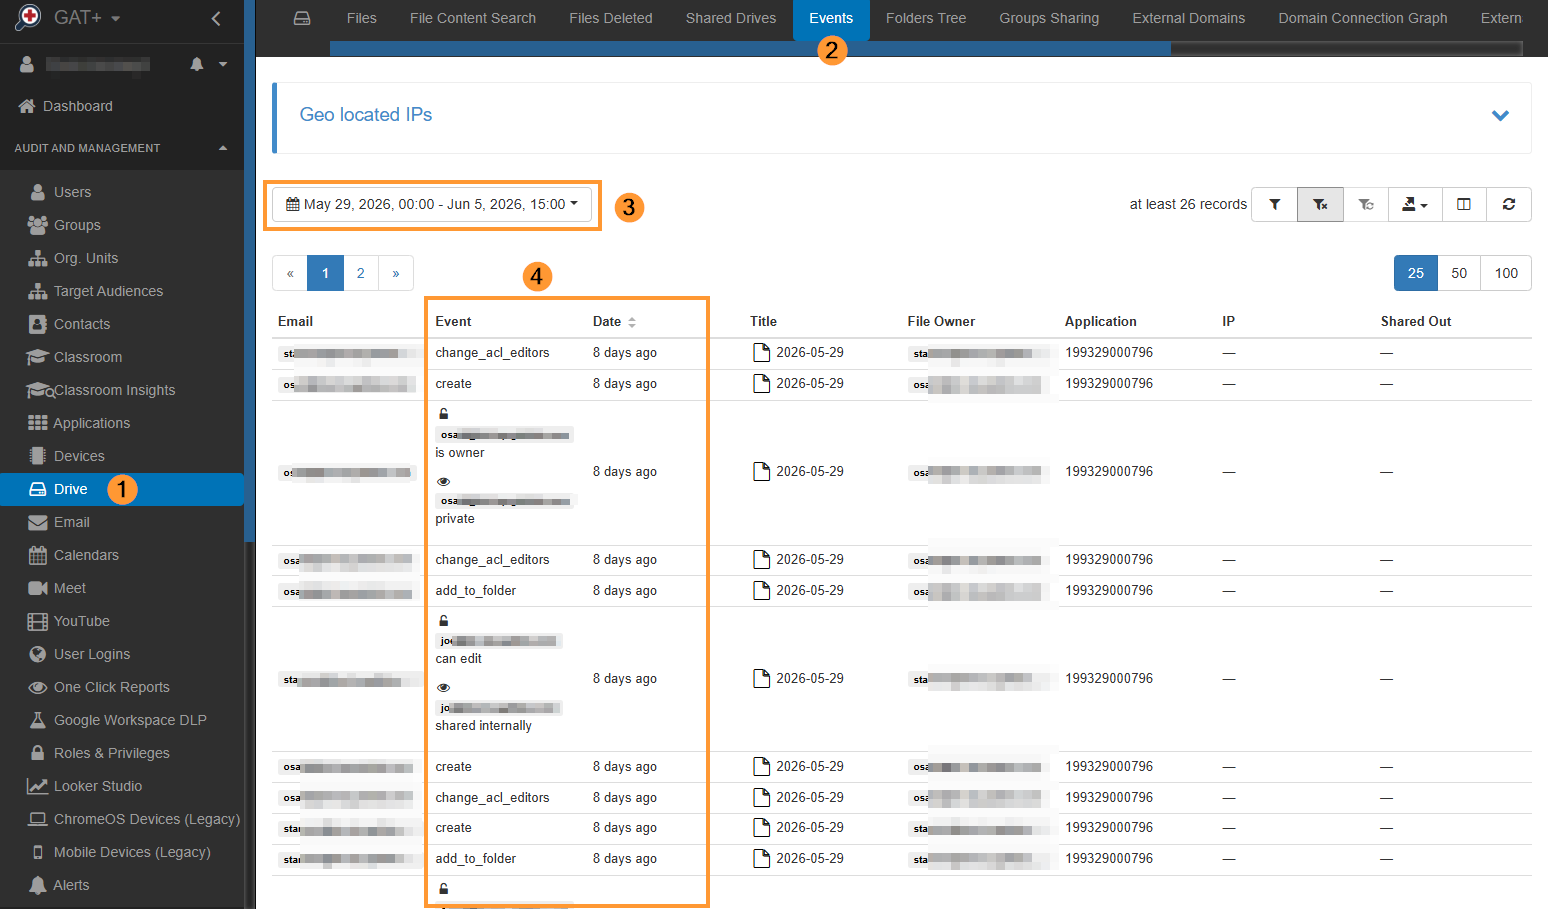
We will now check whether the compromised account made any changes to Drive files. In the Drive > Events audit area, adjust the date & time to show all files modified or shared during the compromise window.
Identifying Other Affected Users, Files, or Systems #
An investigation is incomplete without understanding the full scale. Attackers often try to reuse credentials across multiple accounts or use a compromised account to infect other systems and files.
Impact on Other Users #
Navigate back to GAT+ > Audit & Management > Users Logins. Apply a custom filter searching for the malicious IP Address identified in your initial discovery. This will allow you to check whether the same IP address attempted or successfully logged in to other user accounts across your Google Workspace domain.
Impact on Files #
In the Drive > Events audit area, adjust the date & time to show all files modified or shared during the compromise window as shown above in step 3.
Impact on Emails #
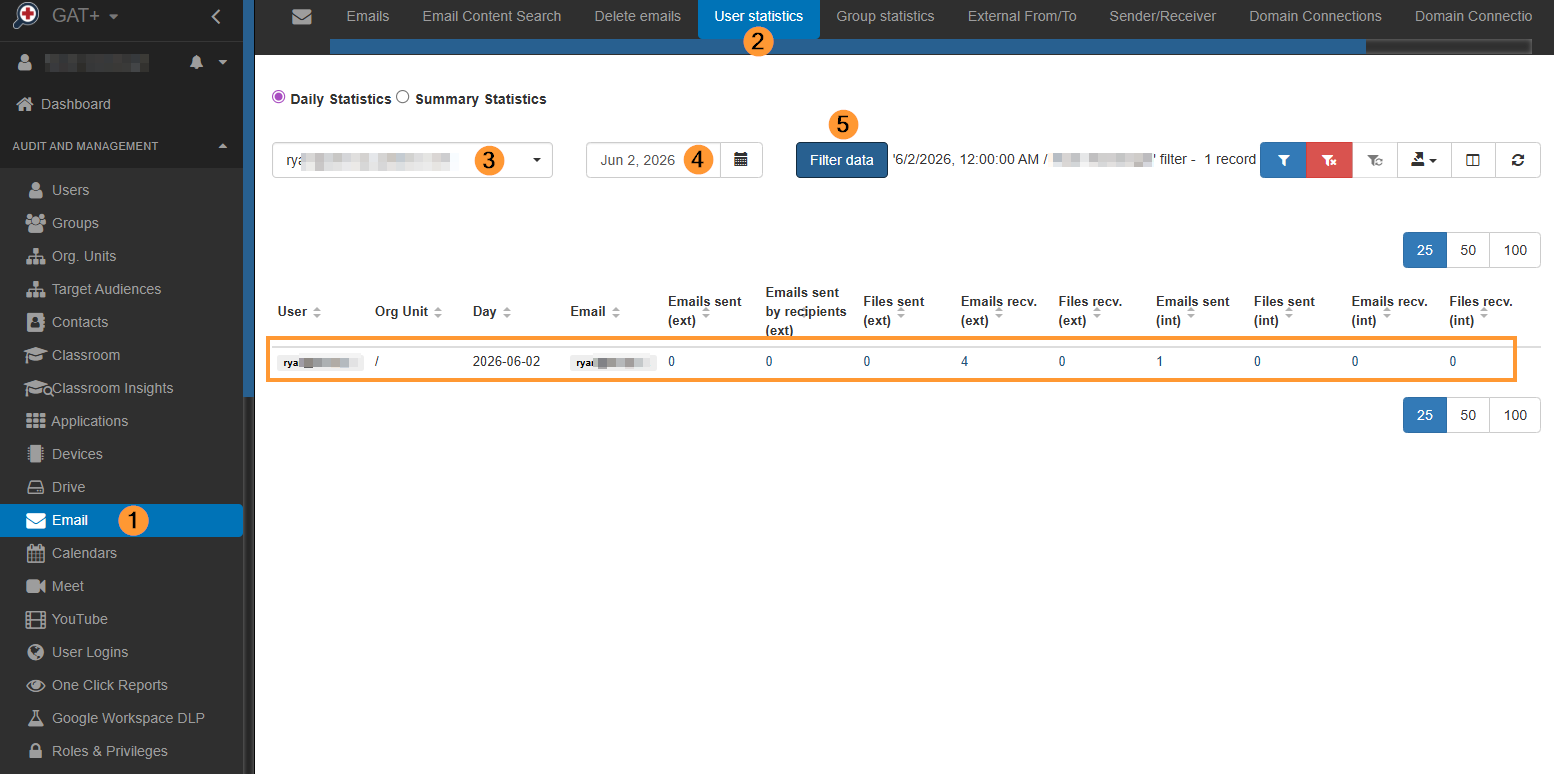
In the Email > User Statistics audit area, adjust the user (3), date (4), and click ‘Filter data’ (5). This will show results of all emails sent and received for both external and internal users. You can then click any of the numbers below, and this will redirect you to the Emails section to investigate further.
Impact on Applications #
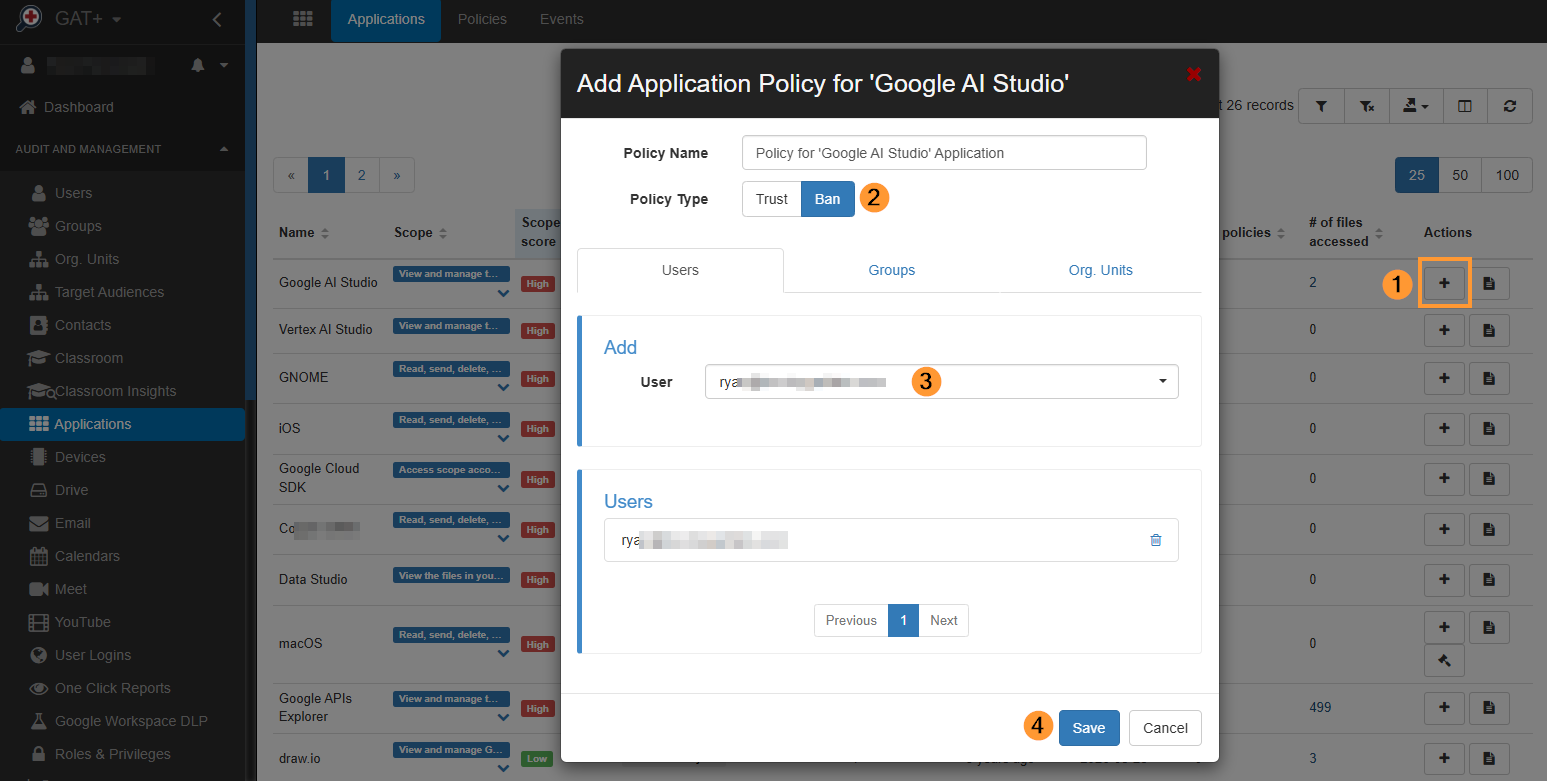
Navigate to GAT+ > Audit & Management > Applications. Search for any new third-party applications or OAuth API scopes authorized by the compromised user during the breach window by sorting by ‘Since’ (3).
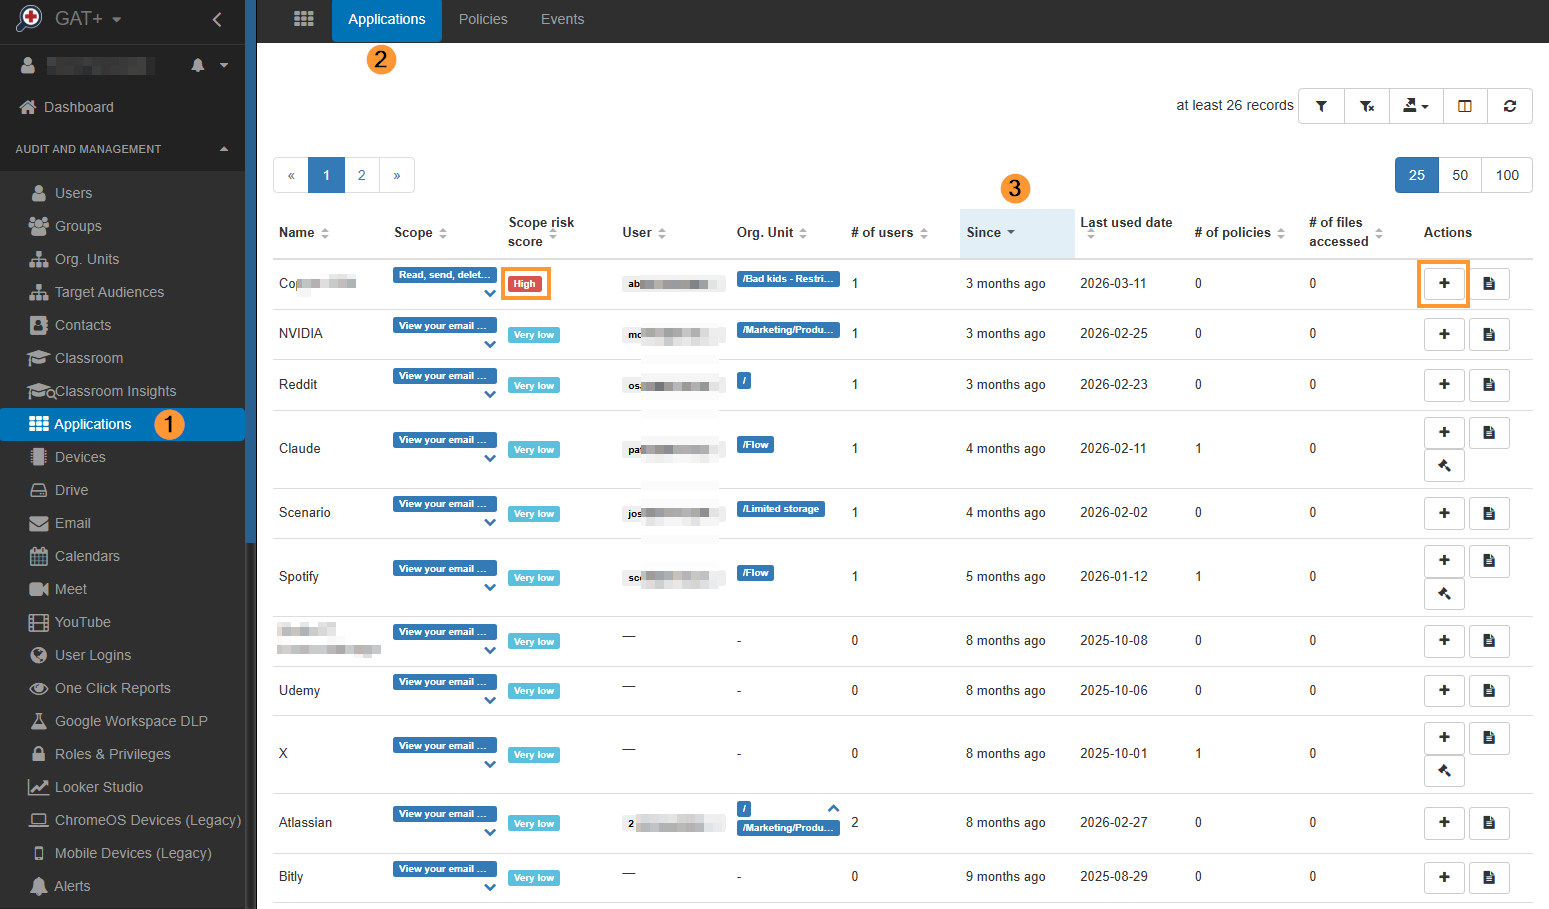
Attackers often authorize malicious apps to maintain a backdoor into the workspace, even after their primary login session is terminated. If any unrecognized apps with extensive read/write permissions are found, ban this application through the GAT+ interface.