

Shared Drives are an important security feature of Google Drive for Google Workspace.
They ensure files are not lost or deleted by a user, and they can have some special features, like restricting file download abilities to a user with contributor rights or restrictions files in a way that they cannot be shared with any account that is external to the domain.
Because these drives often contain sensitive data, it is important to monitor who has access from your domain, and see what shared drives your individual users have access to.
You can find this out in GAT+ > Users.
Navigate to the Users > Drive sub-section.
On the furthermost right column, you will see the number of Shared Drives that each individual user has access to.
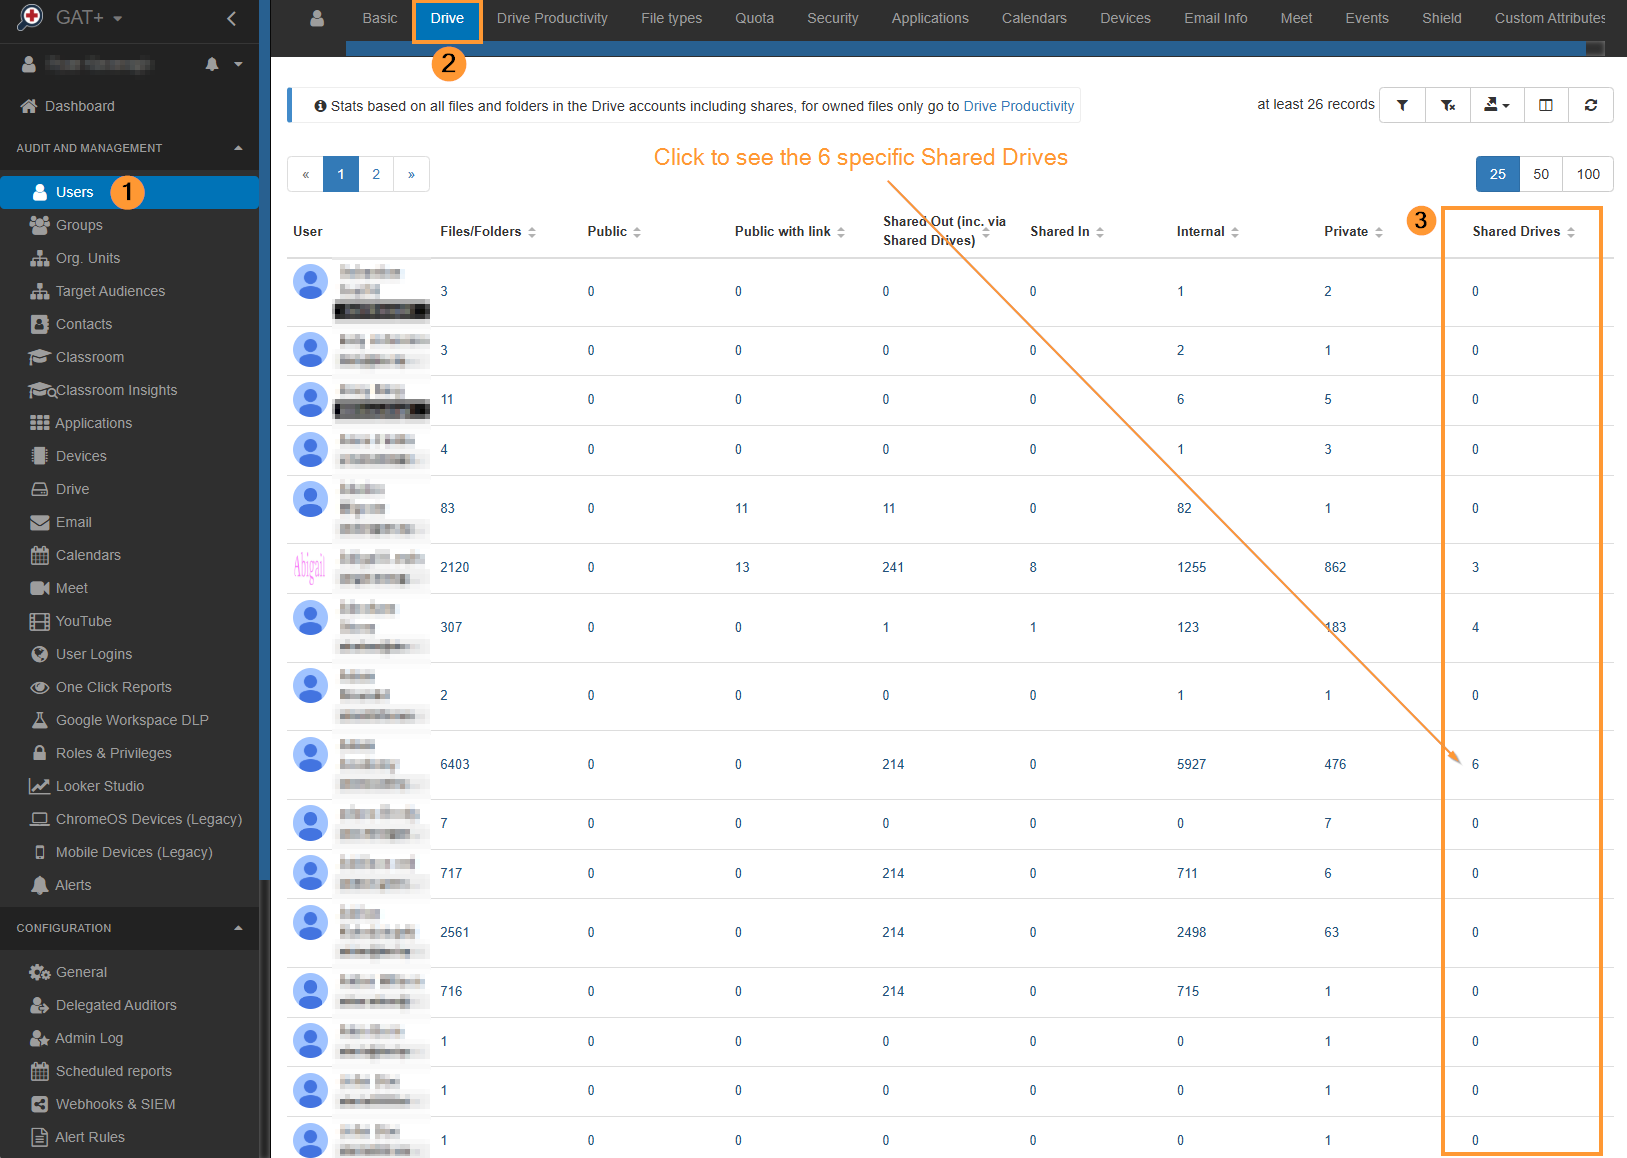
Note: This is the number of Shared Drive ‘root folders’ that a user can access. It’s possible that they may have access to a file or a folder in another shared drive, that is not part of one of these shared drives.
On click of the number, you should see a list like below. You may need to enable extra columns to see the Manager and Content Manager columns.

Add somebody else to the same shared drives #
Now that we can see the shared drives, we can create a workflow to add other users in the same department to the same shared drives.
This could be done automatically going forward with an Event workflow, but here we will do it as a once-off, with a standard workflow.
Navigate to GAT Flow, by clicking the GAT+ logo in the top left corner of GAT+ and select GAT Flow.

You will be brought straight into the ‘Create Workflow‘ section, to create your workflow.
Give it a name, select ‘Modify’, and click ‘Next’. You can find greater detail and options on running a workflow and the options available here.

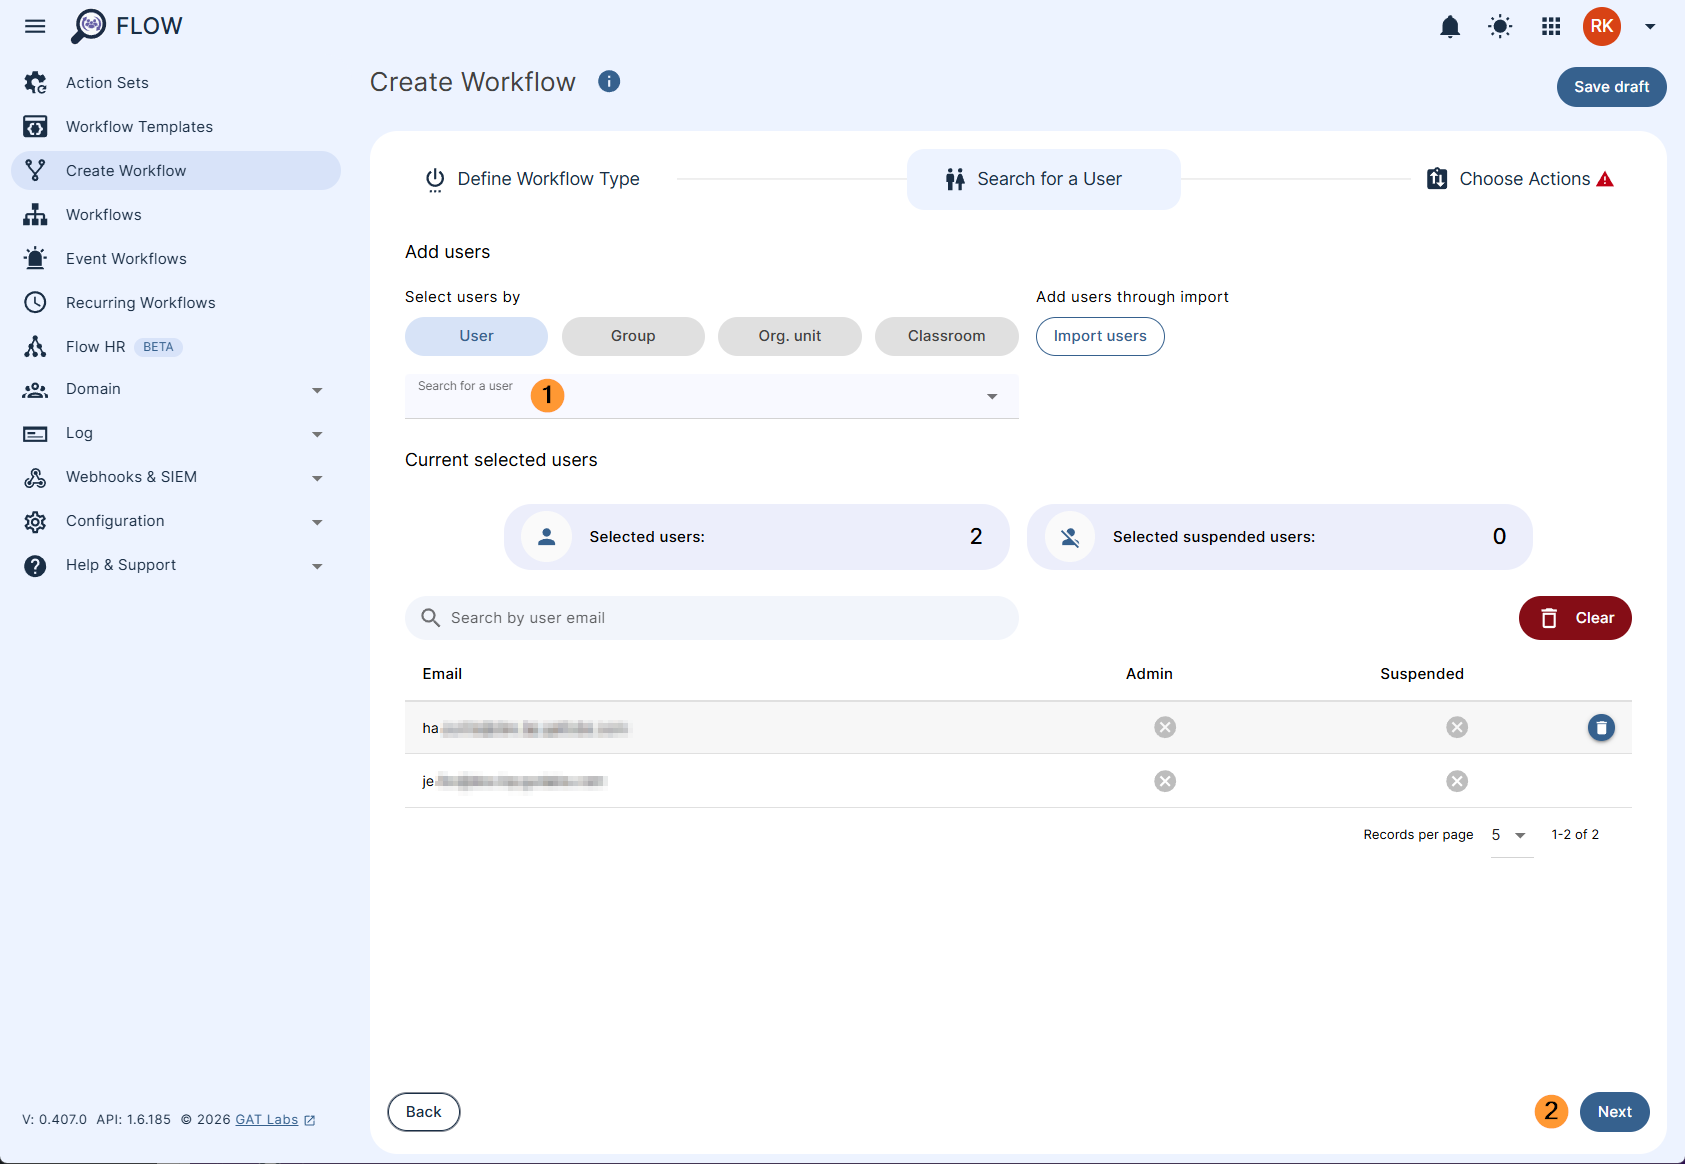
On the user selection screen, select your users, and click ‘Next’.
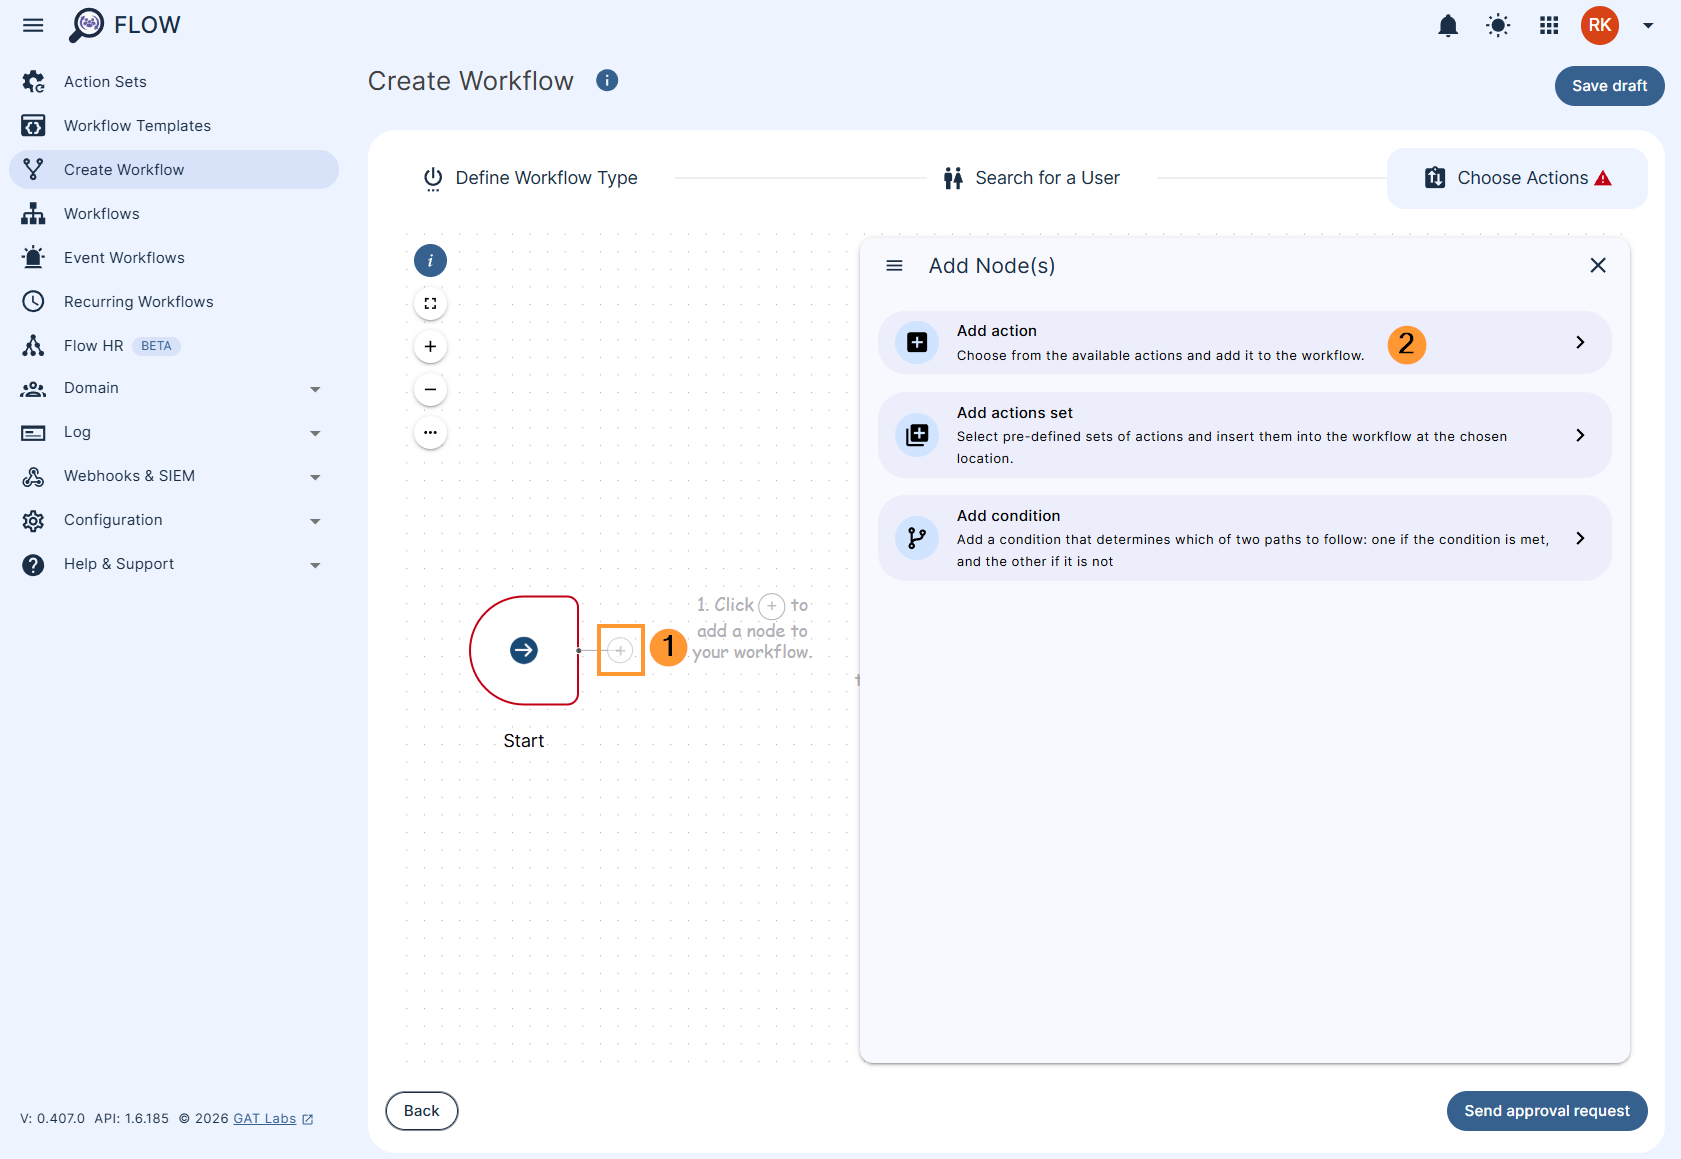
Now click the ‘+’ icon and select ‘Add Action’ from the Add Nodes pop-up.
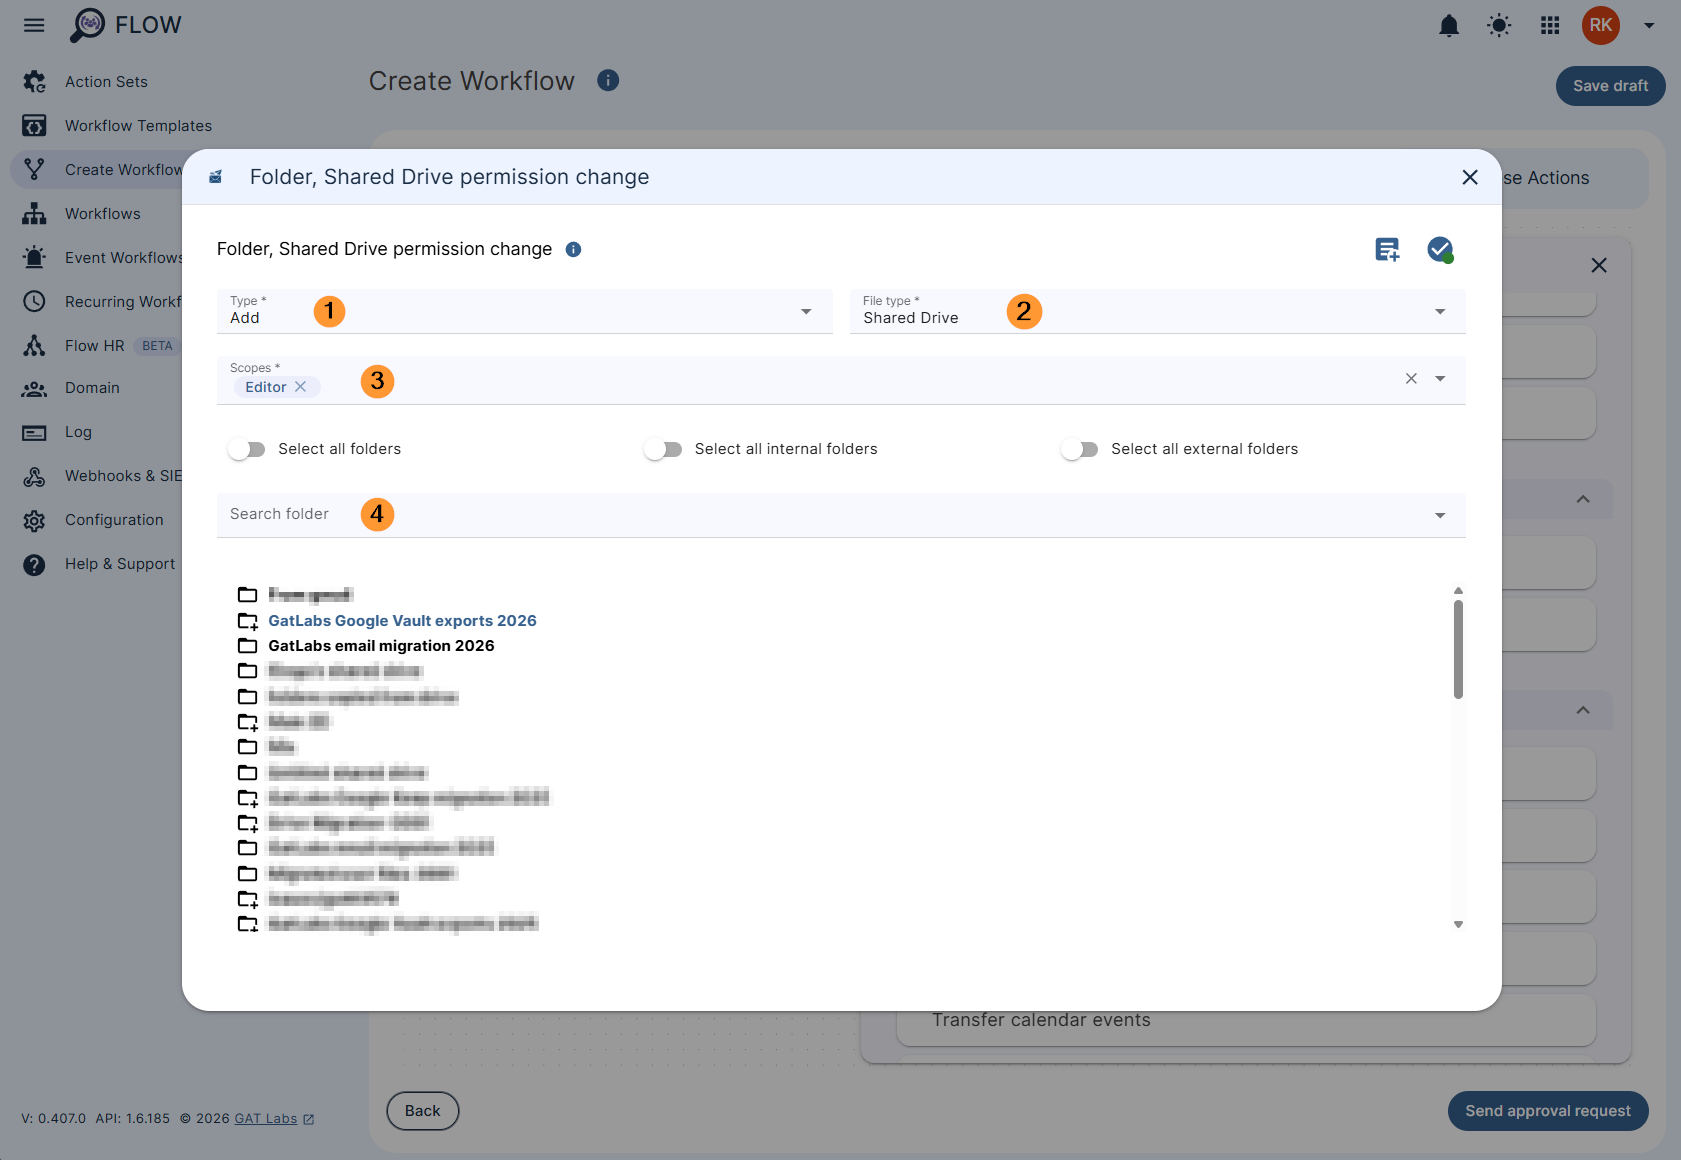
Select the Folder, Shared Drive permission change action and then double click the ‘Folder, Shared Drive permission change’ node.
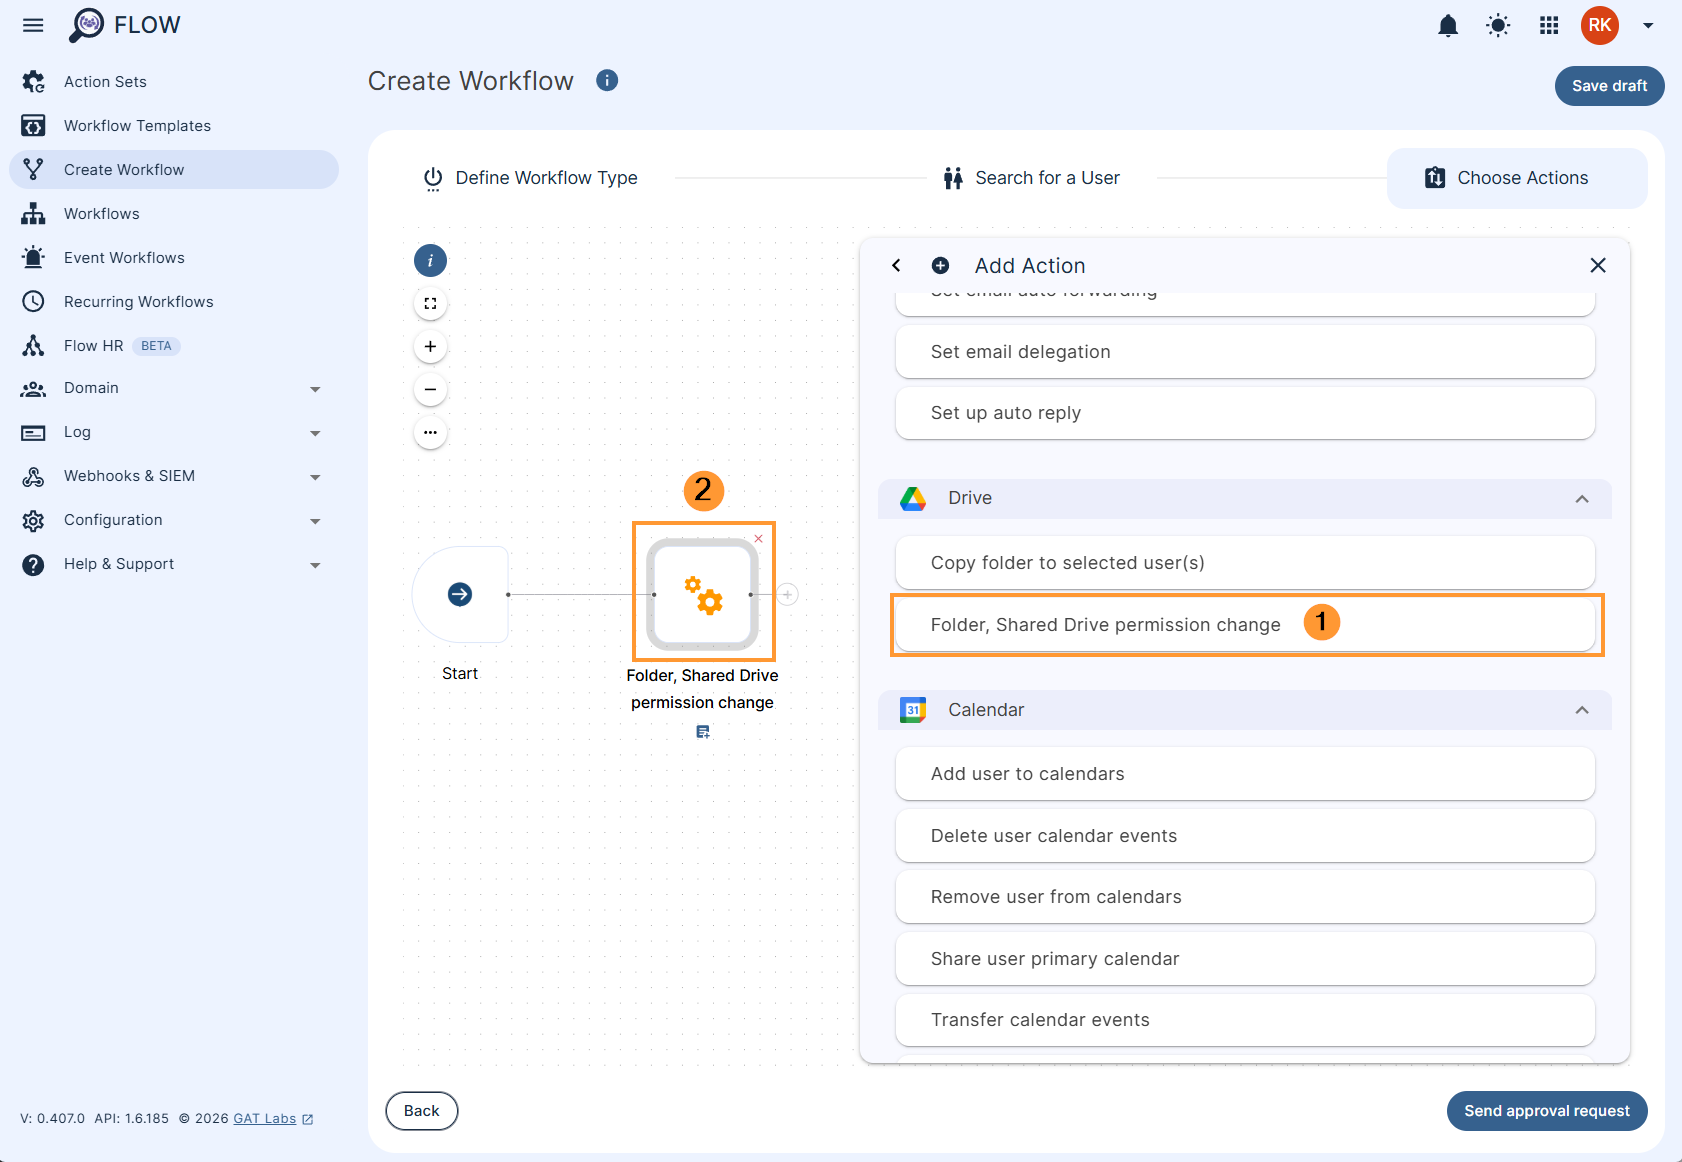
Select the ‘Type’ whether you want to add or remove, change ‘File type’ to ‘Shared Drives’, select the scopes you wish to add to the users and then choose the Shared Drive(s). If there are different permission levels for different drives, select the ‘Folder, Shared Drive permission change’ action again. You can run the action as many times as you need to for different levels of access.
Once you’ve filled in the action, changes are saved automatically. You can now click outside of the pop-up box to continue with your workflow or click the ‘X’ to minimize the pop-up.
When you are finished, click ‘Send approval request’. Once the security officer approves, your selected users will have the same levels of access as the previous user.


