

Migrating Bulk Emails in Google Workspace via GAT Flow #
GAT Flow is a user management tool that provides email migration allowing Google Admins to copy bulk emails from one user of the domain and migrate them into another.
Email migration is an option available in Flow for Offboarding and Modifying existing users
Steps to do this action #
Flow #
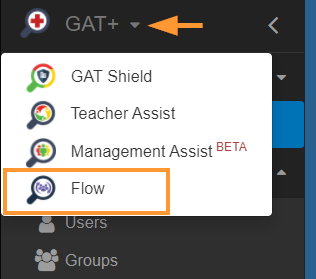
In GAT+ click on the GAT+ icon and open Flow from the menu.
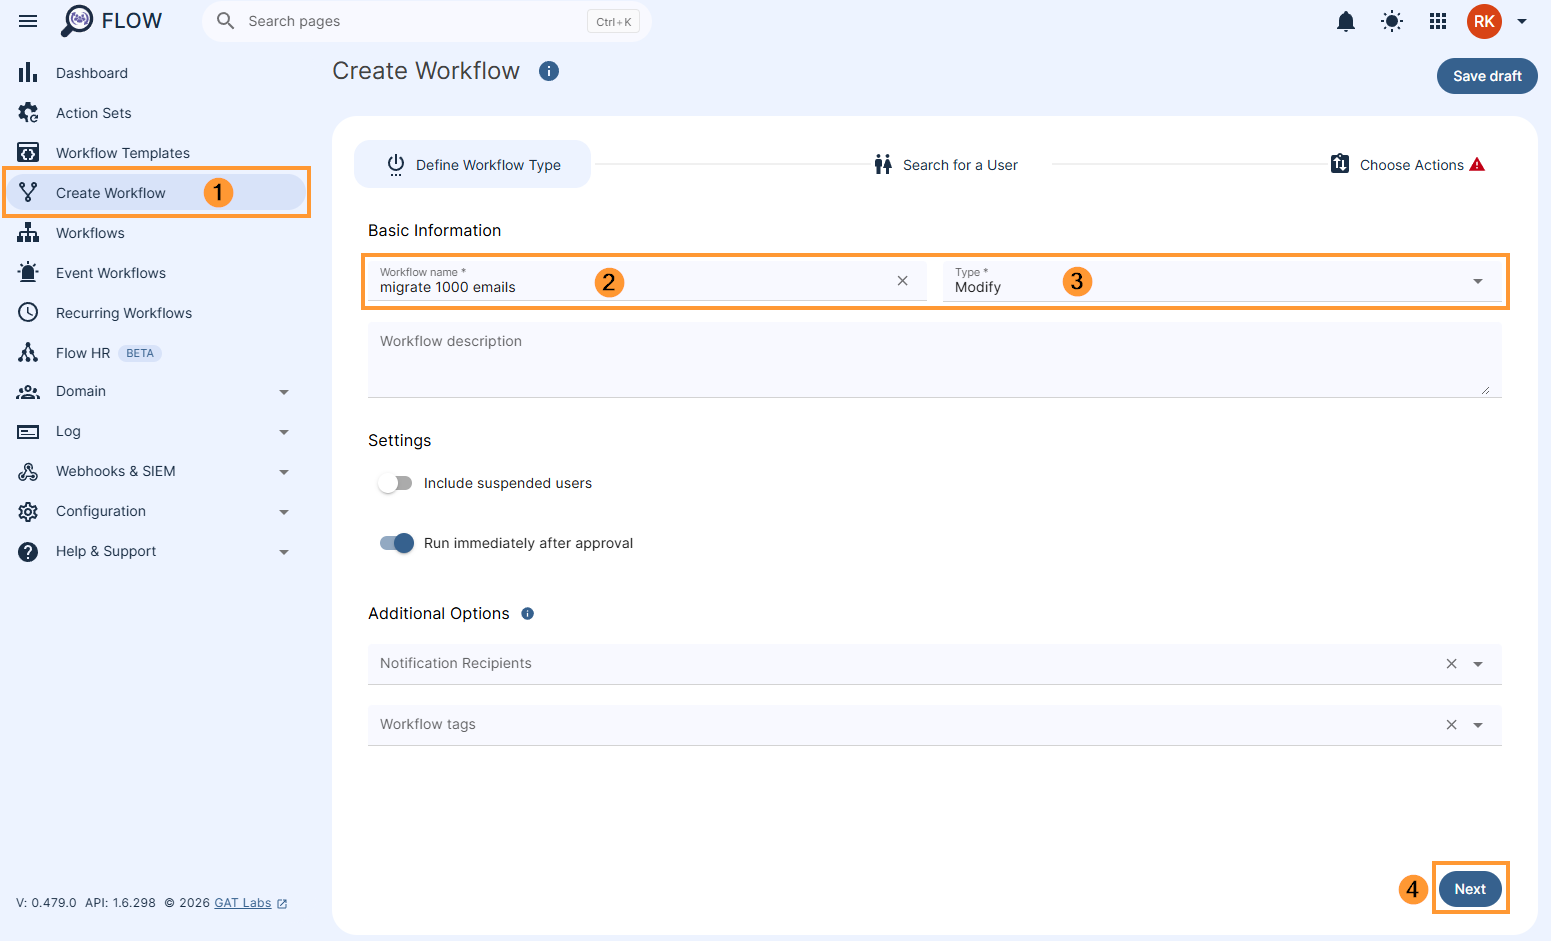
Step 1: Create the workflow #
Navigate to GAT Flow > Create a workflow (1)
In the Workflow fill in the details. You can set it up also as an Event workflow or Recurring workflow.
- Name – enter the name of the workflow (2)
- Description – enter a description for the workflow (optional)
- Type – select what workflow type you would like to run
- Modify – modify existing users (3)
- Offboarding – offboarding existing users
- Include suspended users – enable or disable to allow you to select users who are currently suspended:
- If enabled – you will be able to select even users who are suspended
- If disabled – you will be able to select only users who are active
- Run immediately after approval – provides an option to schedule the workflow to run in a selected future time (optional)
Later click Next (4) to proceed.
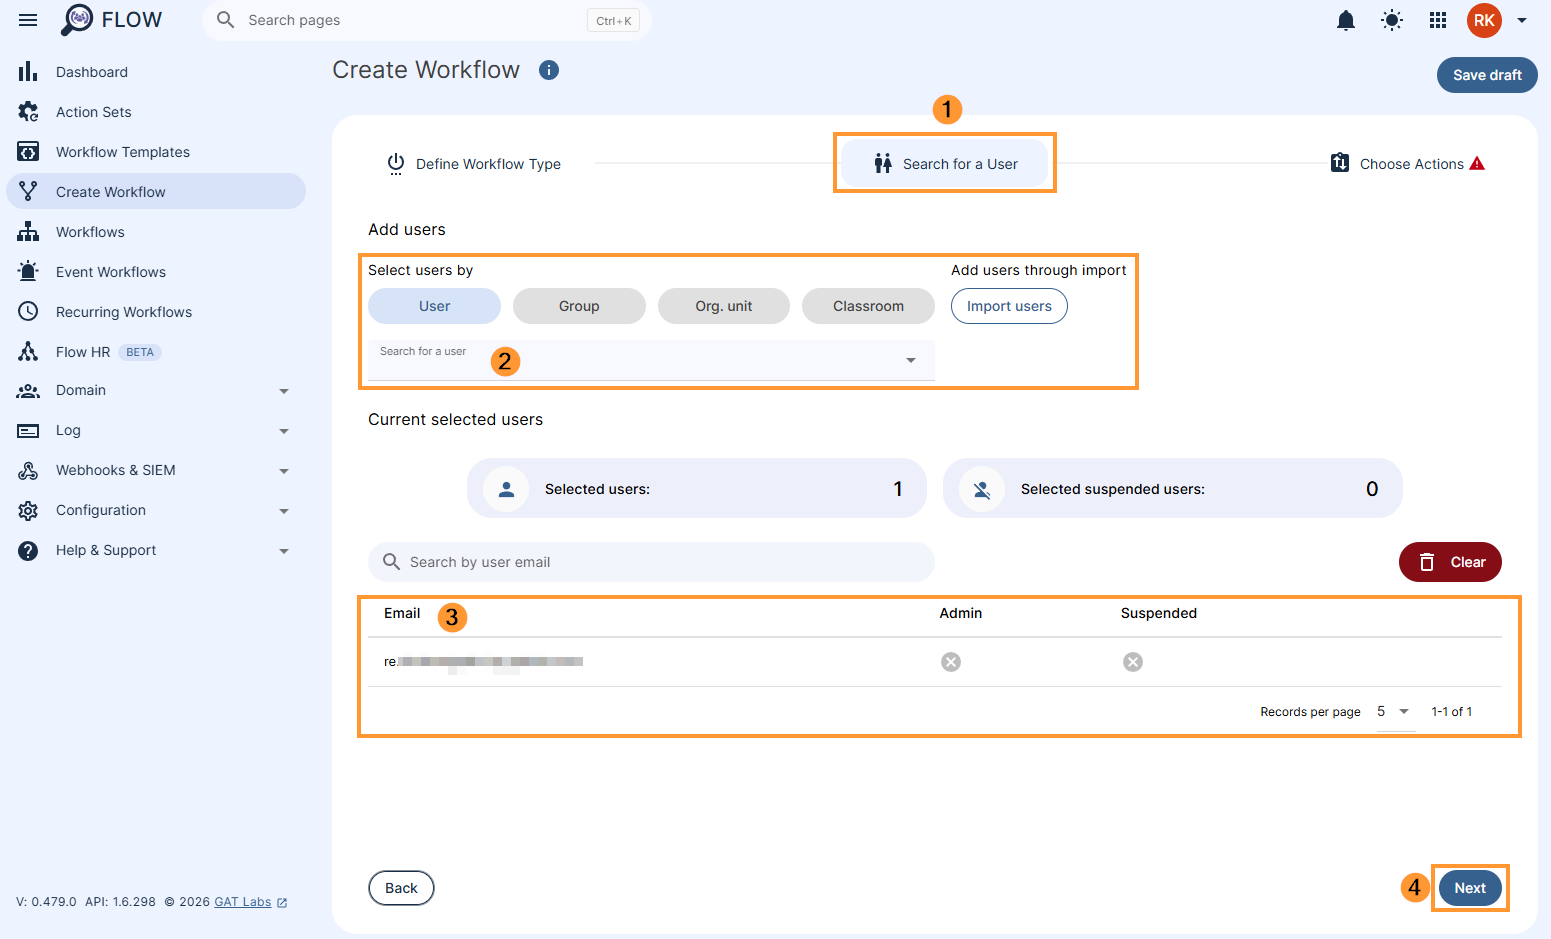
Step 2: Select users #
In the next screen, Search for a user(s) – select the user whose emails will be migrated to other users.
- Search for a user(s) – select individual user(s)
- Search for a group of users – select all users from a selected group
- Search for an OU of users – select all users from an Org. Unit
- Import users – choose to import from a spreadsheet or to provide a filename
- Next – when the users are selected click to proceed
Choose actions #
In the Choose actions click on the (+) button (1) and then click the Add action button (2)
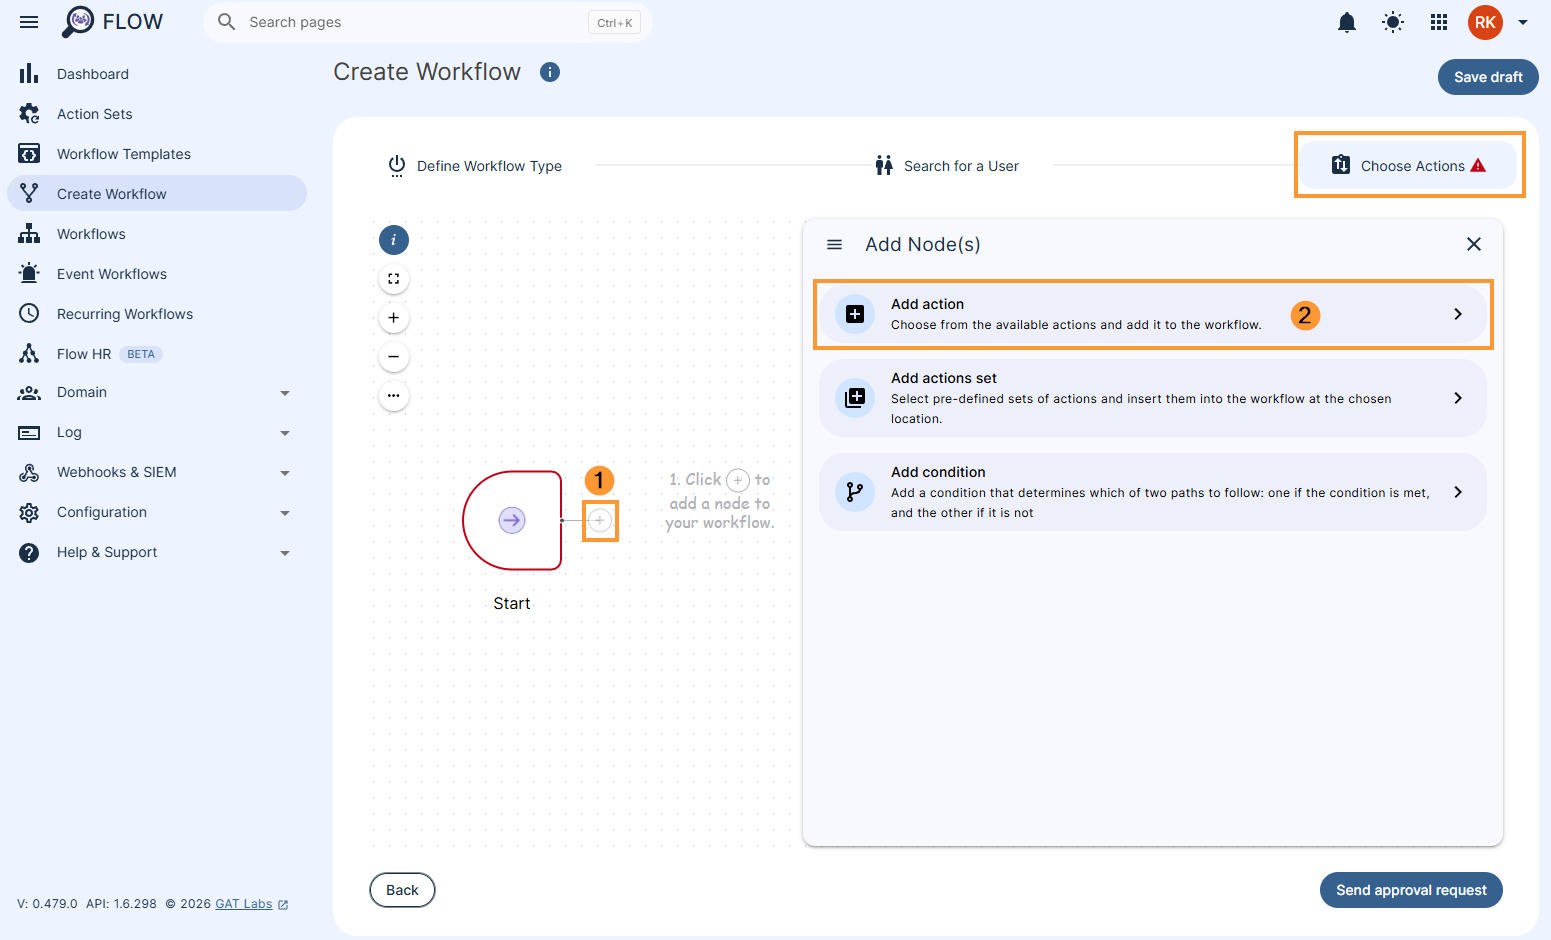
Select the Migrate emails option from the menu:
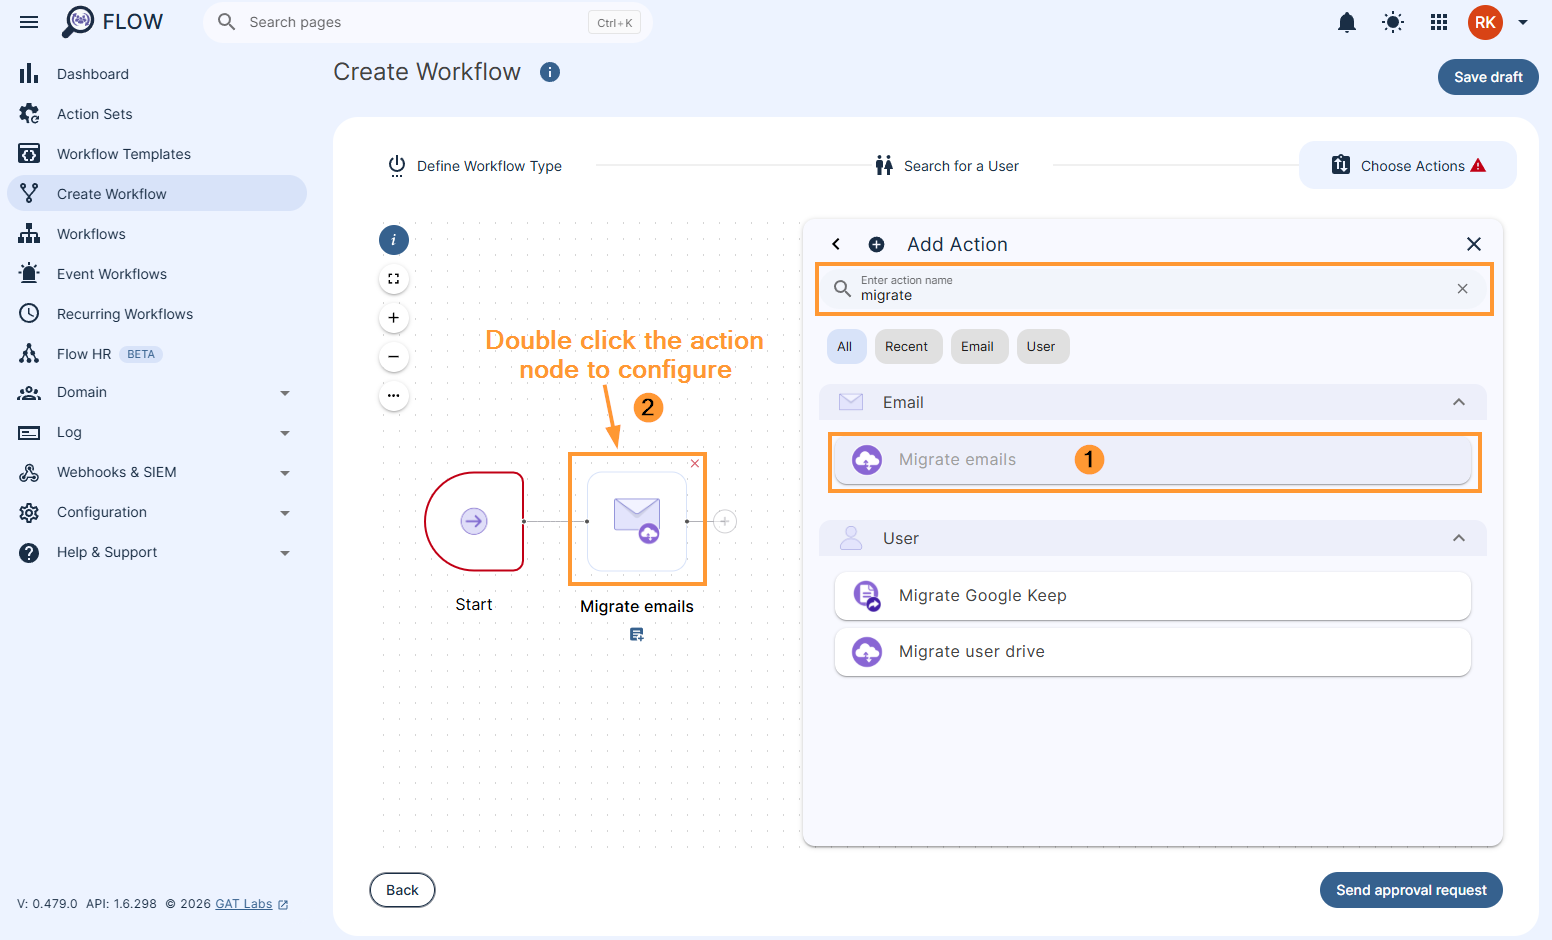
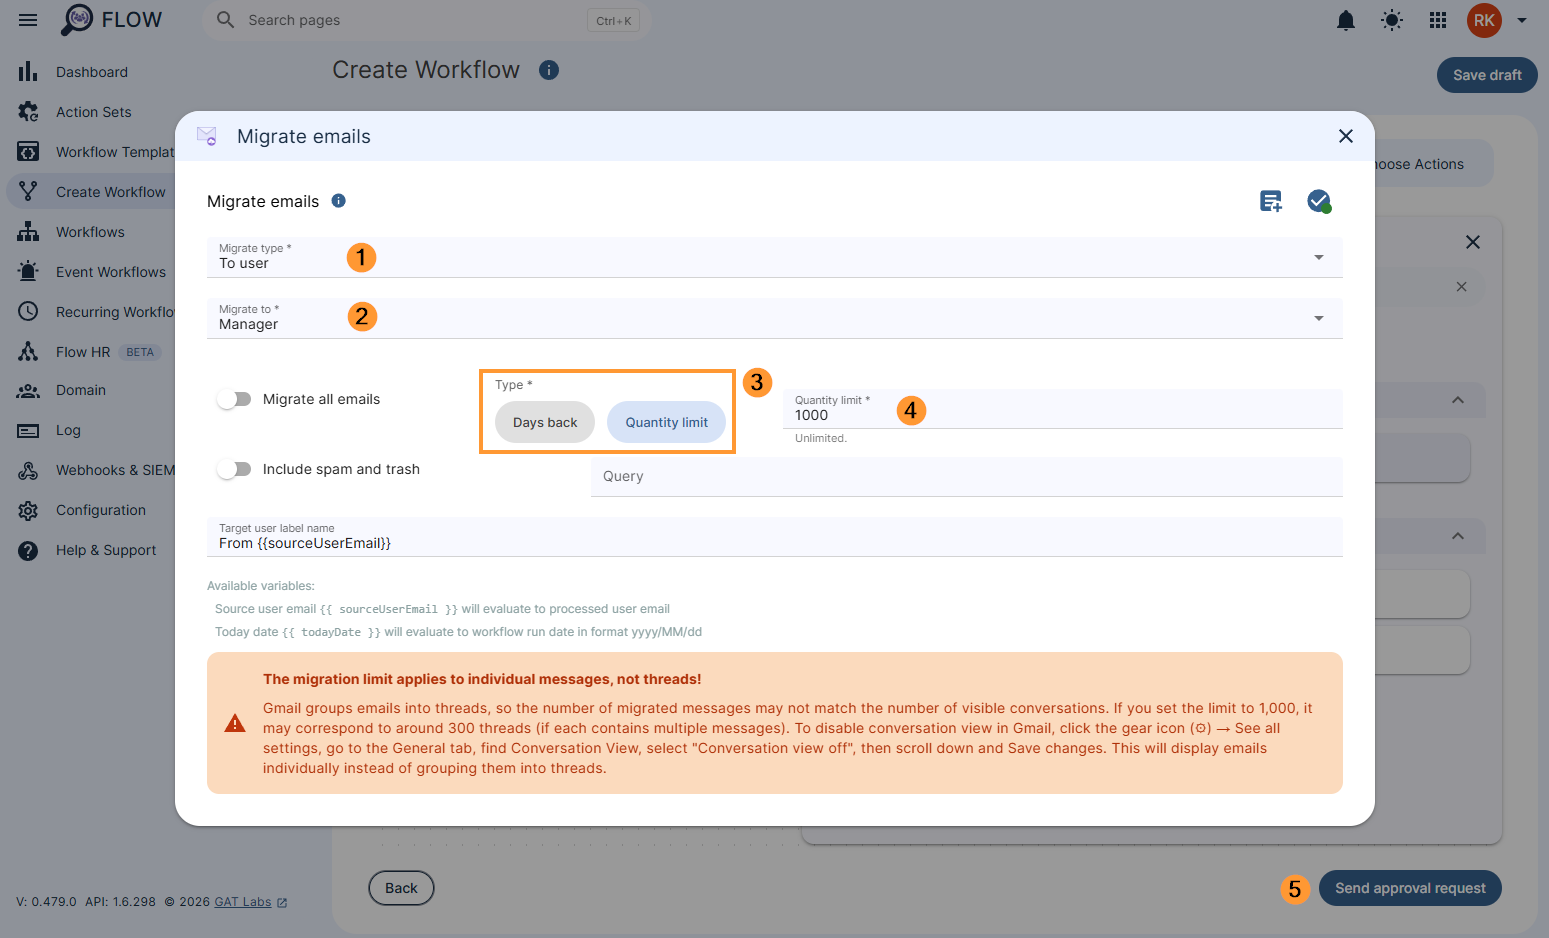
Fill in the details.
- Migration type – select to migrate the emails to a User or a Group
- Migrate to – select the User or Group to who the migration will be done for
- Days back – select how many days back worth of emails is needed – the max is 12 months (365 days)
- Quantity limit – enter the quantity limit – the max is 10,000 emails
- Query – enter a gmail query based on which emails matching the query will be migrated
- Include spam and trash – toggle whether you would like to migrate spam and trashed emails.
- Target user label name – enter a label name (from {{sourceUserEmail}} – this will apply label on the migrated emails
Note: Unlimited email migration is available as an add-on, please contact the GAT Labs sales team for more information.
Click on Send approval request
Security officer #
The security officer will receive an email notification for this approval.
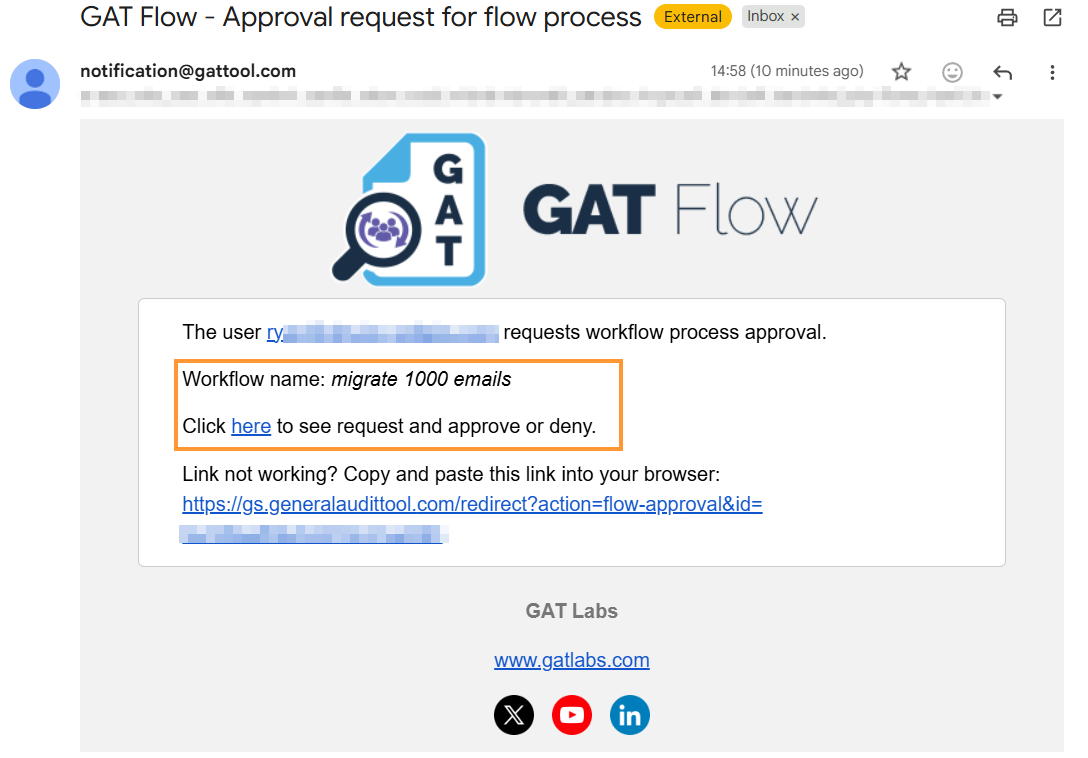
Once it is approved, the job will take effect and the email migration will start.
Workflow #
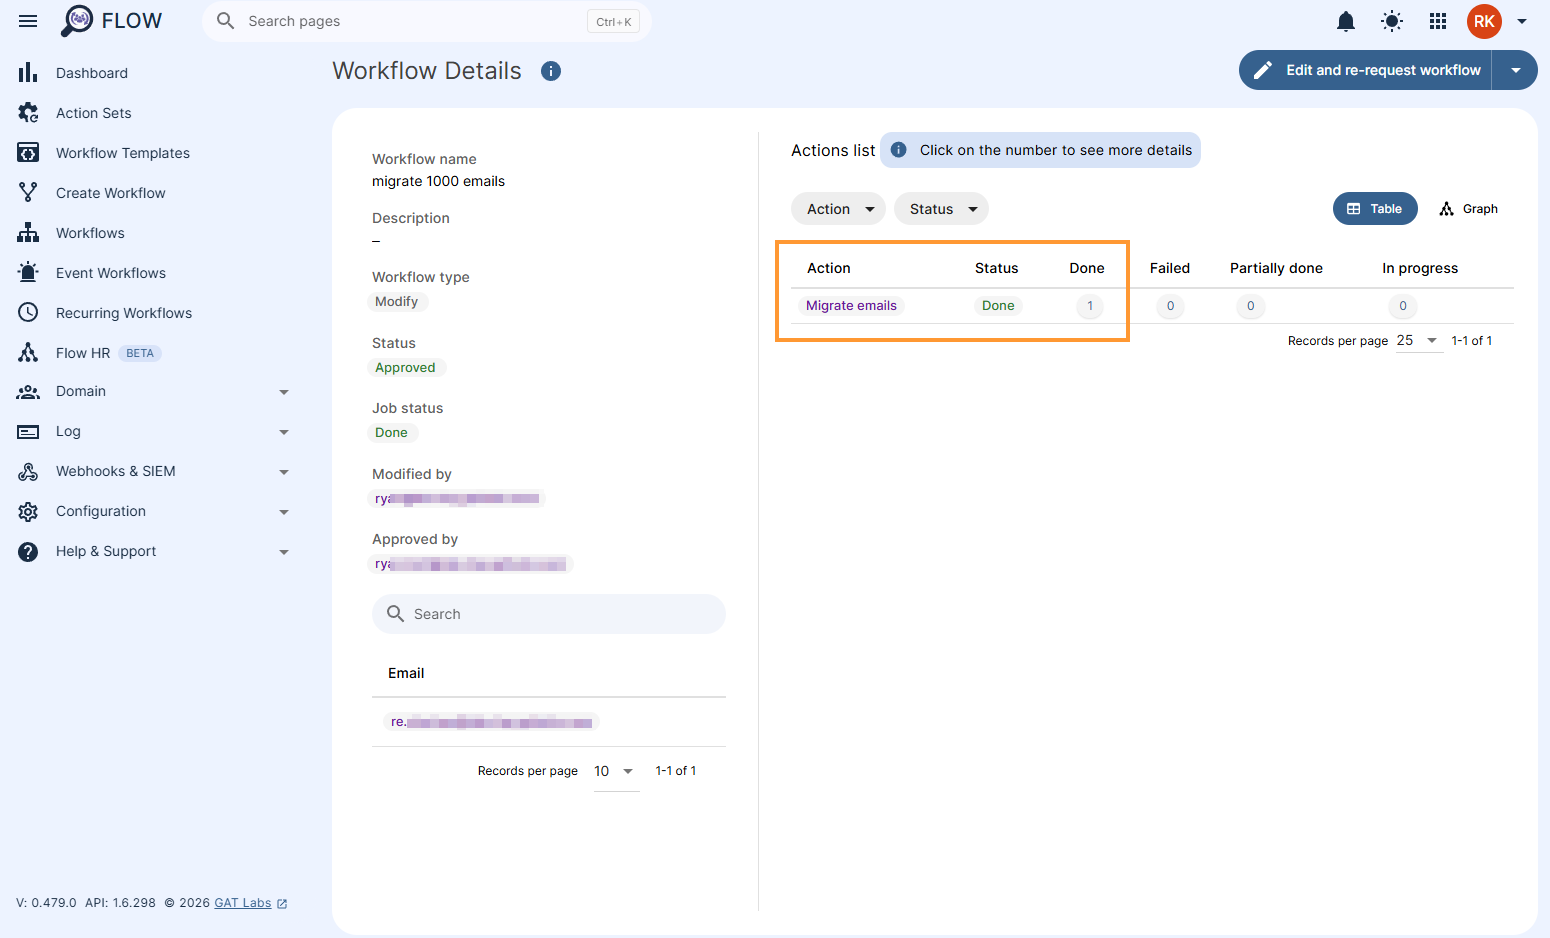
You will be navigated to Workflow. Click on the “page” icon to view details for before and after it is approved
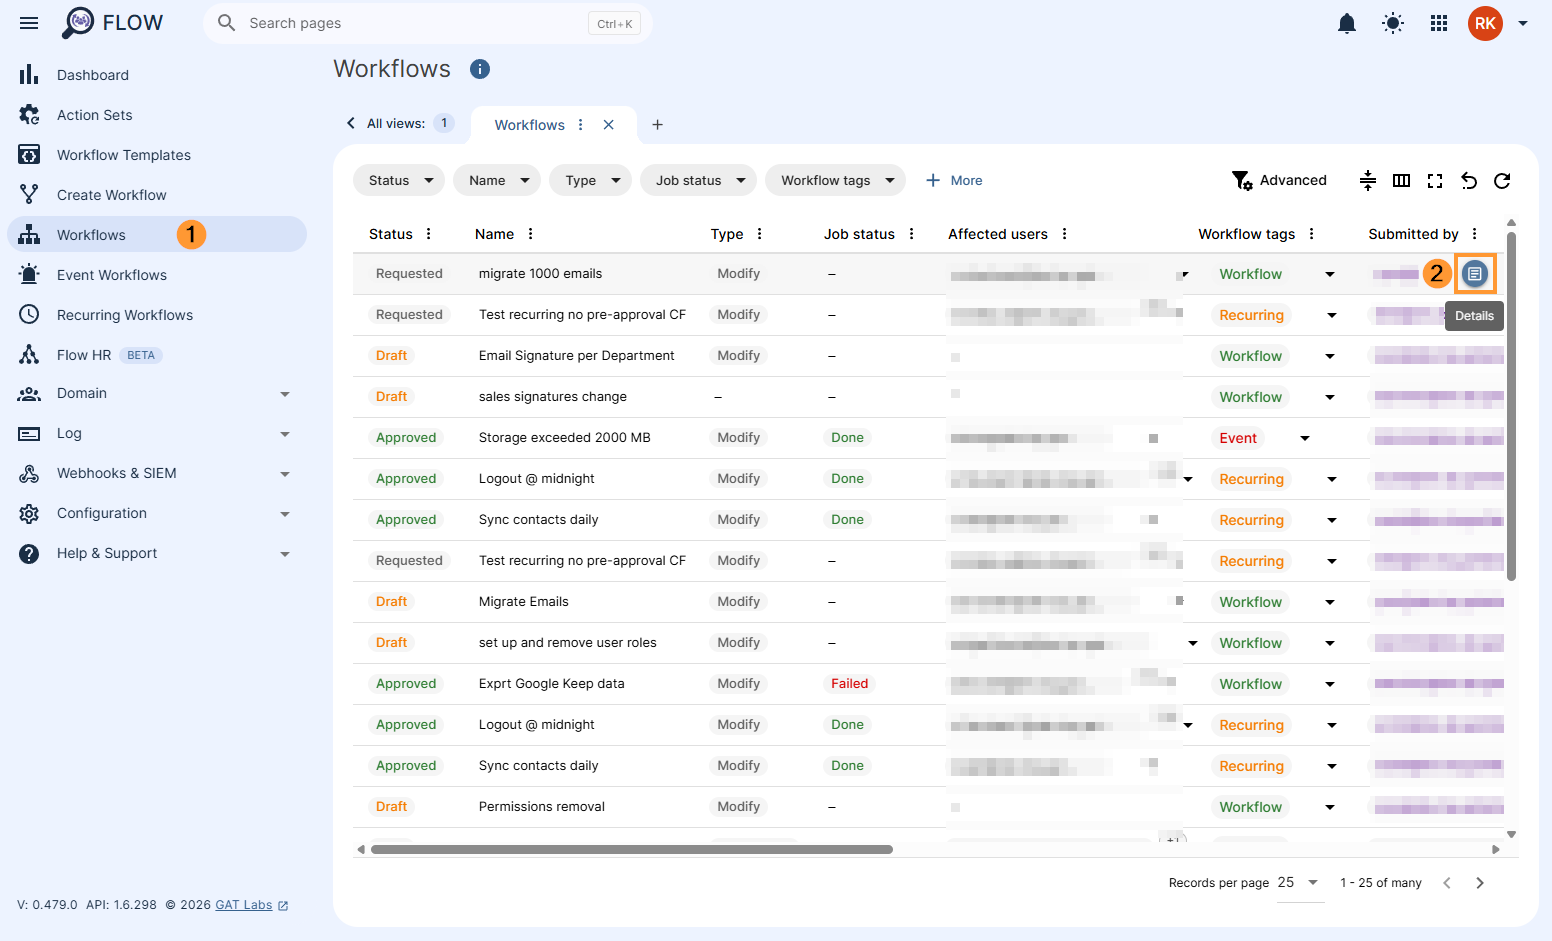
Approval #
The details can be seen on the Approval page, depending on the number of emails and users involved it might take some time.
Clicking on the eye icon will display info for the job done.
Result #
The result for the affected user will be displayed as below. All 1200 emails are migrated.

Video #
How-to video below


