

GAT Flow allows a Google Workspace Admin or/and Delegated Auditor to add users’ send as email signatures in bulk.
You can achieve this with a few simple steps outlined below.
Create Workflow #
First, create a workflow, and navigate to Flow > Create workflow.
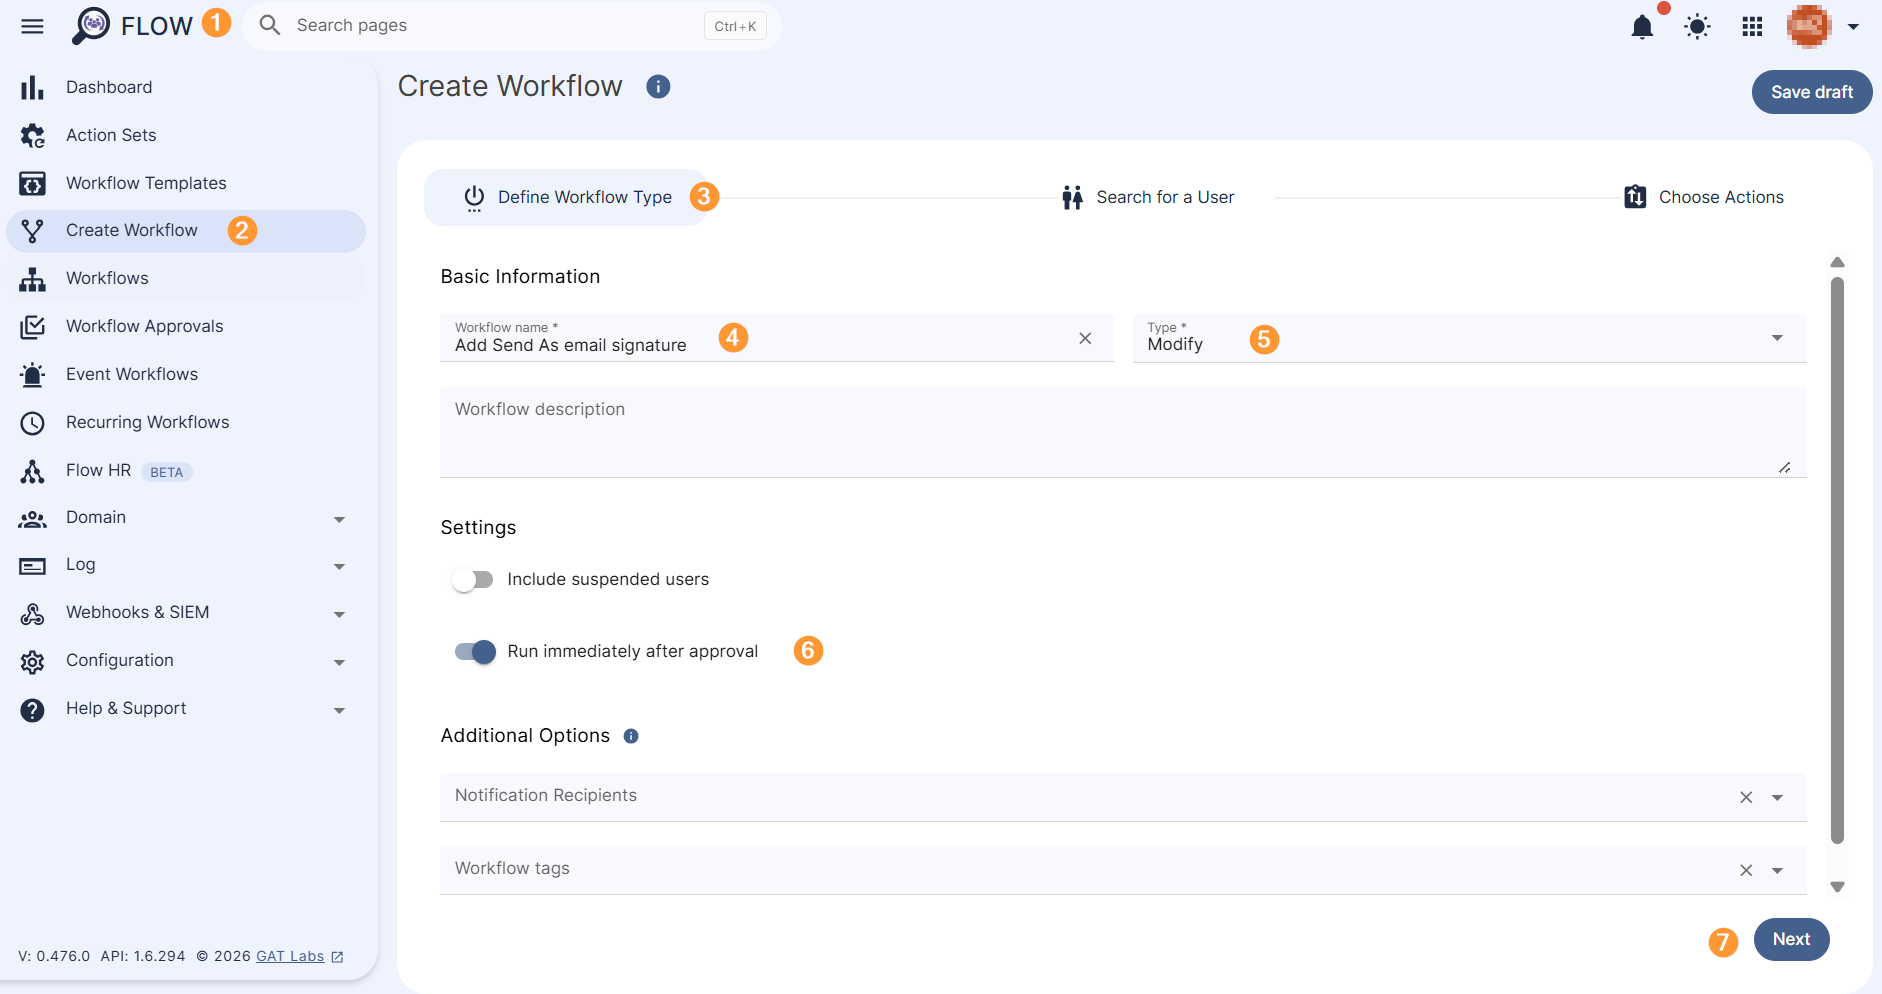
Define Workflow Type section will be displayed.
- Name – enter a name for the workflow
- Description – a description of the workflow can be added
- Type – select the workflow type
- Onboard – onboard and add new users to the domain
- Modify – modify and update existing users of the domain
- Run immediately after approval
- Next – click on the button to proceed
Search for a User #
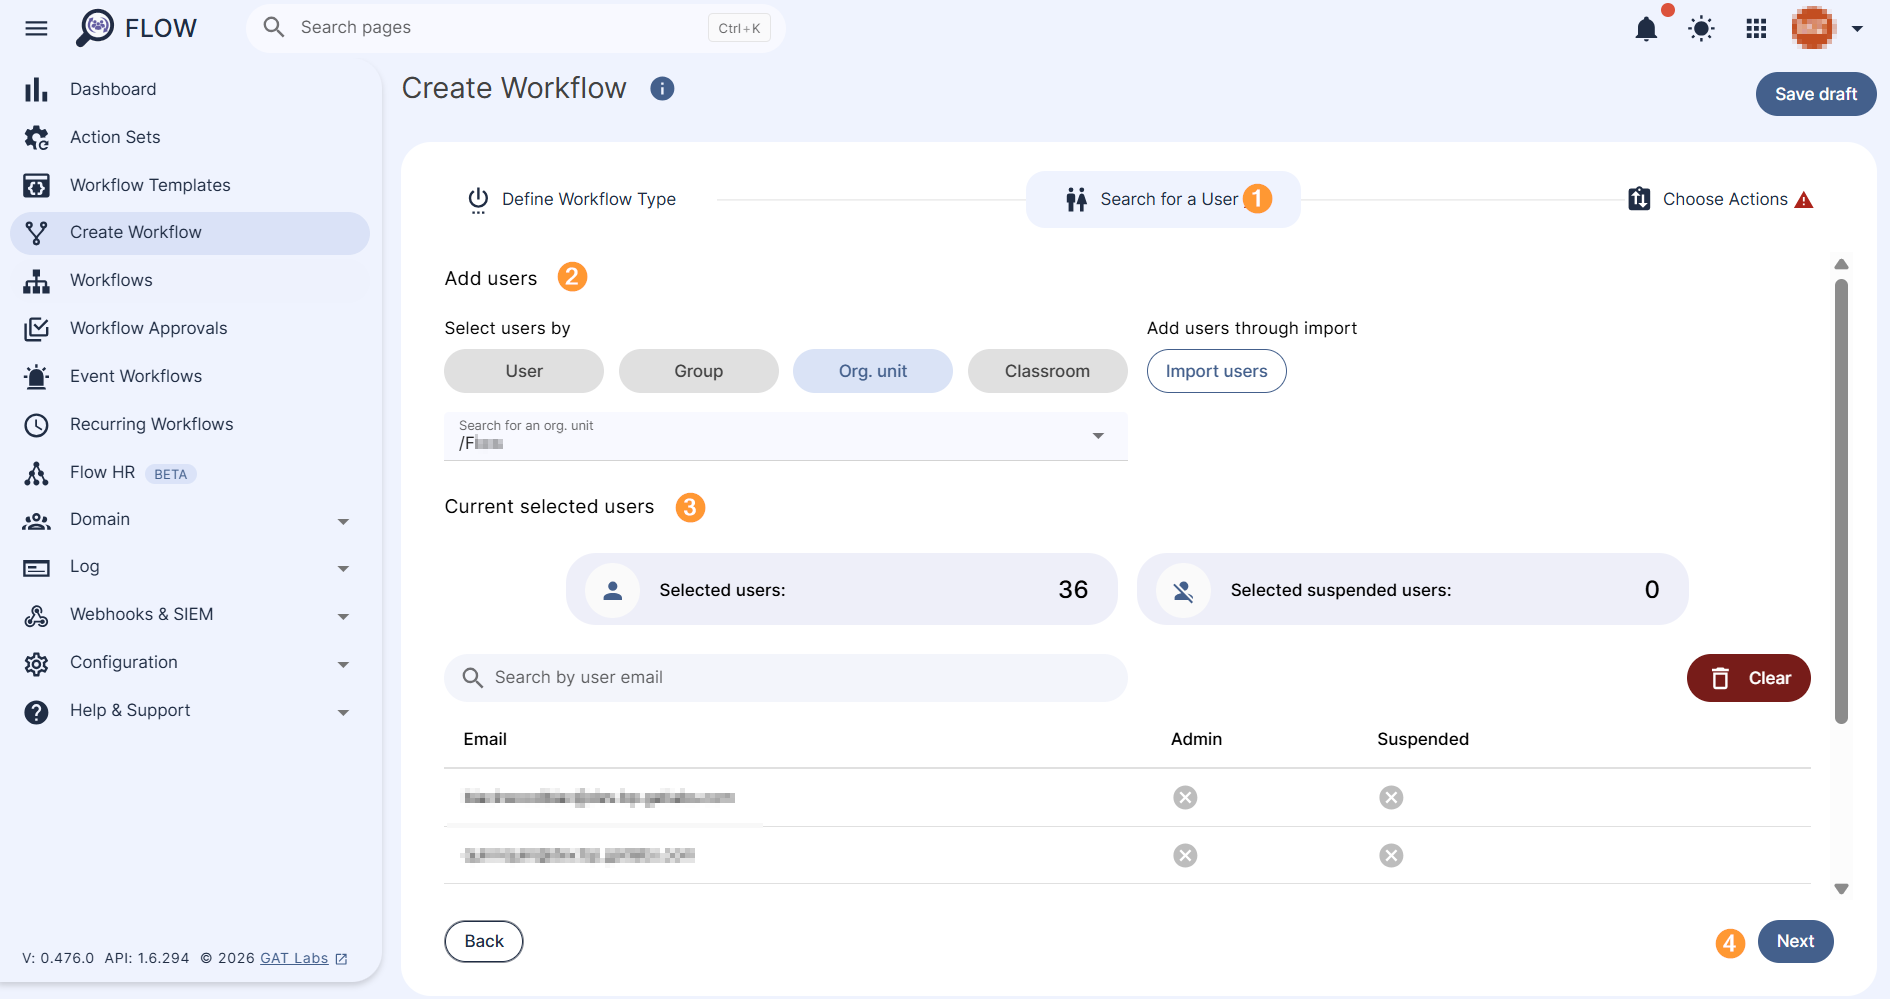
Search and add the users via Search for a user, group, org. unit, or classroom or import them, see available options below:
- Search for a User – select individual users
- Search for a Group – select a group of users
- Search for an Org. Unit – select Org. Unit of users
- Classroom
- Import users – import used via Google spreadsheet
Check the list of selected users under Current selected users section (3), and click Next (4) to move on to the next step.
Choose Actions #
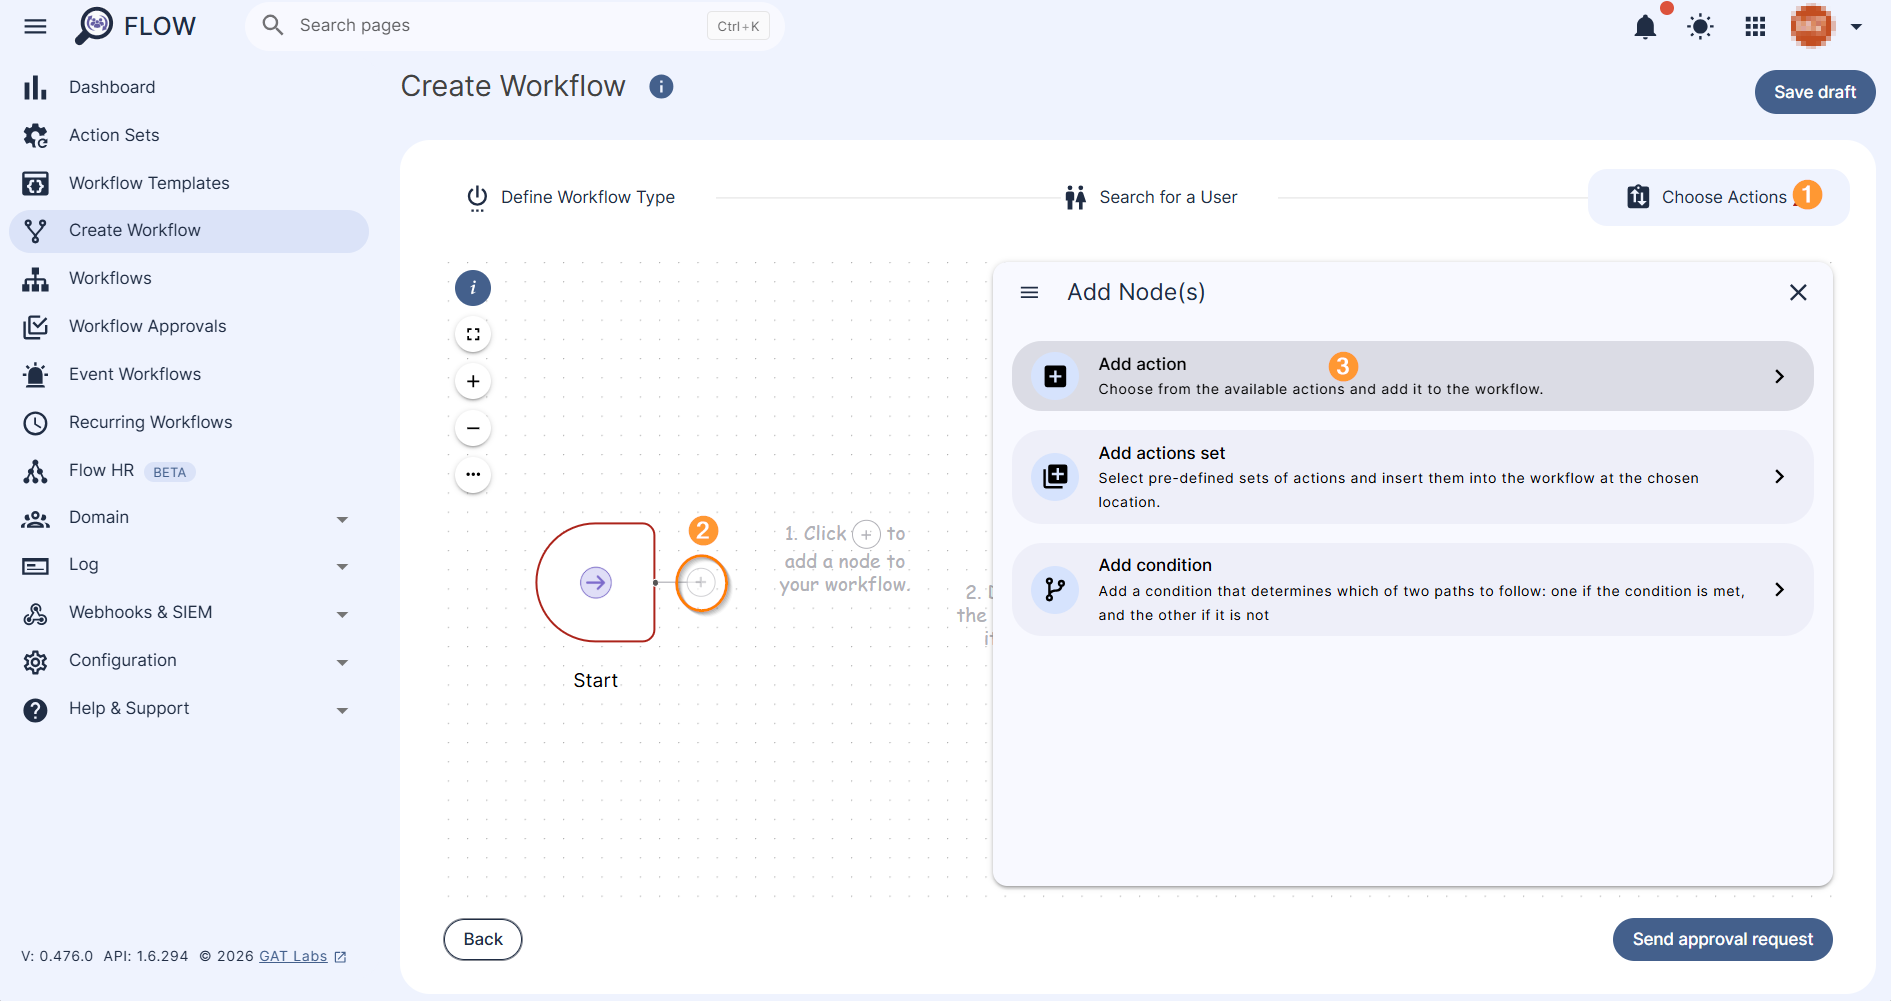
Under the Choose Actions section (1), click on the + button (2) and Add action (3). A pop-up menu with all the available actions will be displayed.
From all available actions, search for (1) and select Add user email Send as (2) under the Users tab.
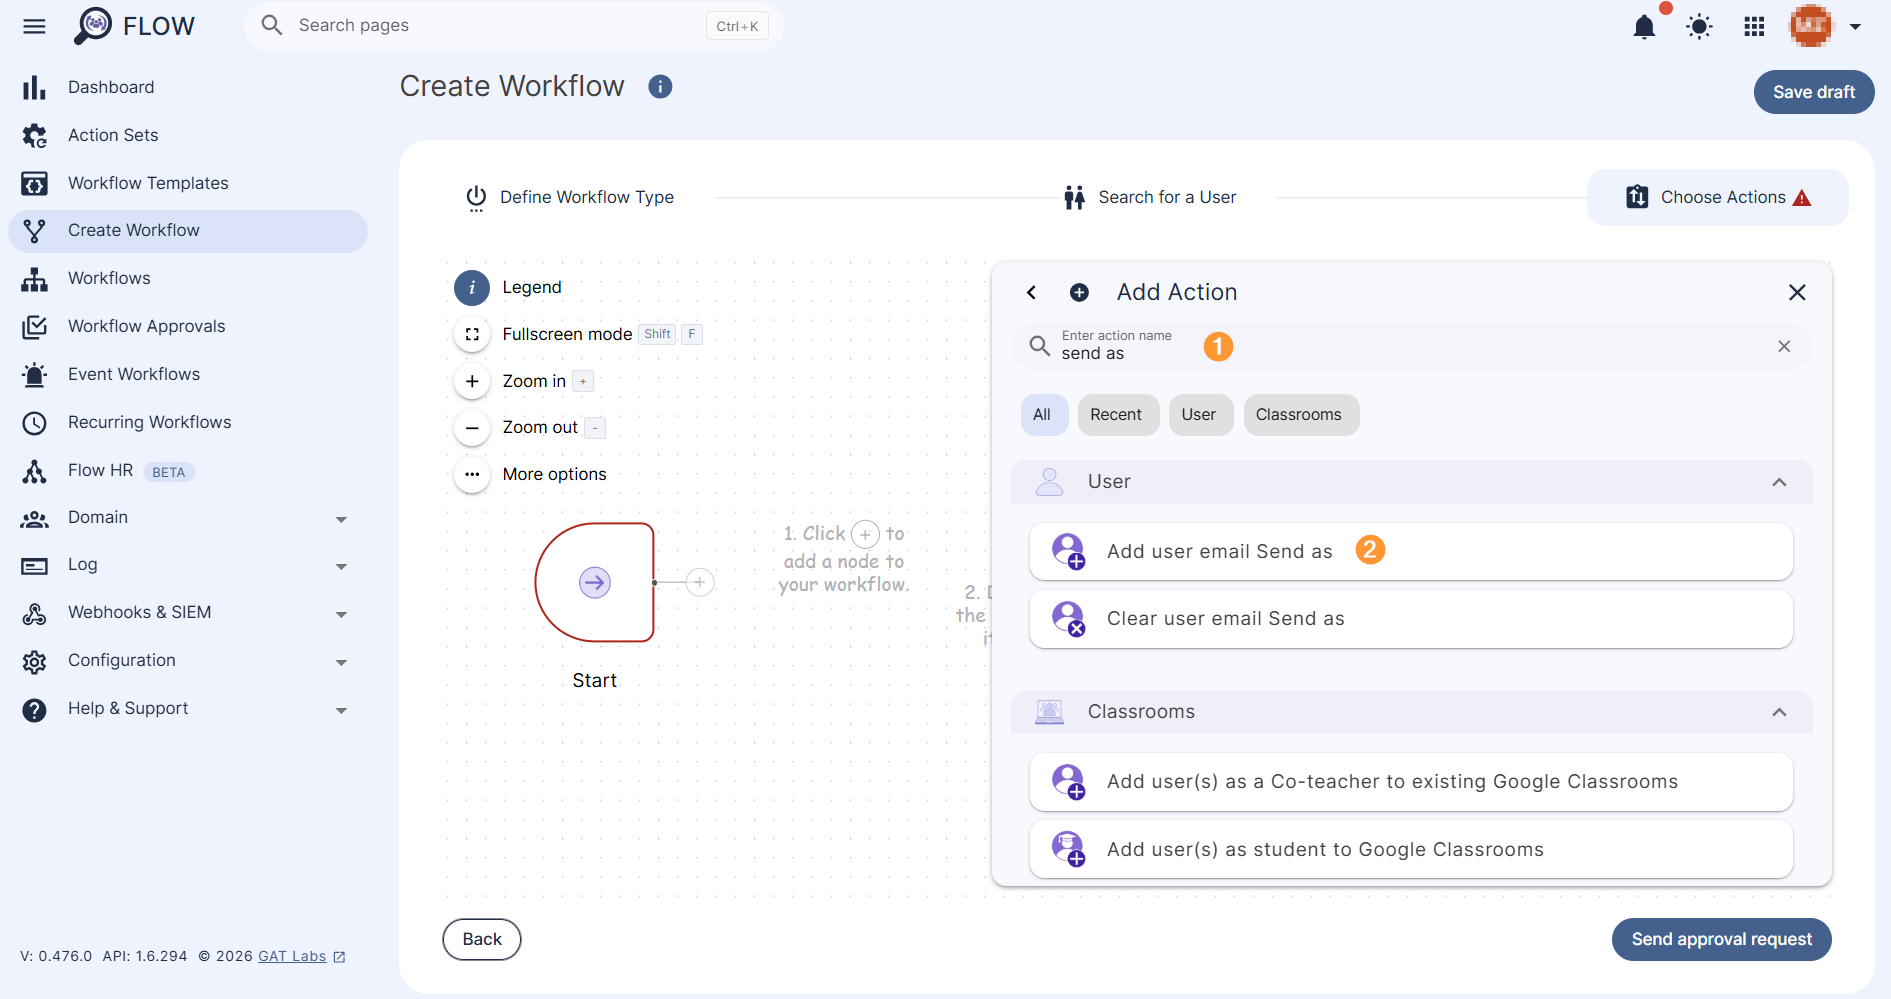
The Add user email Send as action will be added to the node section. Double-click on the action node to open the action’s configuration section.
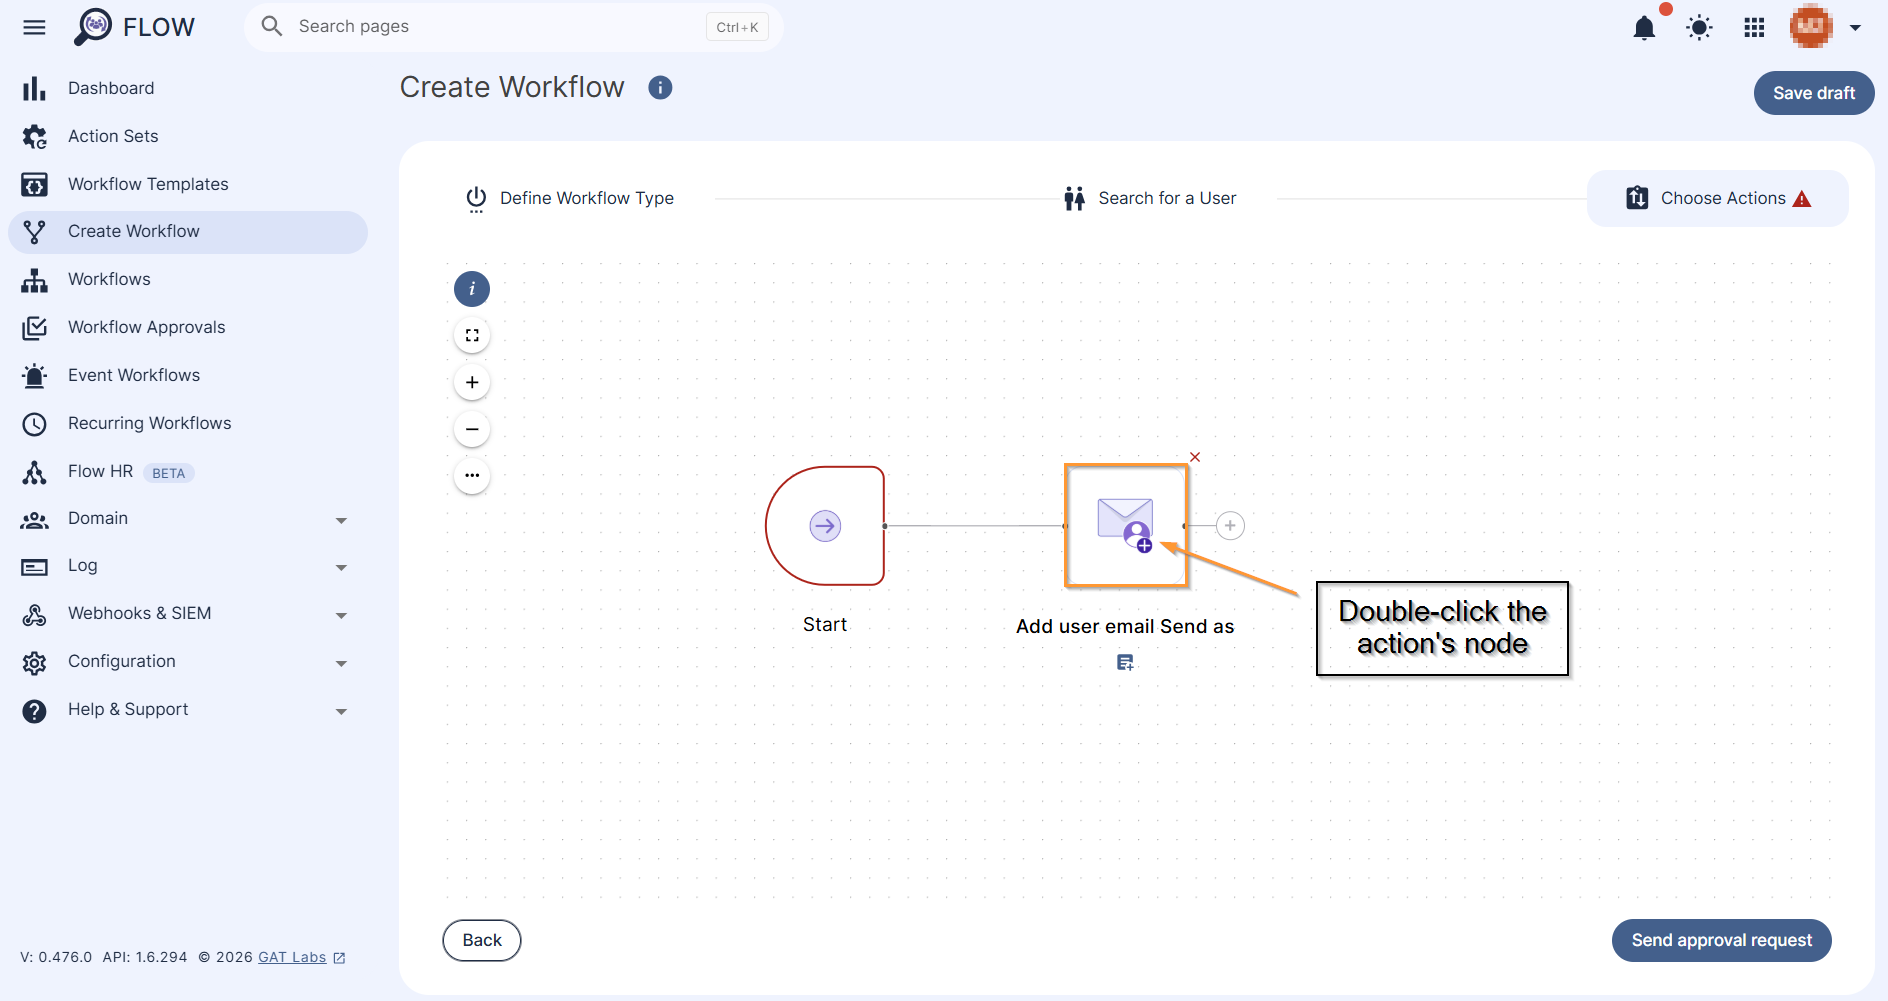
In the next step, configure the email address and the signature that will be assigned to it, see steps below.
Add user email Send as #
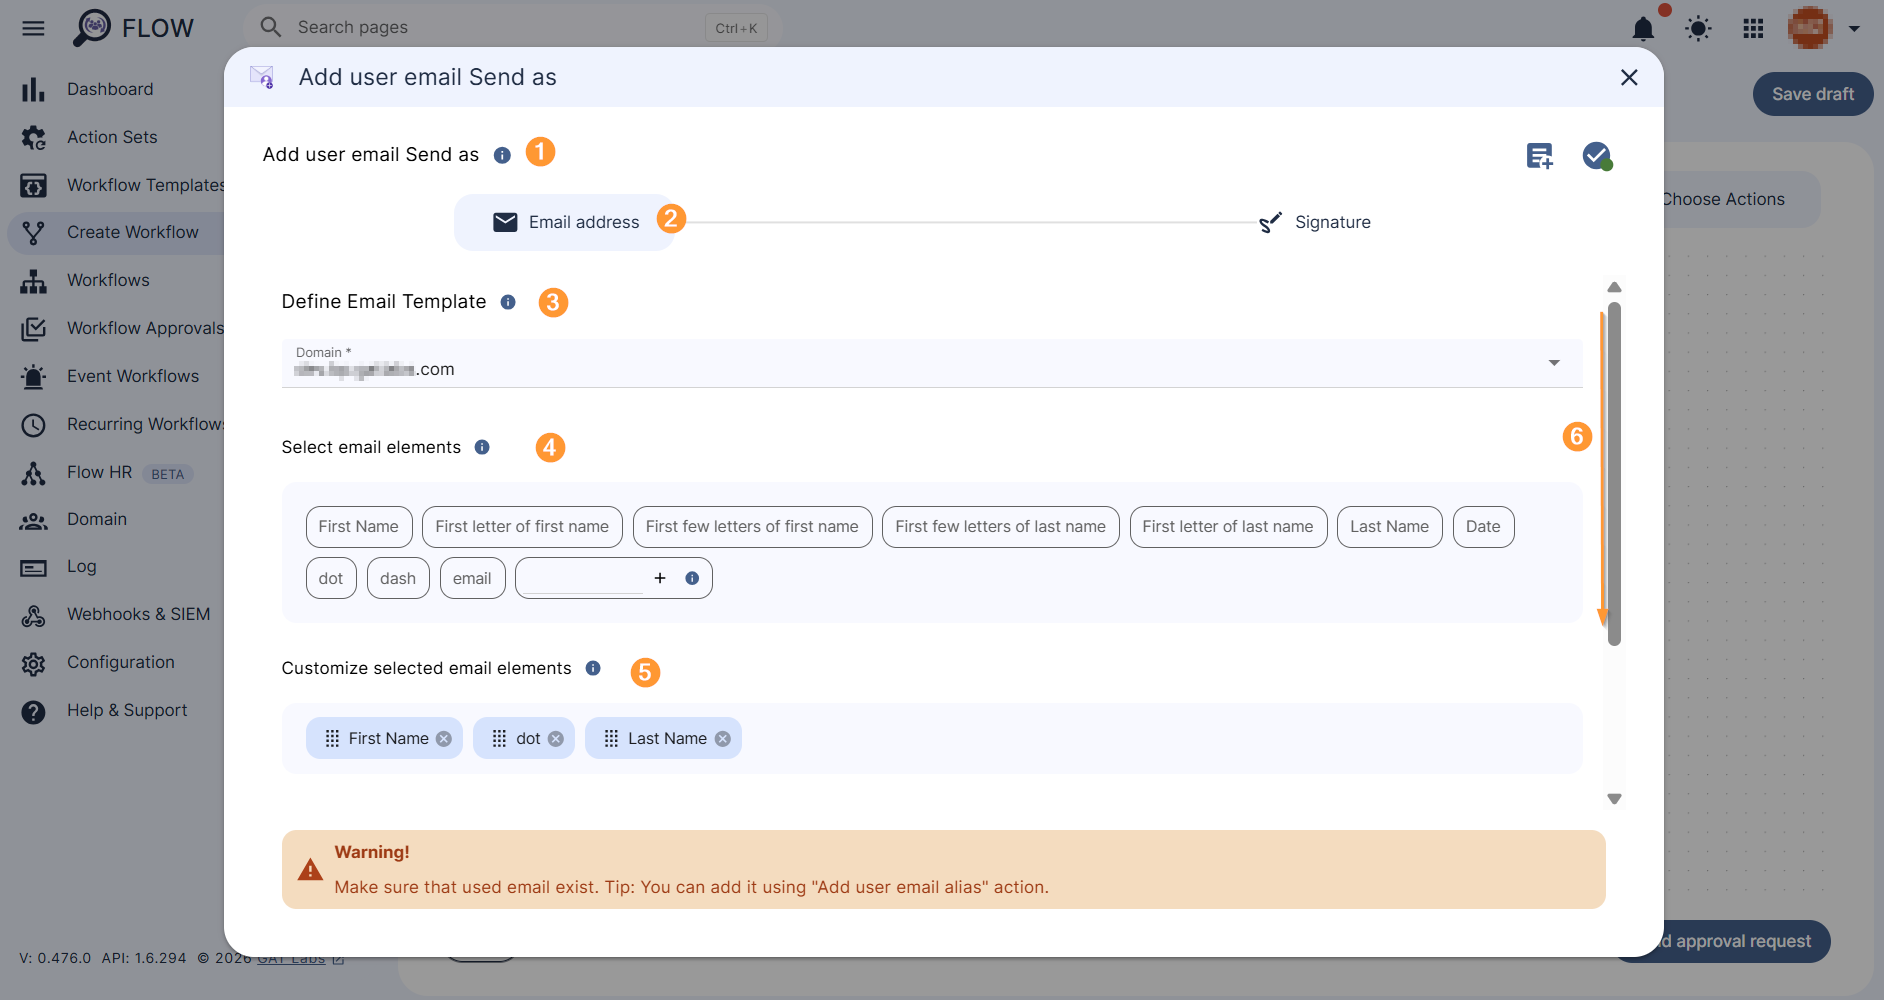
First add user email Send as (1-2), Define Emails Template (3), use available email elements to do so (4-5), if applicable, create a custom variable of your choice by typing into the variable field and clicking on ‘+’.
Scroll down the section (6) to see more information.
See Example preview (1) before moving on to the next stage.
Carefully review the Warning message (2).
Make sure that used email exist. Tip: You can add it using “Add user email alias” action.
NOTE: Please note that an alternative email address (alias) used for add send as an email signature must already exist. If not, the workflow will fail.
This post explains how to set up a user email alias address.

Add Send as signature #
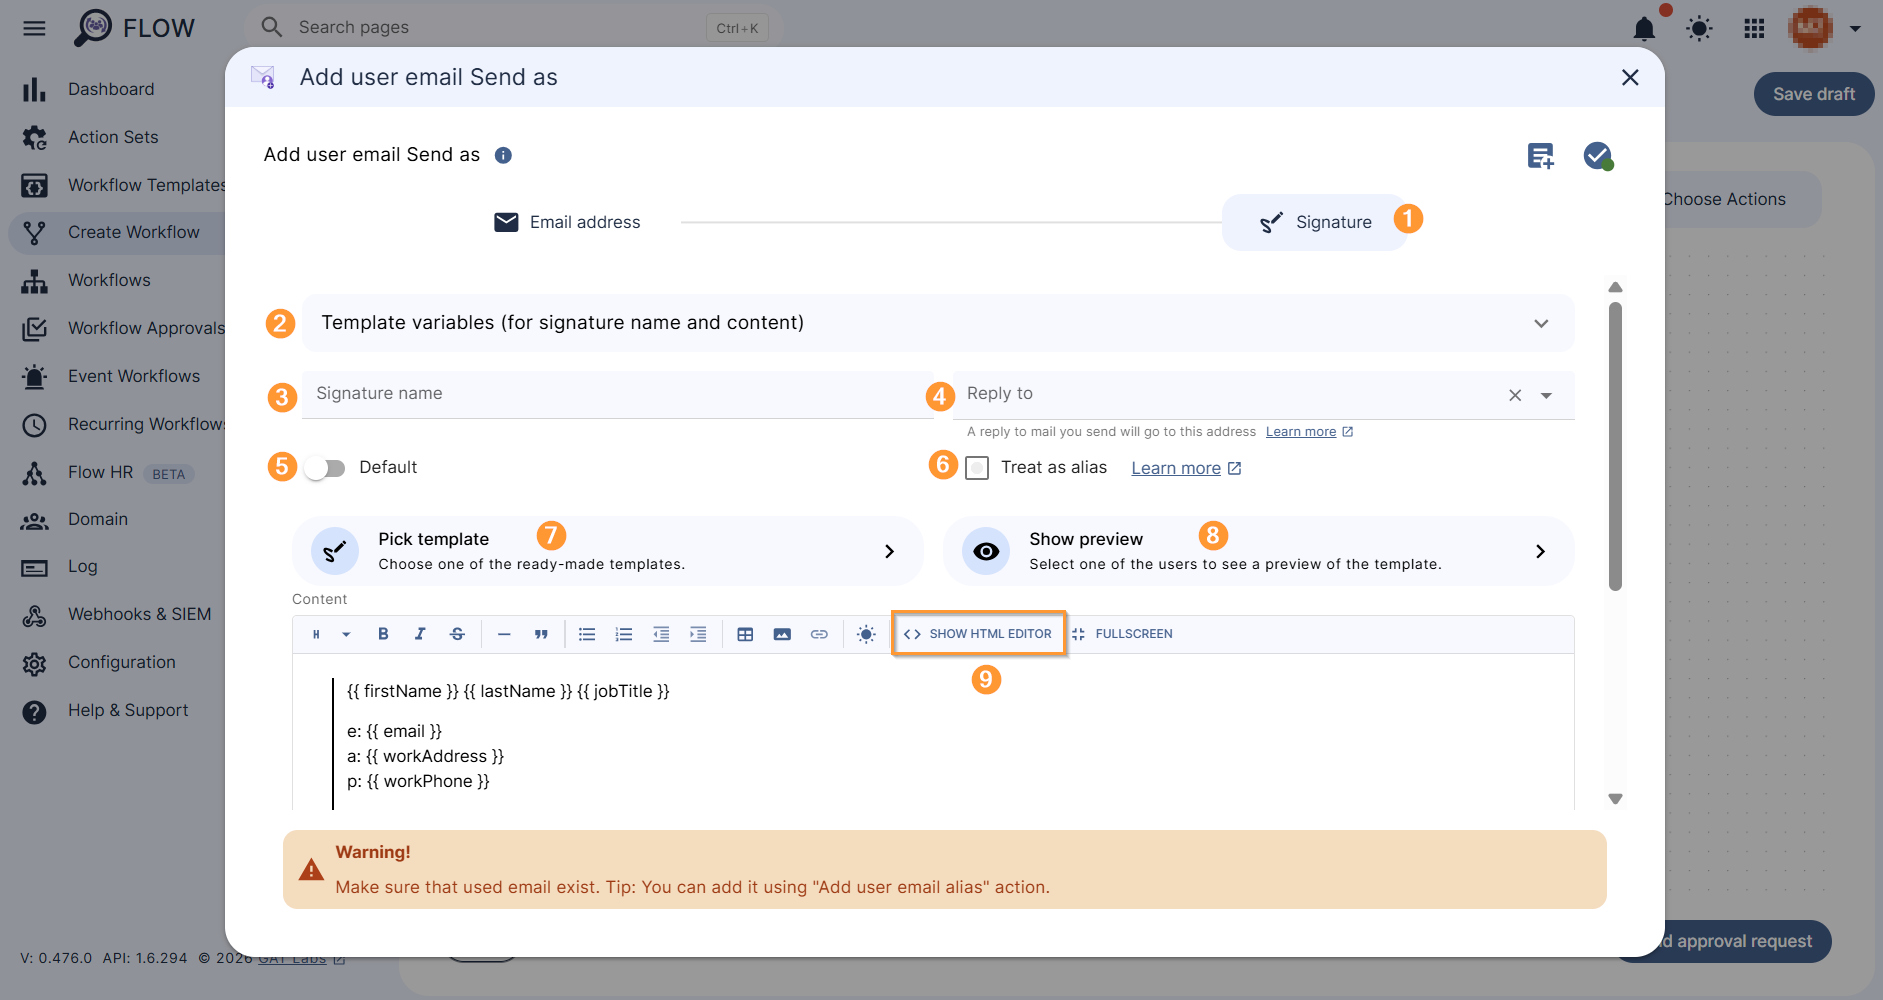
Move on to Signature section (1), , if applicable, use Template variables (for signature name and content) (2).
Name the signature (3) and set Reply to option (4) if needed.
Set default (5) and Treat as alias (6) – optional.
Create the signature by using a Pick template (7), or create one by using HTML editor – Show to HTML editor (9).
Show preview (8) allows to visualize the signature for a particular user in the domain.
When ready, click outside the signature creating window to exit it.
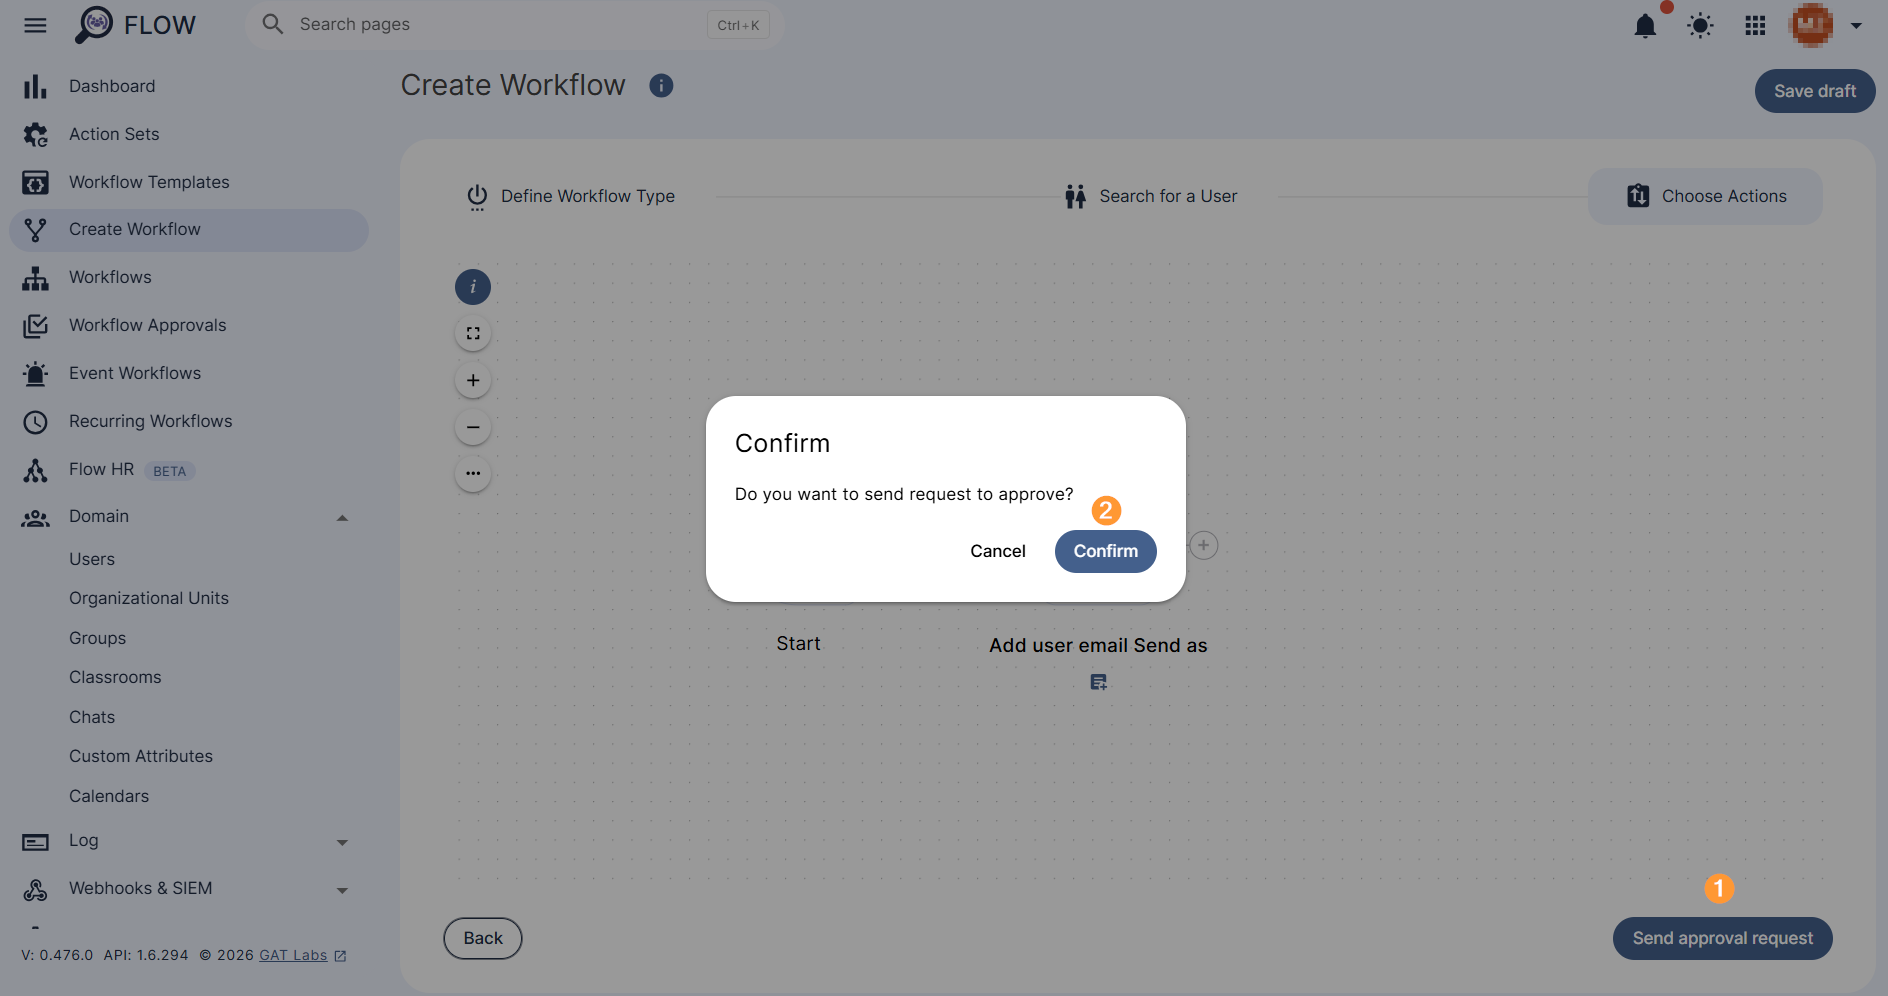
Next, Send approval request (1) for review to Security Officer. Confirm to proceed (2).
Security Officer Review #
After sending the request for review, the Security Officer has to approve the request. They will receive an email that will lead them to the approval page.

Note: If the pre-approval option is enabled, an email is not being sent to Security Officer. The workflow creator can confirm the preapproval option to run the workflow right away.
Result #
Once approved, the workflow will run.
The status of the request can be viewed in details under Workflow (1 -2). The Details (3) icon on the right side of the workflow record allows to view it in detail.
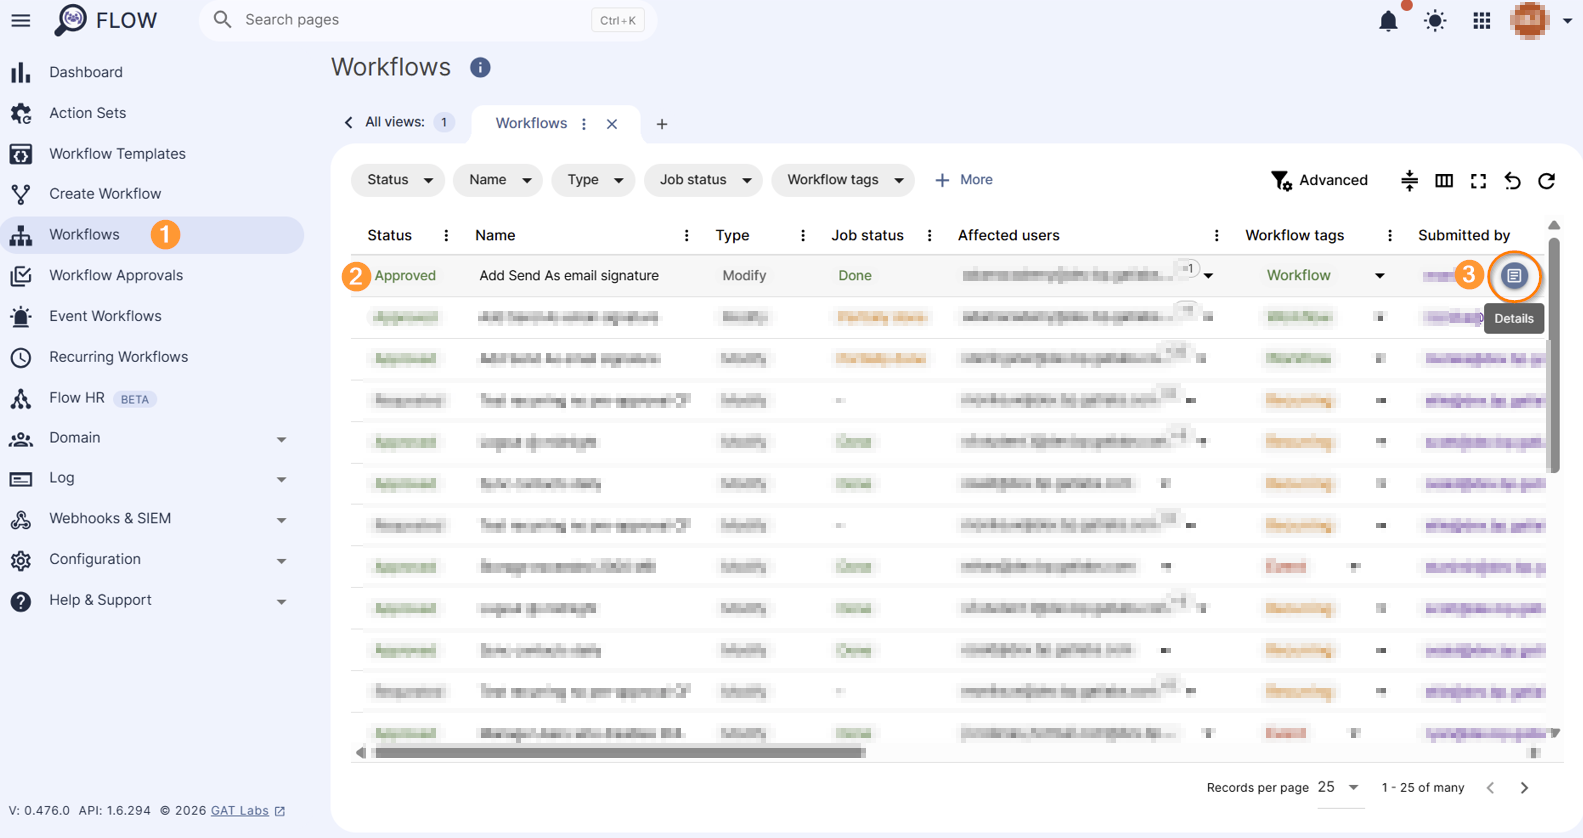
Once the workflow job status is displayed as Done, new Send as Email signatures will be created for users.
A newly set up Send as email signature will populate by default in the email creation window in Gmail. If not set up by default, an alternative email suggestion appears once clicking on the dropdown arrow:
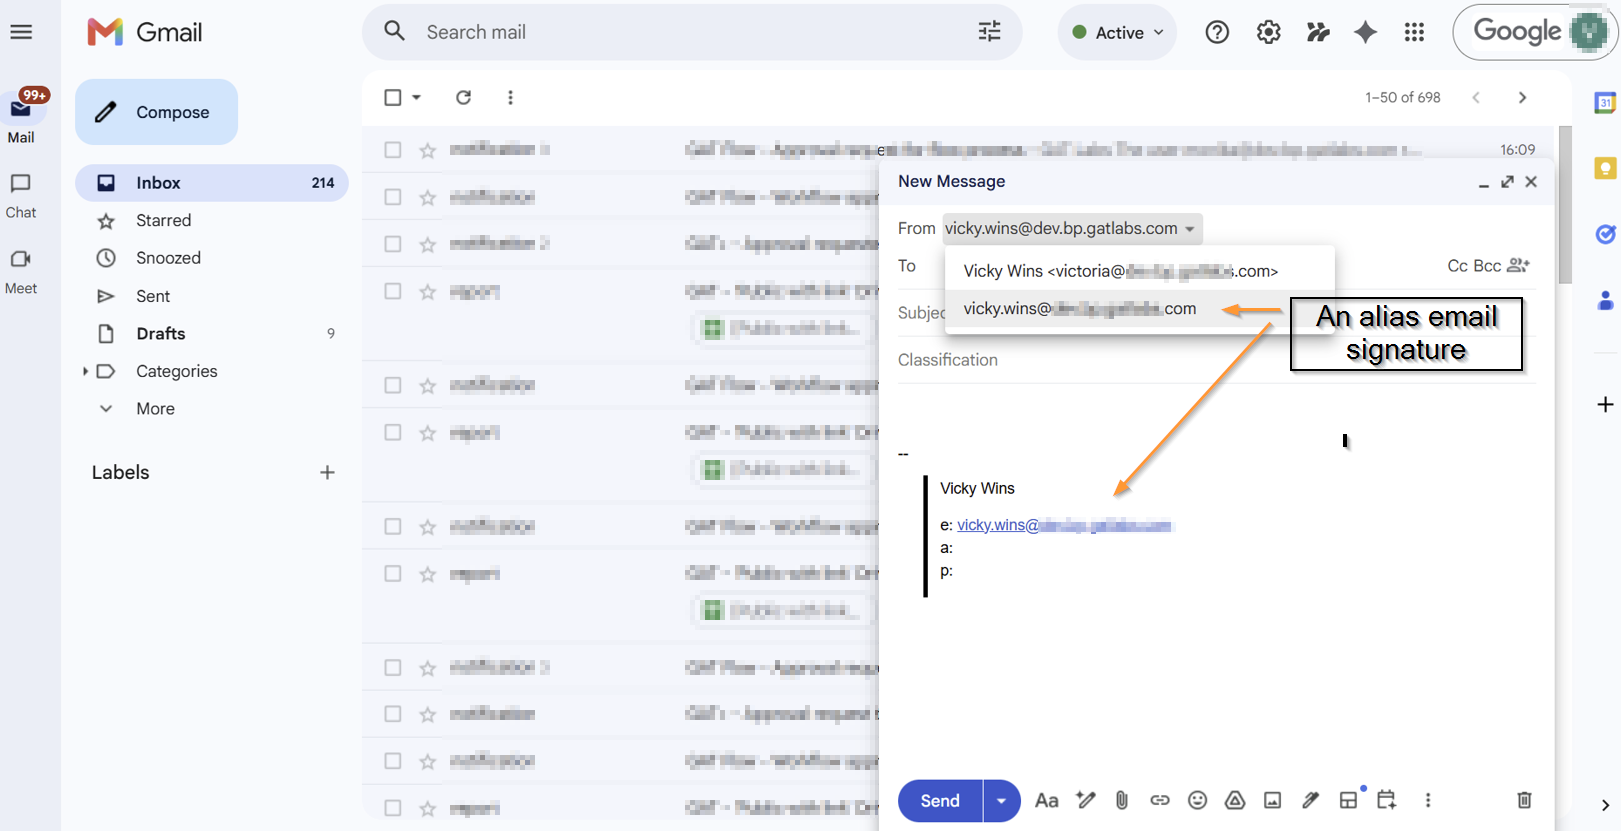
The relevant email address can see selected and will appear in the new message wizard along with the designated email signature.


