

The GAT Flow API allows administrators to programmatically access and manage GAT Flow operations.
By generating custom API tokens with specific permission levels, administrators can integrate GAT Flow with external tools and automate administrative workflows.
This guide explains how to generate a GAT Flow API token, configure its permissions, authorize access, and execute API endpoints using the interactive Swagger documentation.
Step 1: Generate a GAT Flow API Token #
First, navigate to GAT Flow > Configuration (1) > API Access (2) > + Create API Access (3)
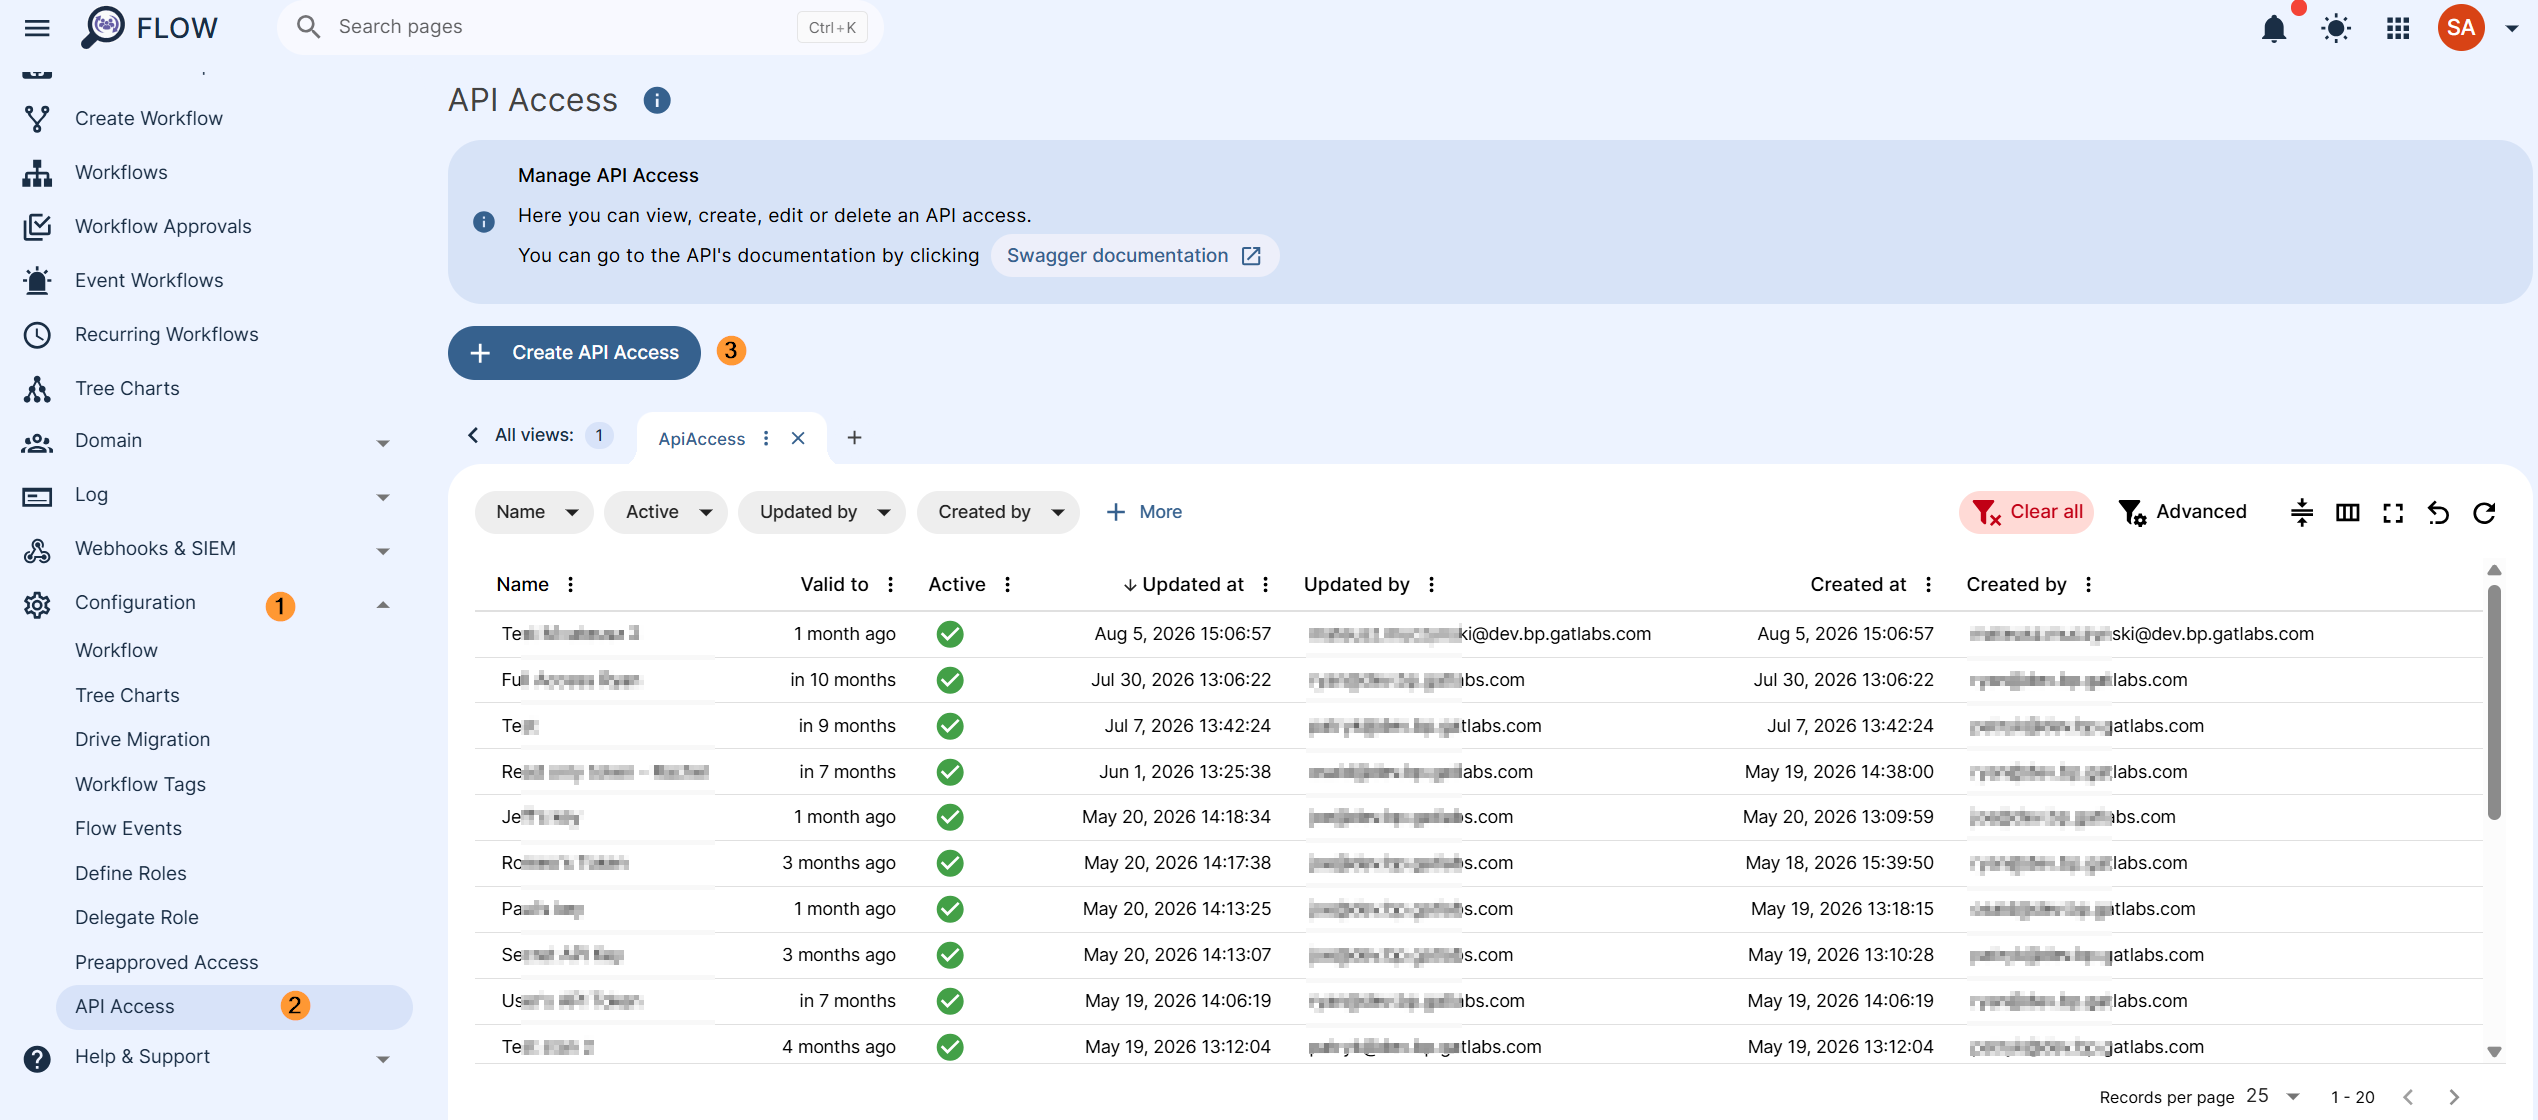
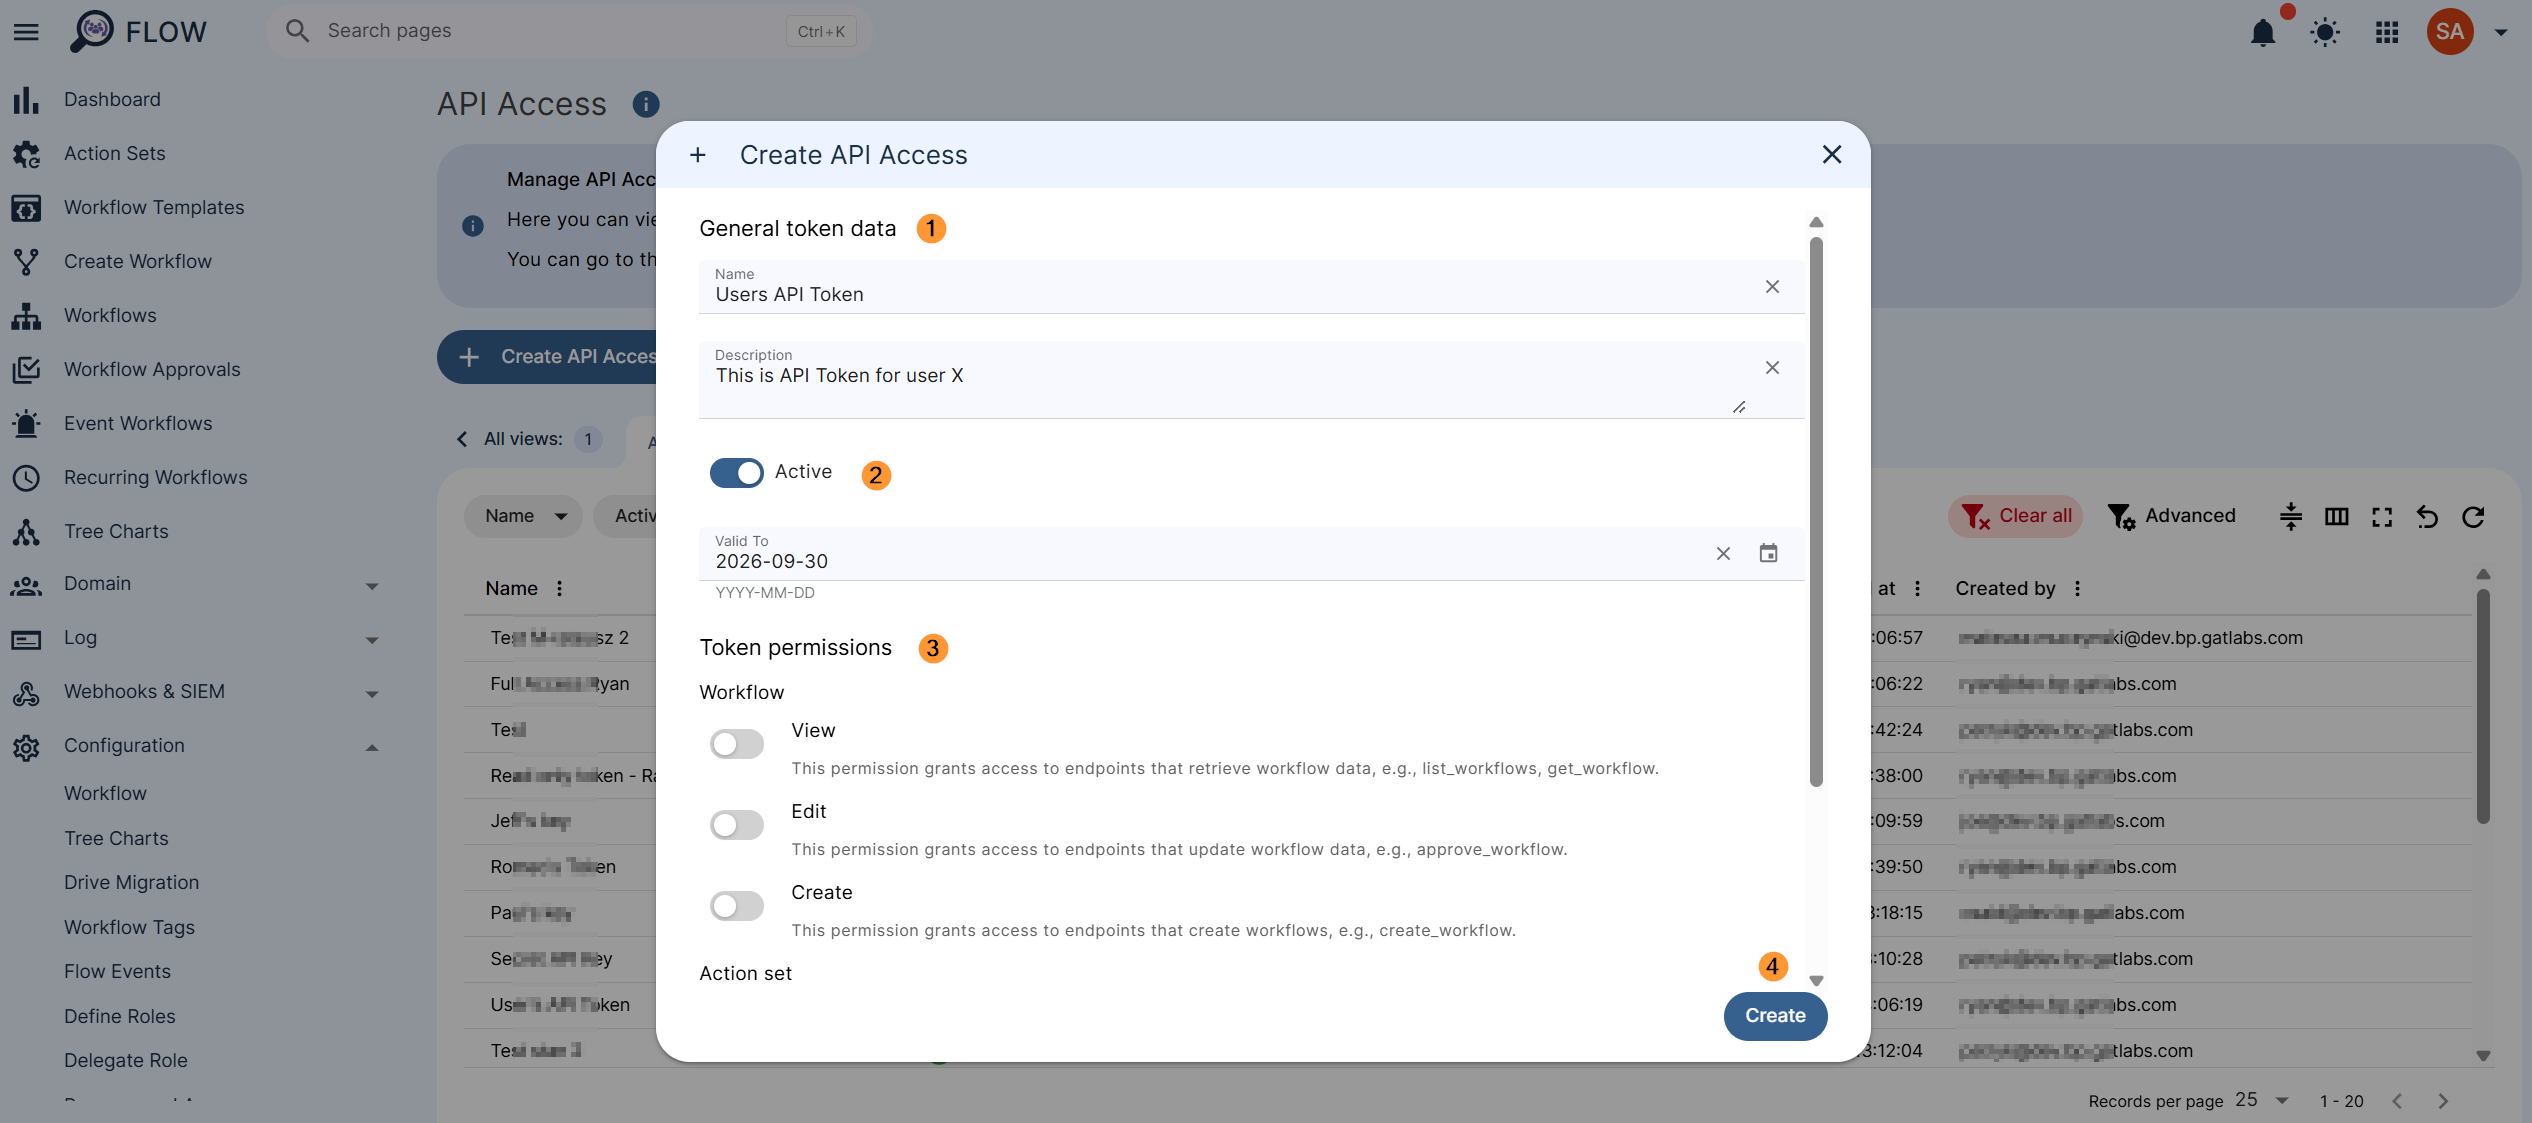
After clicking ‘Create API Access’, you will then need to populate the general token data.
- Name – Enter a unique name for the API Token.
- Description – Enter a brief description of what this token will be used for.
- Active – Enable this to make the token usable. If disabled, the token will return an unauthorized error.
- Valid To – Set the expiration date. NOTE: The maximum validity period is one year.
- Token Permissions – Specify the access level for this token
- View – This allows the user to access endpoints to retrieve data.
- Edit – This allows the user to access endpoints to update & modify data.
- Create – This allows the user to access endpoints to create data.
- Action set – View
- This permission grants access to endpoints that retrieve action set data, e.g., list_action_sets, get_action_set.
- User edit – Edit
- This permission grants access to endpoints that modify a user, e.g., force_sign_out, suspend_user.
Once this information has been filled out, click the ‘Create’ button to generate your API token.
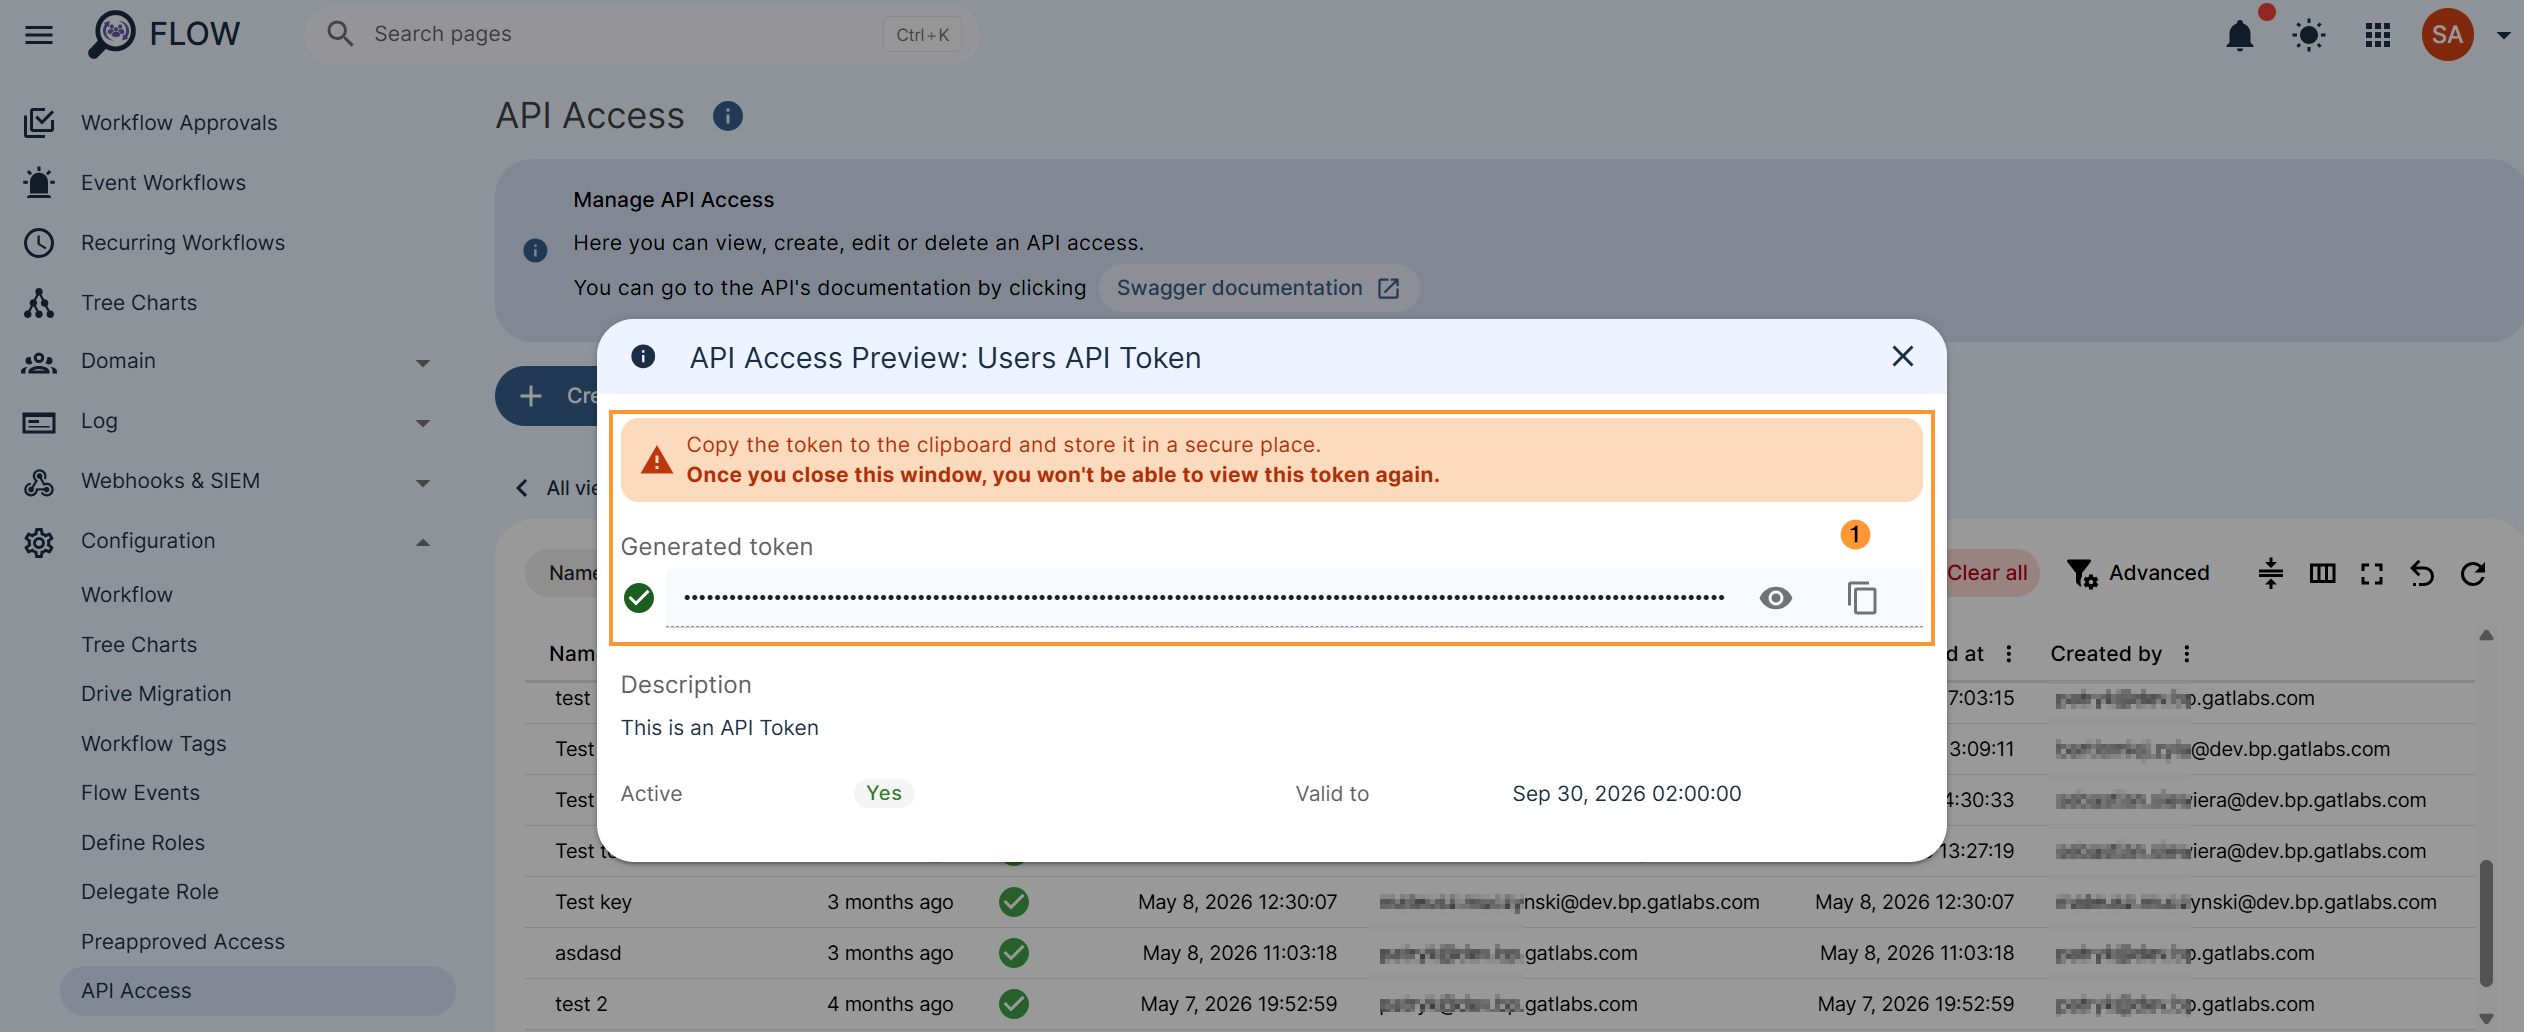
You can now copy the API token to begin utilizing the API calls.
NOTE: Once you close this window, you won’t be able to view your token again. Make sure to copy your token (1) and store it in a secure place.
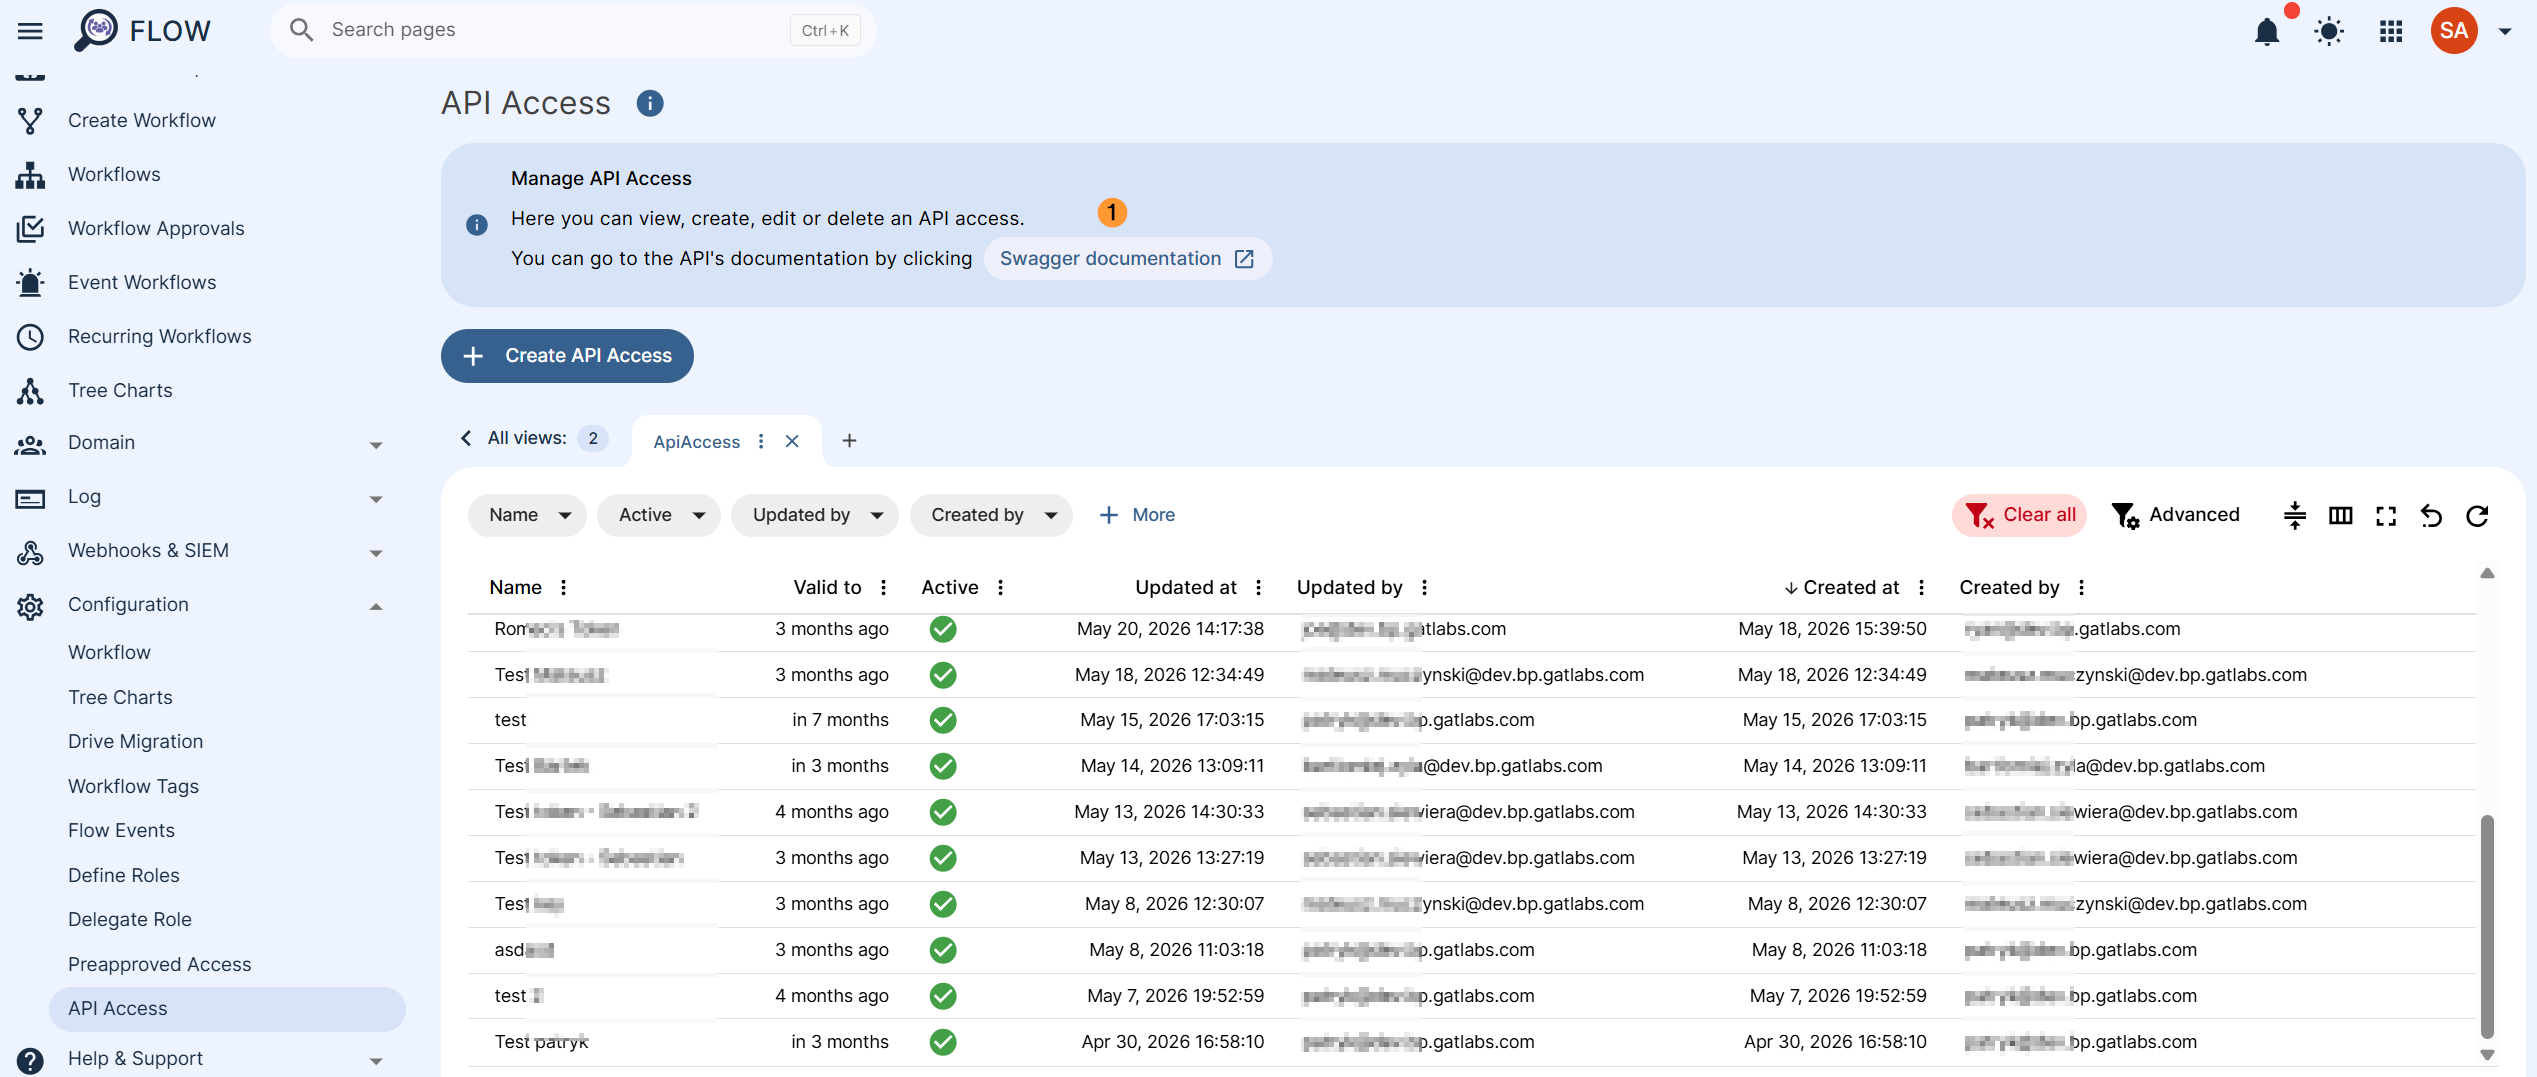
Step 2: Access the GAT Flow API with Swagger #
Click the ‘Swagger documentation’ (1) button.
NOTE: You must be logged into GAT to access the link above.
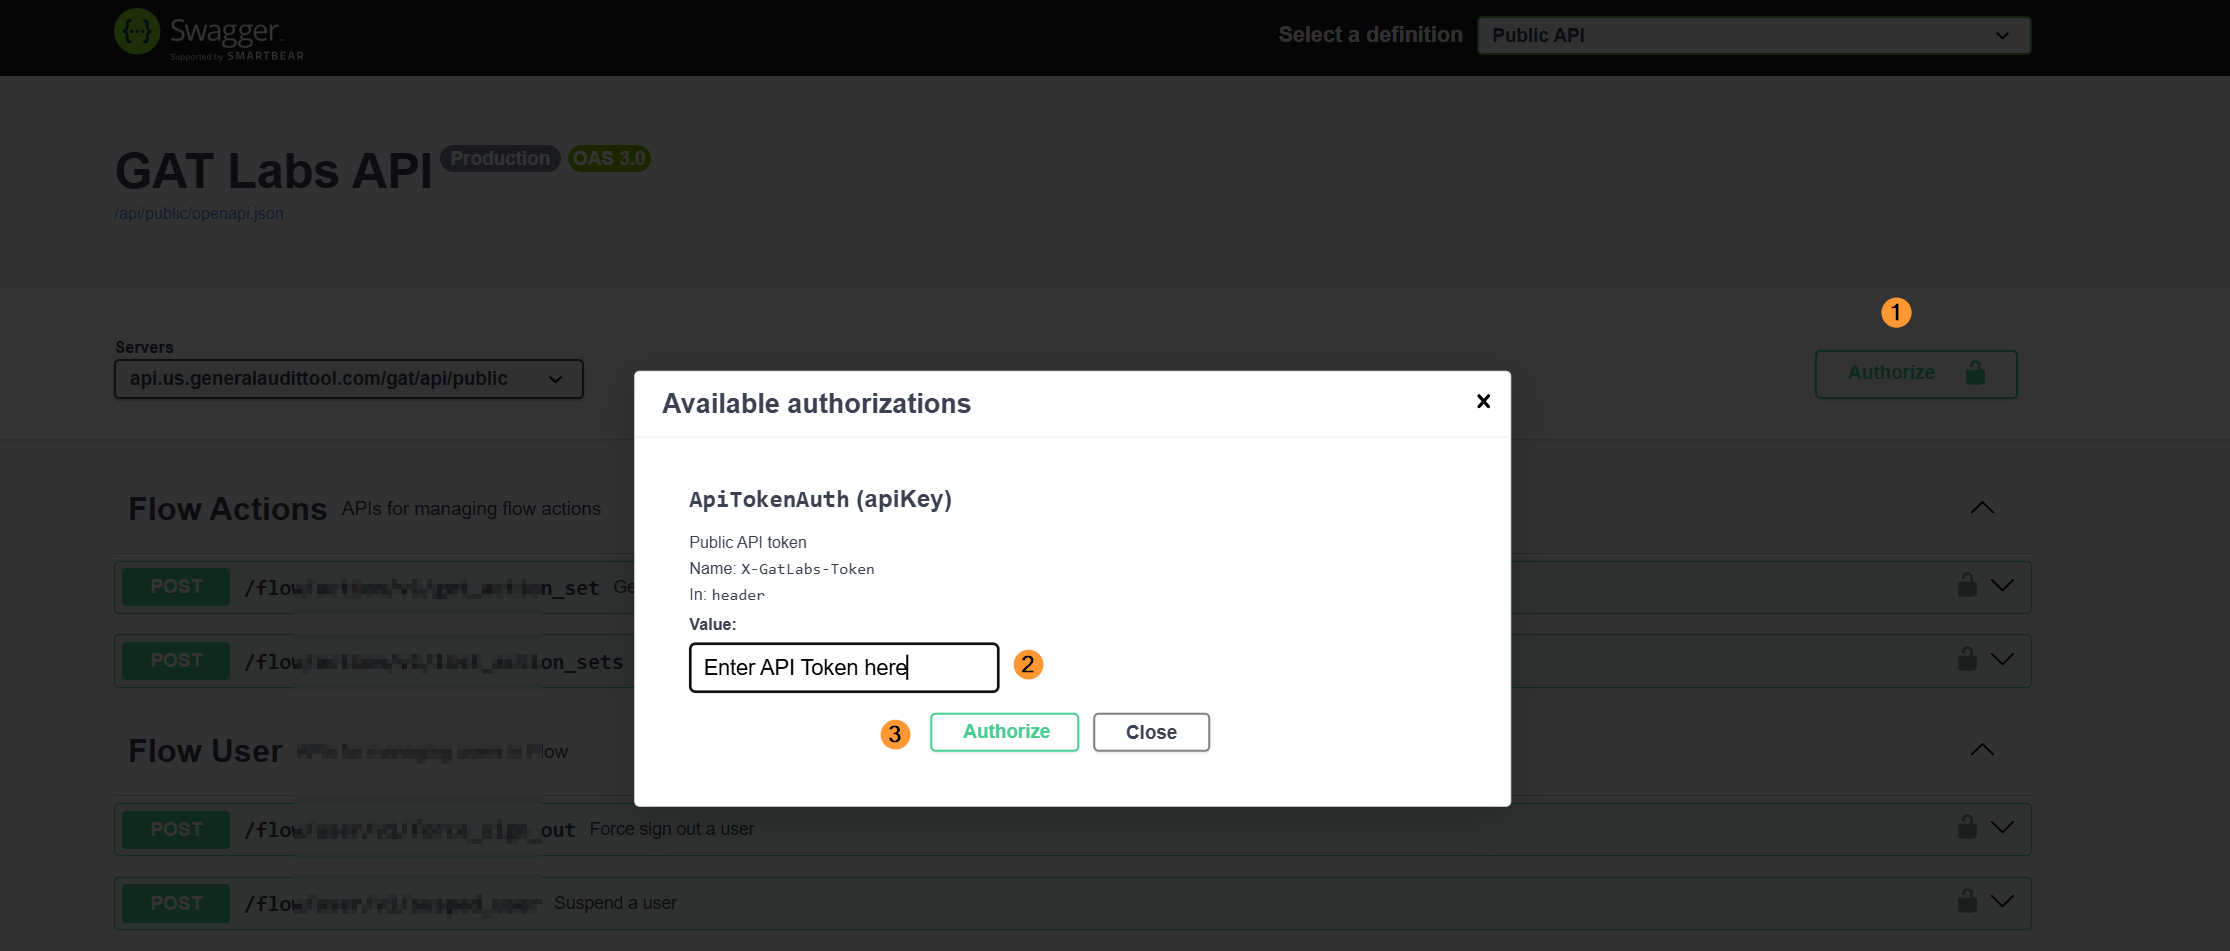
Once you’re in the Swagger documentation, you can now click the ‘Authorize’ button (1) in the top right corner, paste in your API token (2) and click the ‘Authorize’ button (3) to get started.
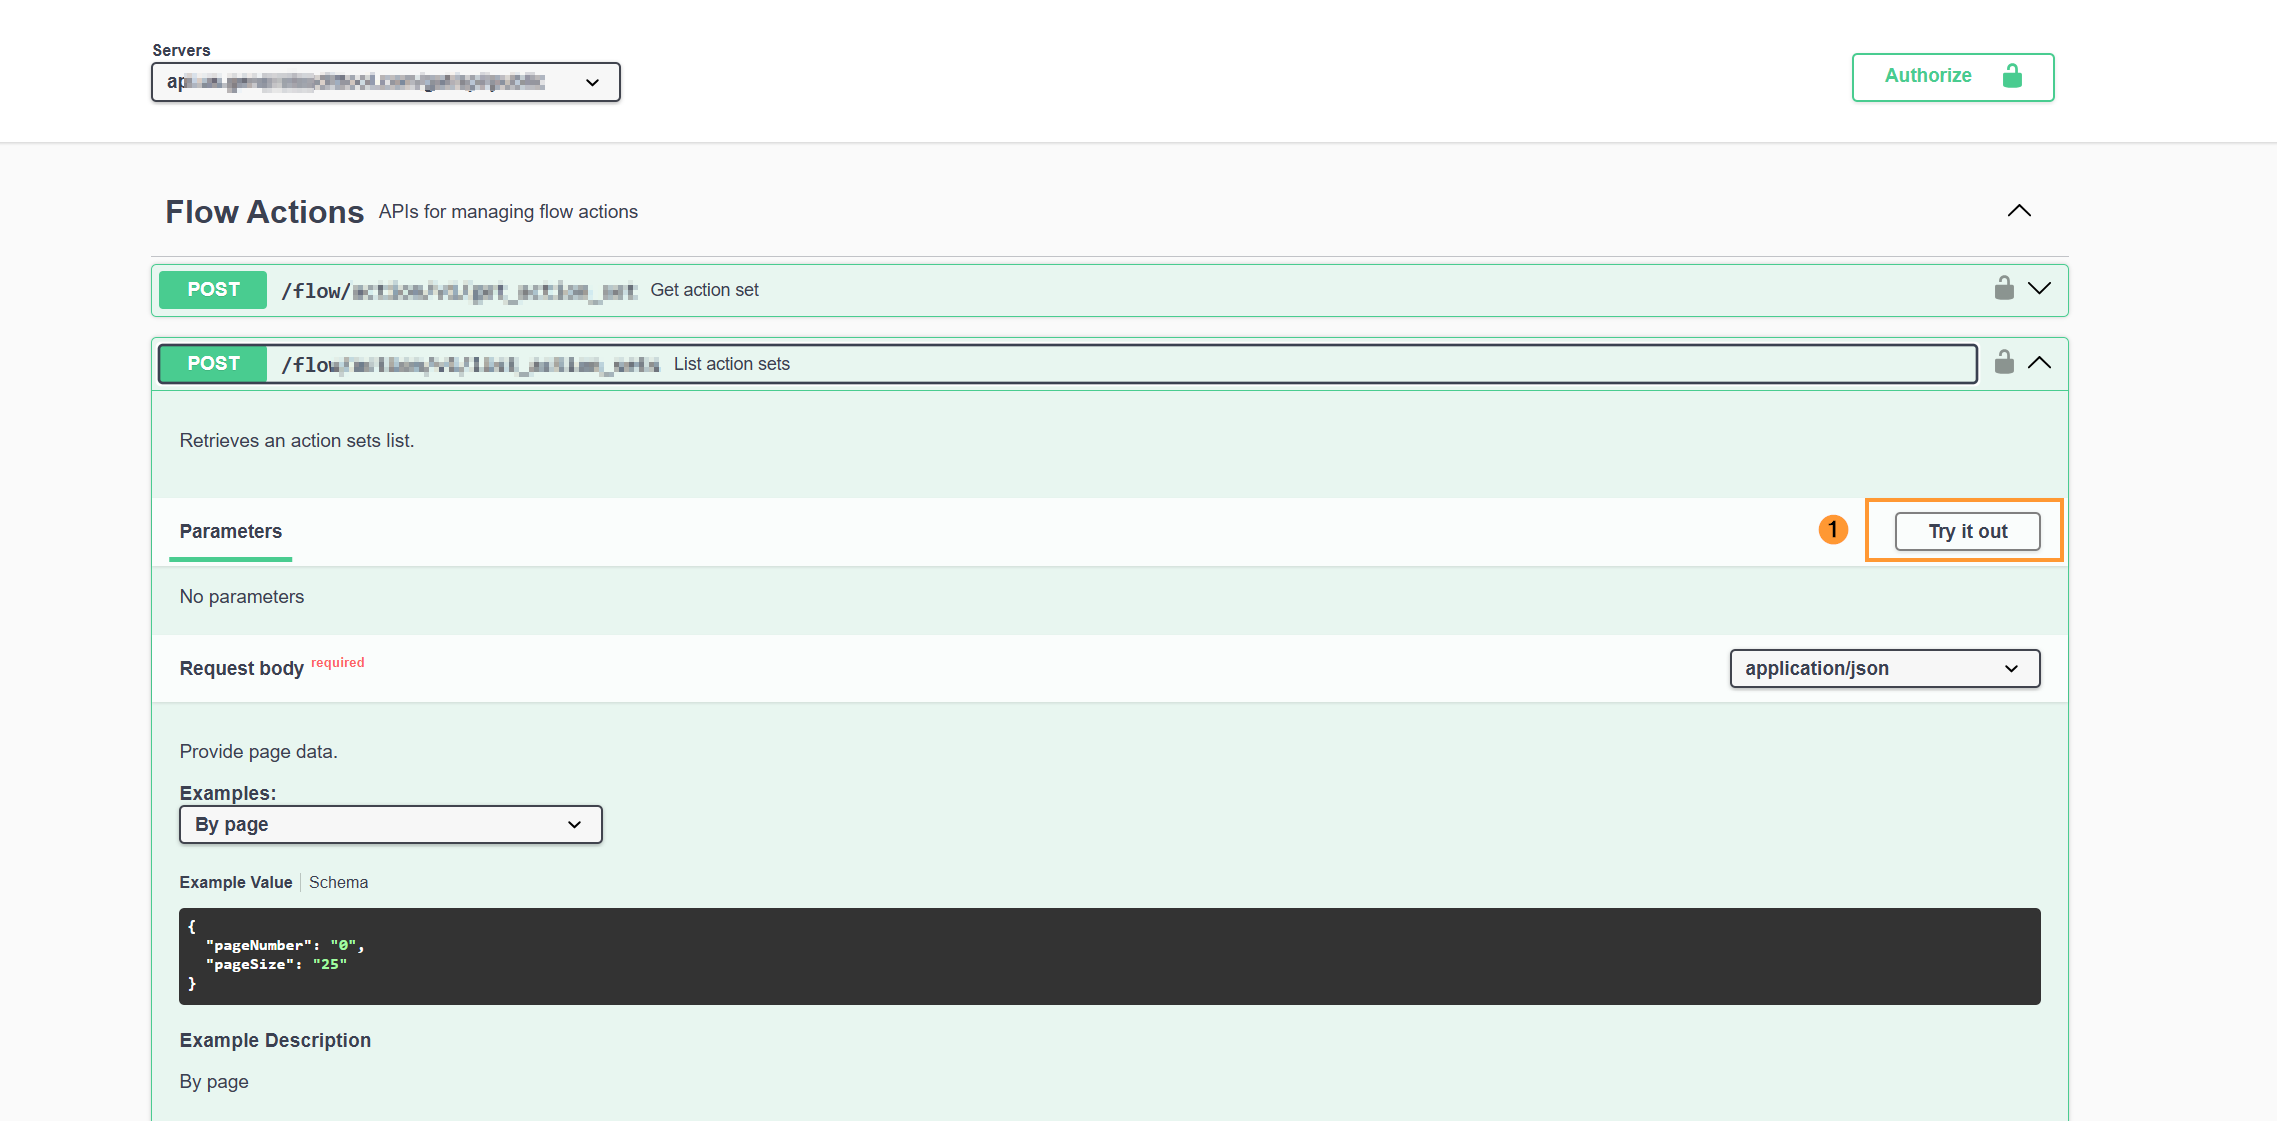
You can now select any of the API endpoints to which you have access, click the ‘Try it out’ button, update the request body if necessary, and click the ‘Execute’ button.
Step 3: Run a GAT Flow API Request #
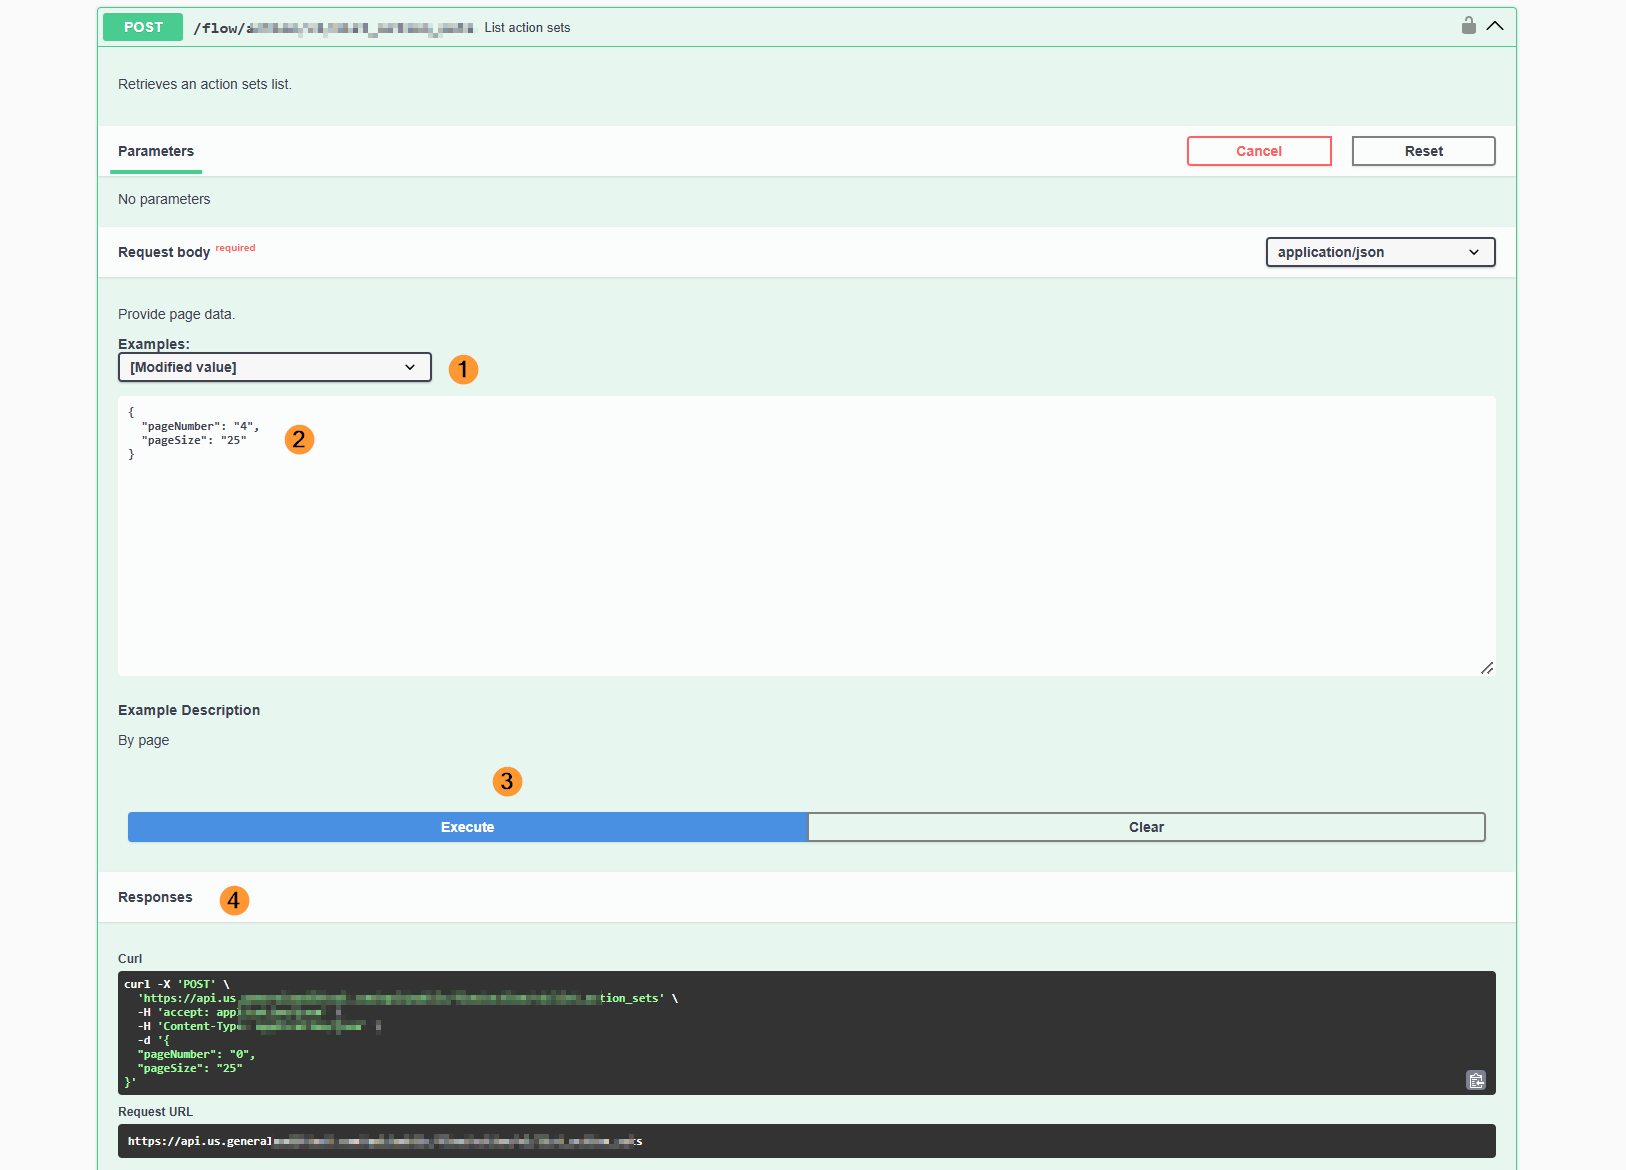
An example is shown below:
- Select the API endpoint you would like to call.
- Select the request body example that works best for you.
- Update the request body with the relevant information.
- Click the ‘Execute’ button.
- Check the response code to see if this was successful or failed.
Conclusion #
The GAT Flow API Access feature delivers programmatic control over your GAT Flow instance, bridging the gap between automated management and customized IT infrastructure.
By leveraging granular scope permissions – from read-only access to specific actions like user suspension—and pairing them with an interactive Swagger testing suite, IT administrators can securely integrate GAT Flow operations directly into custom scripts, SIEM platforms, and internal automation pipelines while maintaining full control over token lifecycles.
Frequently Asked Questions #
1.How do I create a GAT Flow API token?
Navigate to GAT Flow > Configuration > API Access > + Create API Access. Enter the token details, configure the required permissions, set the expiration date, and click Create.
2. How long can a GAT Flow API token remain valid?
The maximum validity period for a GAT Flow API token is one year.
3. Can I view my GAT Flow API token again after creating it?
No. Once you close the token creation window, you cannot view the token again. Copy it and store it securely before closing the window.
4. What permissions can I give a GAT Flow API token?
GAT Flow API tokens can have View, Edit, and Create permissions. The permissions determine which API endpoints the token can access.
5. How can I test GAT Flow API requests?
Use the GAT Flow Swagger documentation. Authorize access with your API token, select an endpoint, click Try it out, configure the request body if required, and click Execute.
All five are directly supported by the article, so we’re not introducing assumptions about the API.


