

GAT Shield’s Calendars feature gives administrators precise control over when security policies, alerts, and access restrictions are active. Instead of applying rules continuously, administrators can create calendars with custom date ranges, active days, and exclusions based on their organization’s schedule.
Once created, these calendars can be applied across supported GAT Shield settings to specify the days when rules and configurations should be active or inactive.
Where Can GAT Shield Calendars Be Applied? #
The setup calendar can be used for many configuration settings.
- Site Access Control
- User-defined categories
- Predefined categories
- Rules – create rule
- Block page configuration
- Alerts
- Rules
- Configuration
- Audit
- Site Access Control
- Searches
- YouTube
- YouTube Access
- Block embedded videos
- Gmail Access
- Communication access
- Login control
- Monitoring Ranges
How to create a new calendar #
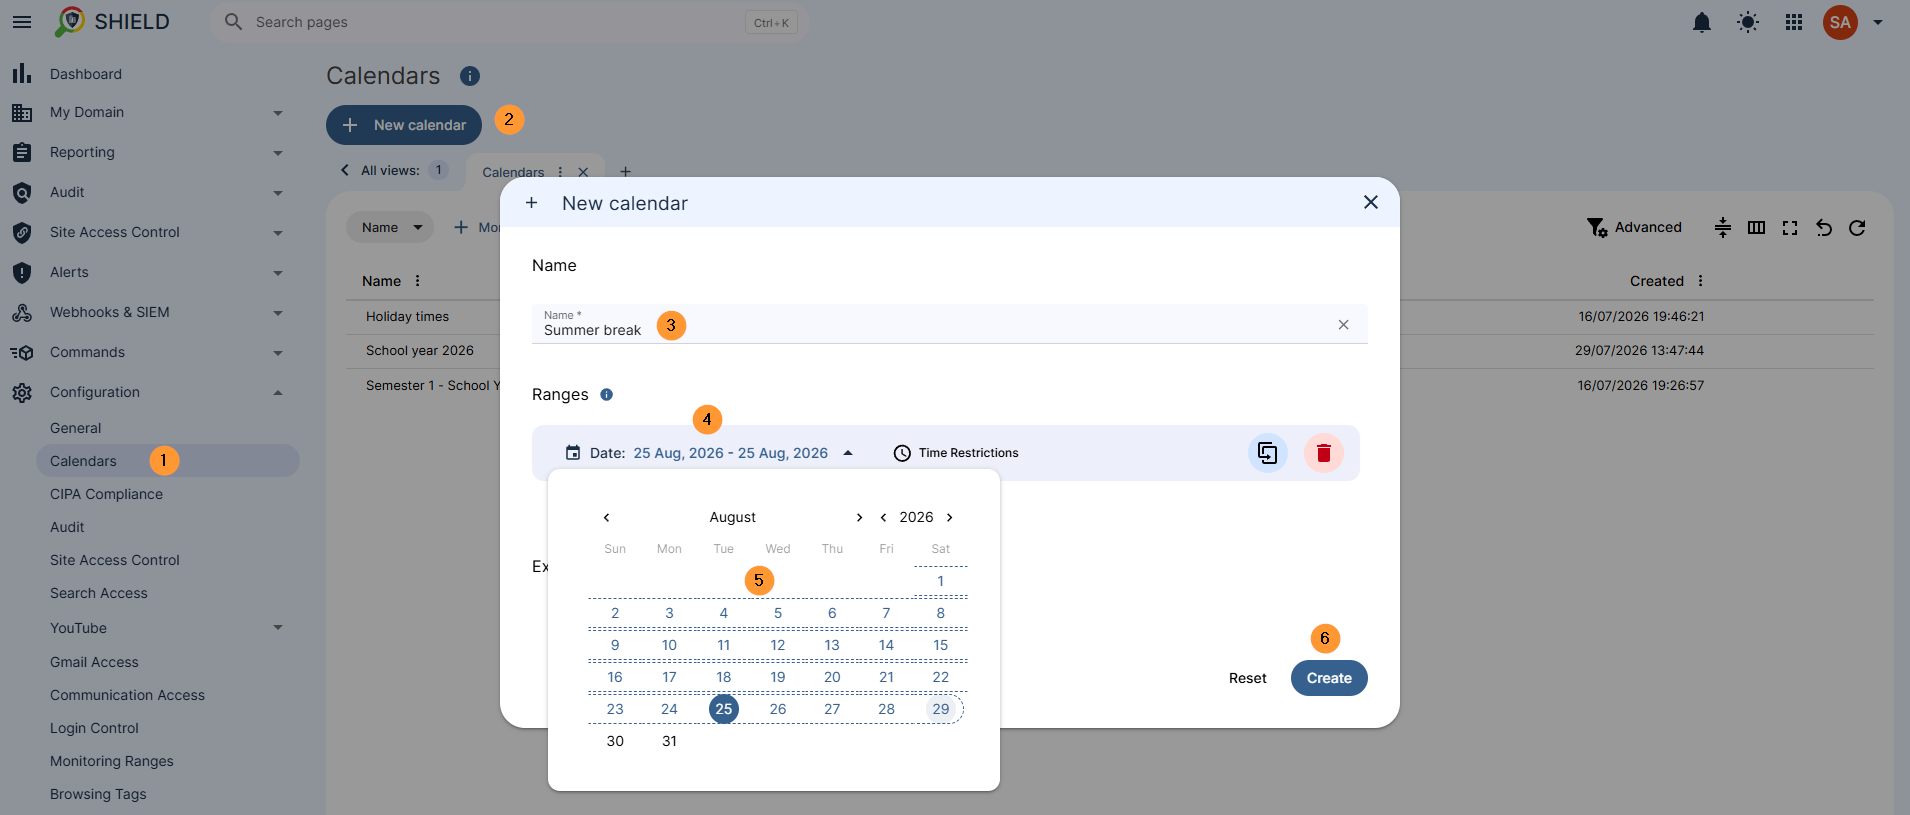
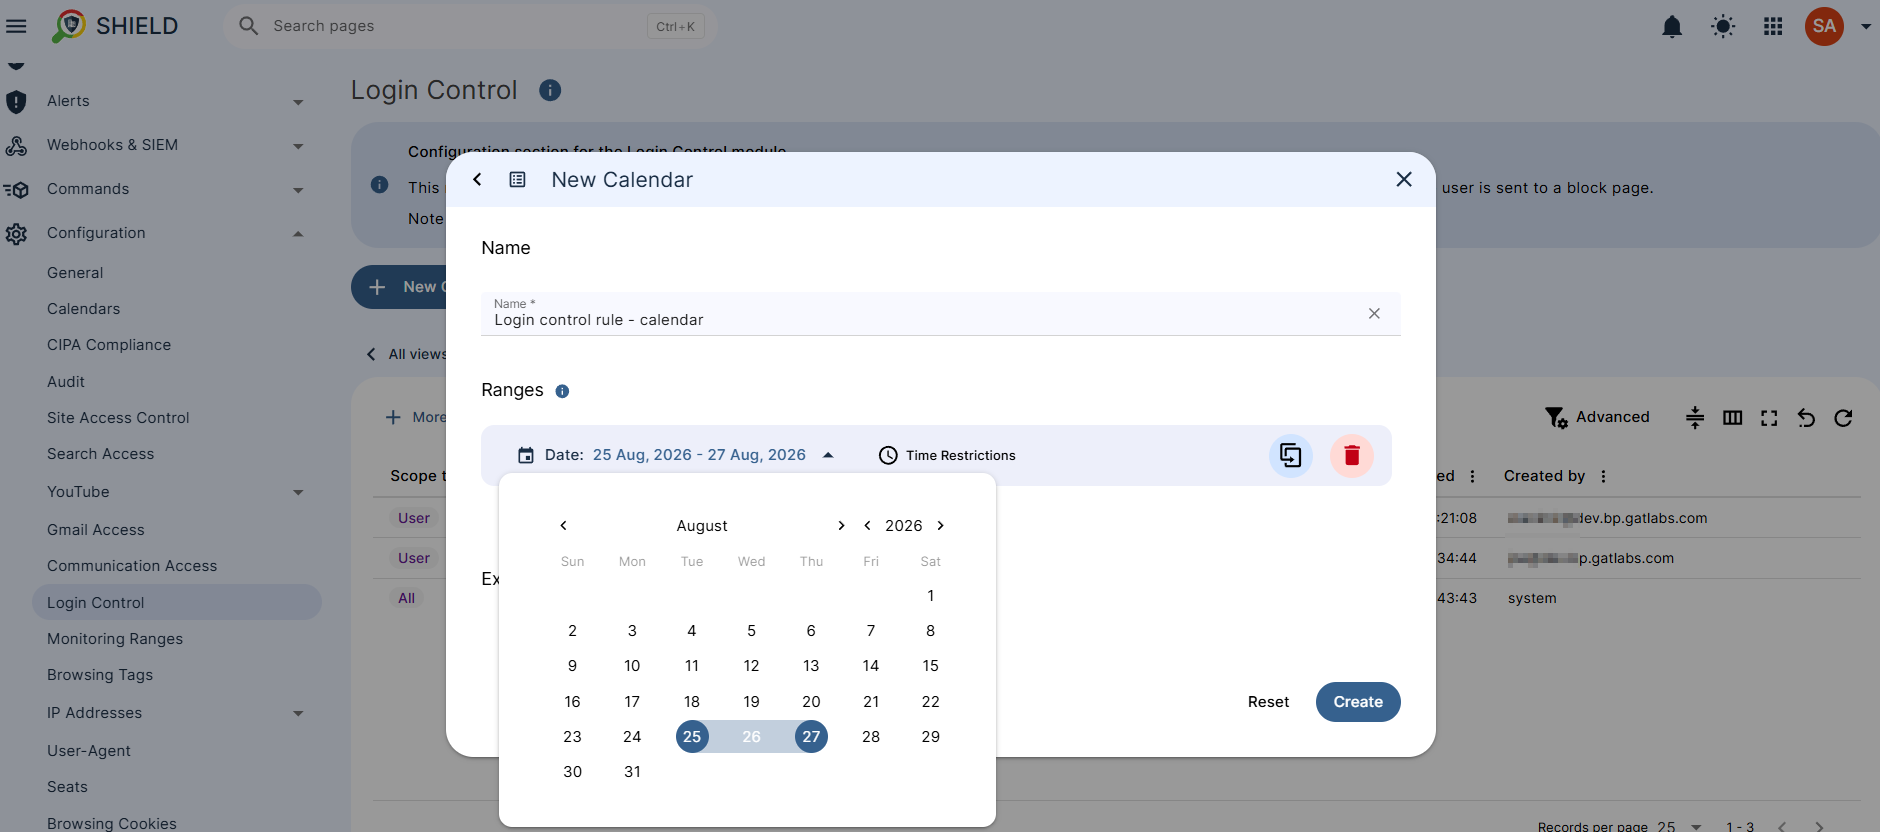
- First, navigate to GAT Shield > Configuration > Calendars.
- Click the New calendar button.
- Fill in the following details:
- Name: Enter a clear name for the calendar (e.g., Summer School Schedule, Holiday Restrictions).
- Ranges: Use the interactive calendar tool to select your active date ranges and set any required exclusion days.
- Click Create to save the calendar.
How to Apply a Calendar #
Admin can navigate to Site Access Control, Alerts, or Configuration to set up rules.
The calendar option will be available to be used when the rules are active based on the selected times in the Calendar.
Applying Calendars to Rules and Configurations #
Important Rule Logic: When selecting multiple calendars, Shield combines all date ranges and exclusions. Exclusions always take higher priority over active date ranges.
Example 1: #
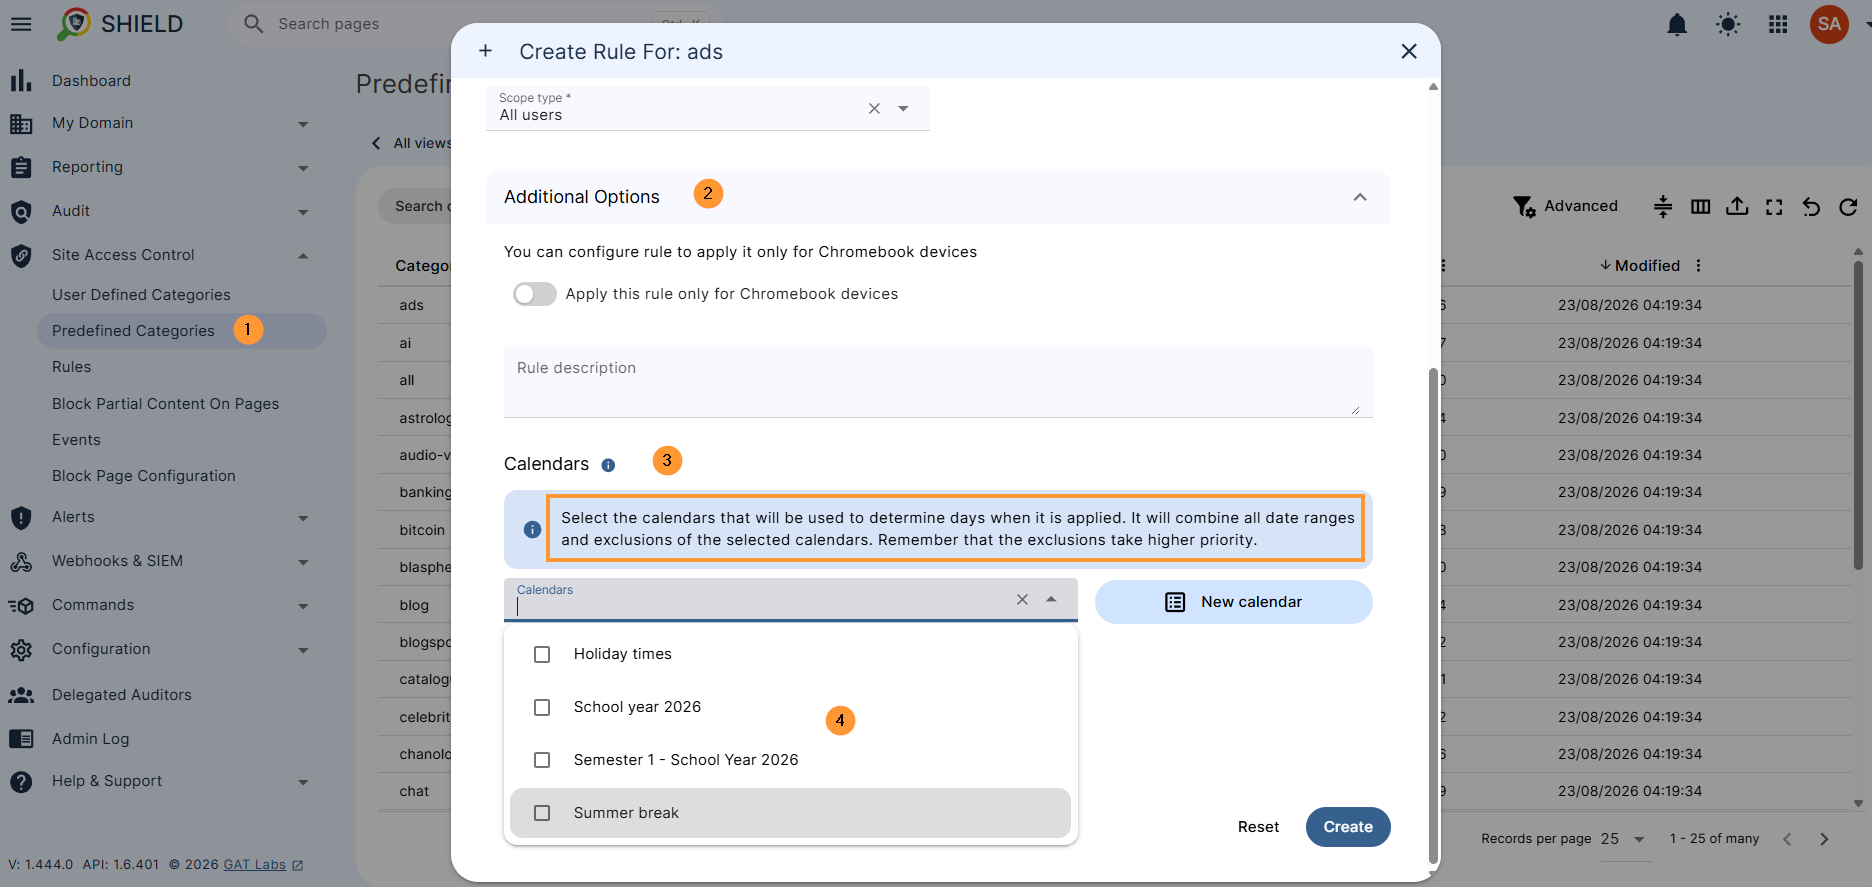
Site Access Control – Predefined categories
- Create the rule.
- Under the Additional options, select the Calendars option
- Select the calendars that will be used to determine the days when it is applied. It will combine all date ranges and exclusions of the selected calendars. Remember that the exclusions take higher priority.
Example 2: #
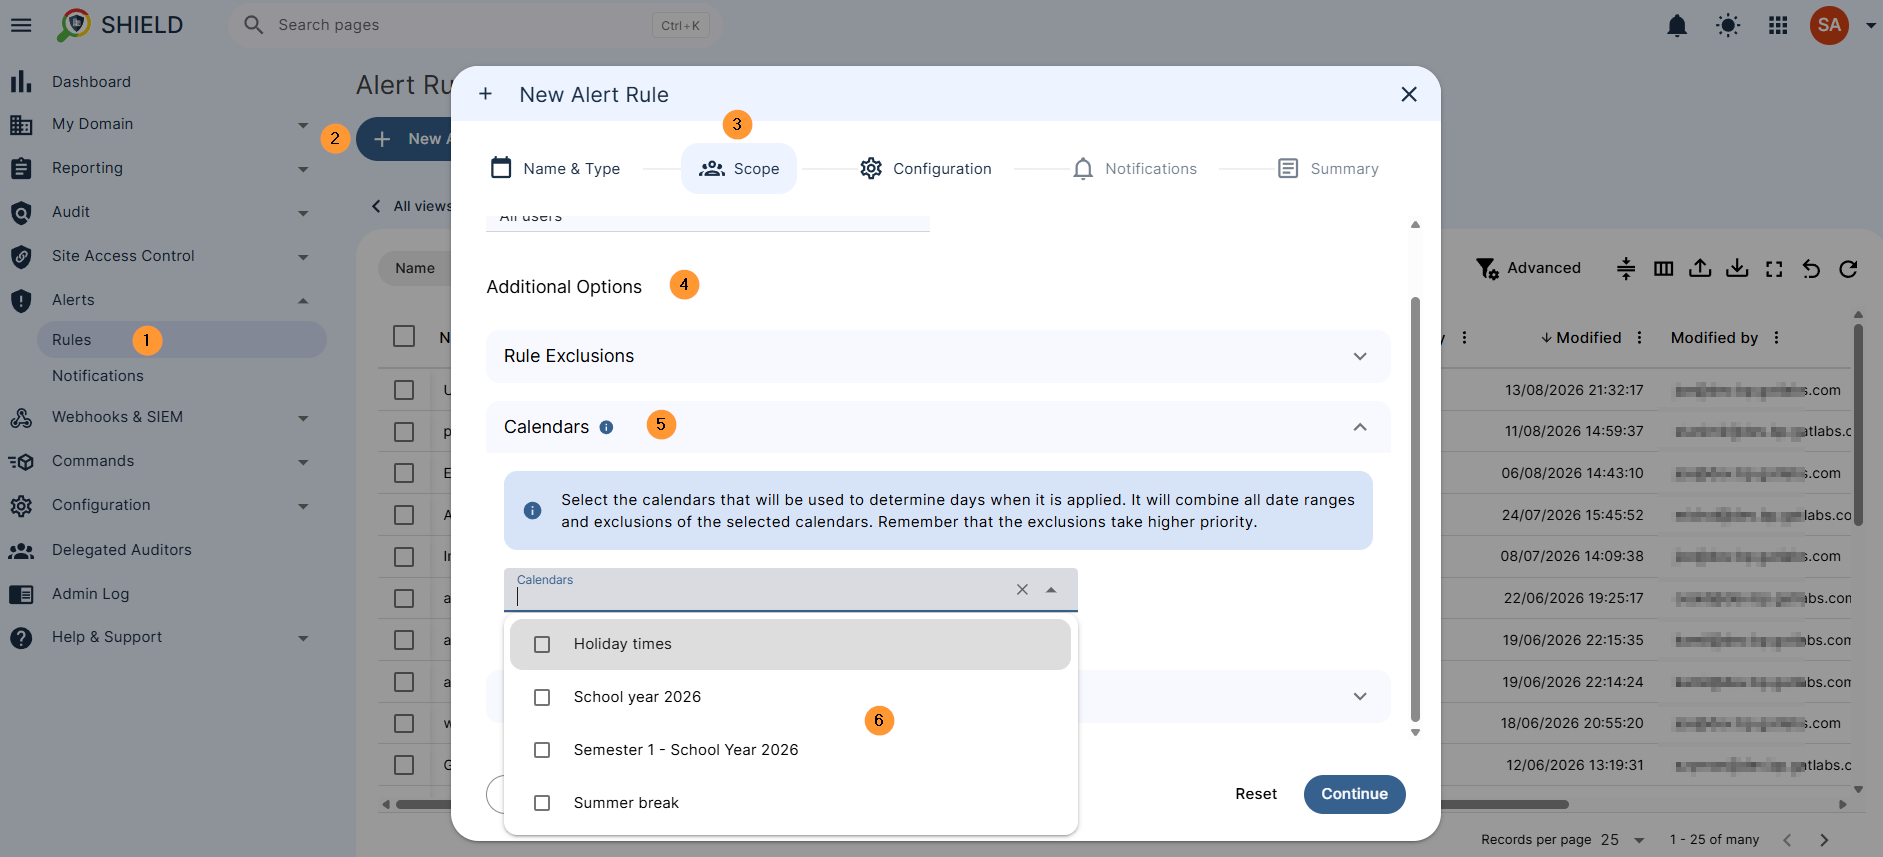
Alerts > Rules
- Create a new alert rule, and in the Scope section
- Under the Additional options, select the Calendars option
- Select the calendars that will be used to determine the days when it is applied. It will combine all date ranges and exclusions of the selected calendars. Remember that the exclusions take higher priority.
Example 3: #
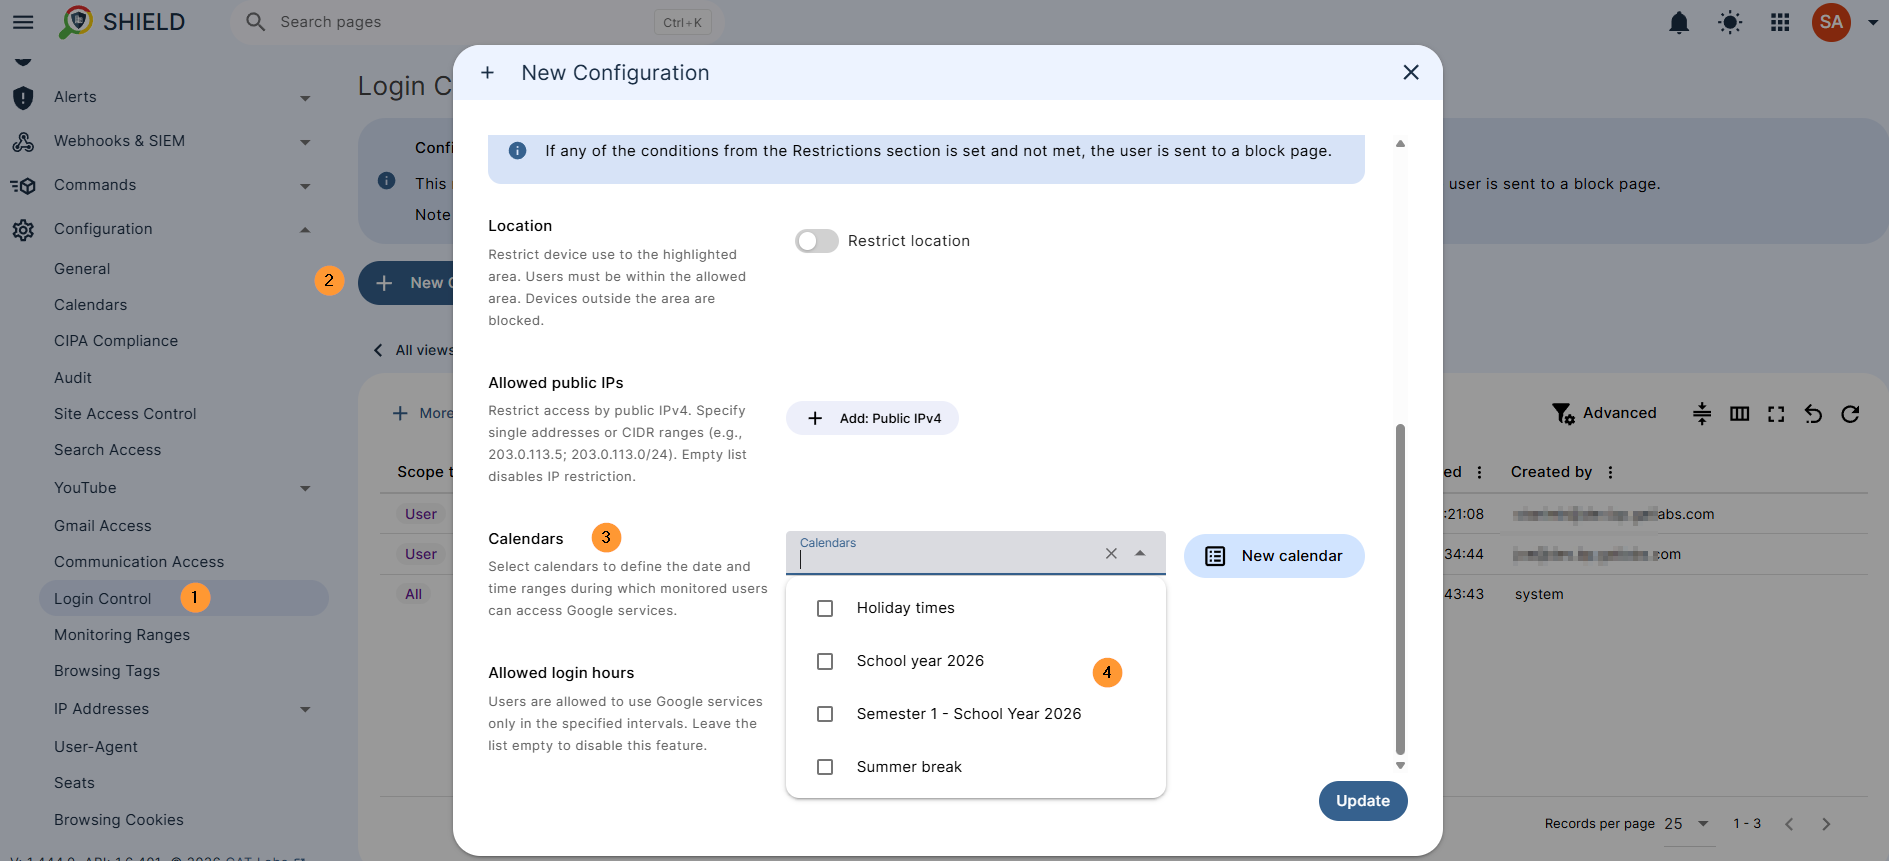
Configuration > Login Control
- New configuration
- Under the Restrictions option, select the Calendars
- Select the calendars that will be used to determine the days when it is applied. It will combine all date ranges and exclusions of the selected calendars. Remember that the exclusions take higher priority.
On-the-Fly Creation #
When creating or editing a rule in supported sections (e.g., Site Access Control, Alerts, or Configuration):
- Look for the New calendar blue button in the calendar selection area.
- Click New calendar to open the creation window directly.
- Define the name and date ranges, then save to immediately apply it to your active rule.
Summary #
GAT Shield Calendars allow administrators to control when supported security policies, alerts, and access restrictions are active.
By creating reusable calendars with specific date ranges and exclusions, administrators can apply the same schedule across supported Site Access Control, Alerts, and Configuration settings.
FAQ’s #
Q: What happens if I select multiple calendars with overlapping dates or conflicts?
A: GAT Shield combines all date ranges and exclusions across the selected calendars. If there is a conflict between an active date range and an exclusion, exclusions always take priority, and the rule will remain inactive on those excluded days.
Q: Can I create a new calendar directly while setting up a policy, or do I have to leave the configuration page?
A: You can create one on the spot without leaving your page. In the policy setup window (such as Site Access Control or Alerts), click the blue New calendar button inside the calendar selection section to build and attach a calendar immediately.
Q: Can I apply the same GAT Shield Calendar to multiple rules?
A: Yes. Once created, calendars can be selected when configuring supported rules and settings across Site Access Control, Alerts, and Configuration.
Q: Can I exclude specific dates from a GAT Shield Calendar?
A: Yes. When creating a calendar, administrators can define active date ranges and exclusion days. If an exclusion conflicts with an active date range, the exclusion takes priority.


