

Email Signature Manager #
Standardizing corporate branding across a growing organization is a constant challenge, especially when employees edit, break, or remove their required email signatures.
Email Signature Manager solves this by letting Google Workspace administrators design, assign, and automatically enforce standardized HTML signatures across individual users, groups, or Organizational Units.
Once assigned, signatures are updated daily and automatically corrected if modified by the user, ensuring complete brand consistency without manual intervention.
Create the signature #
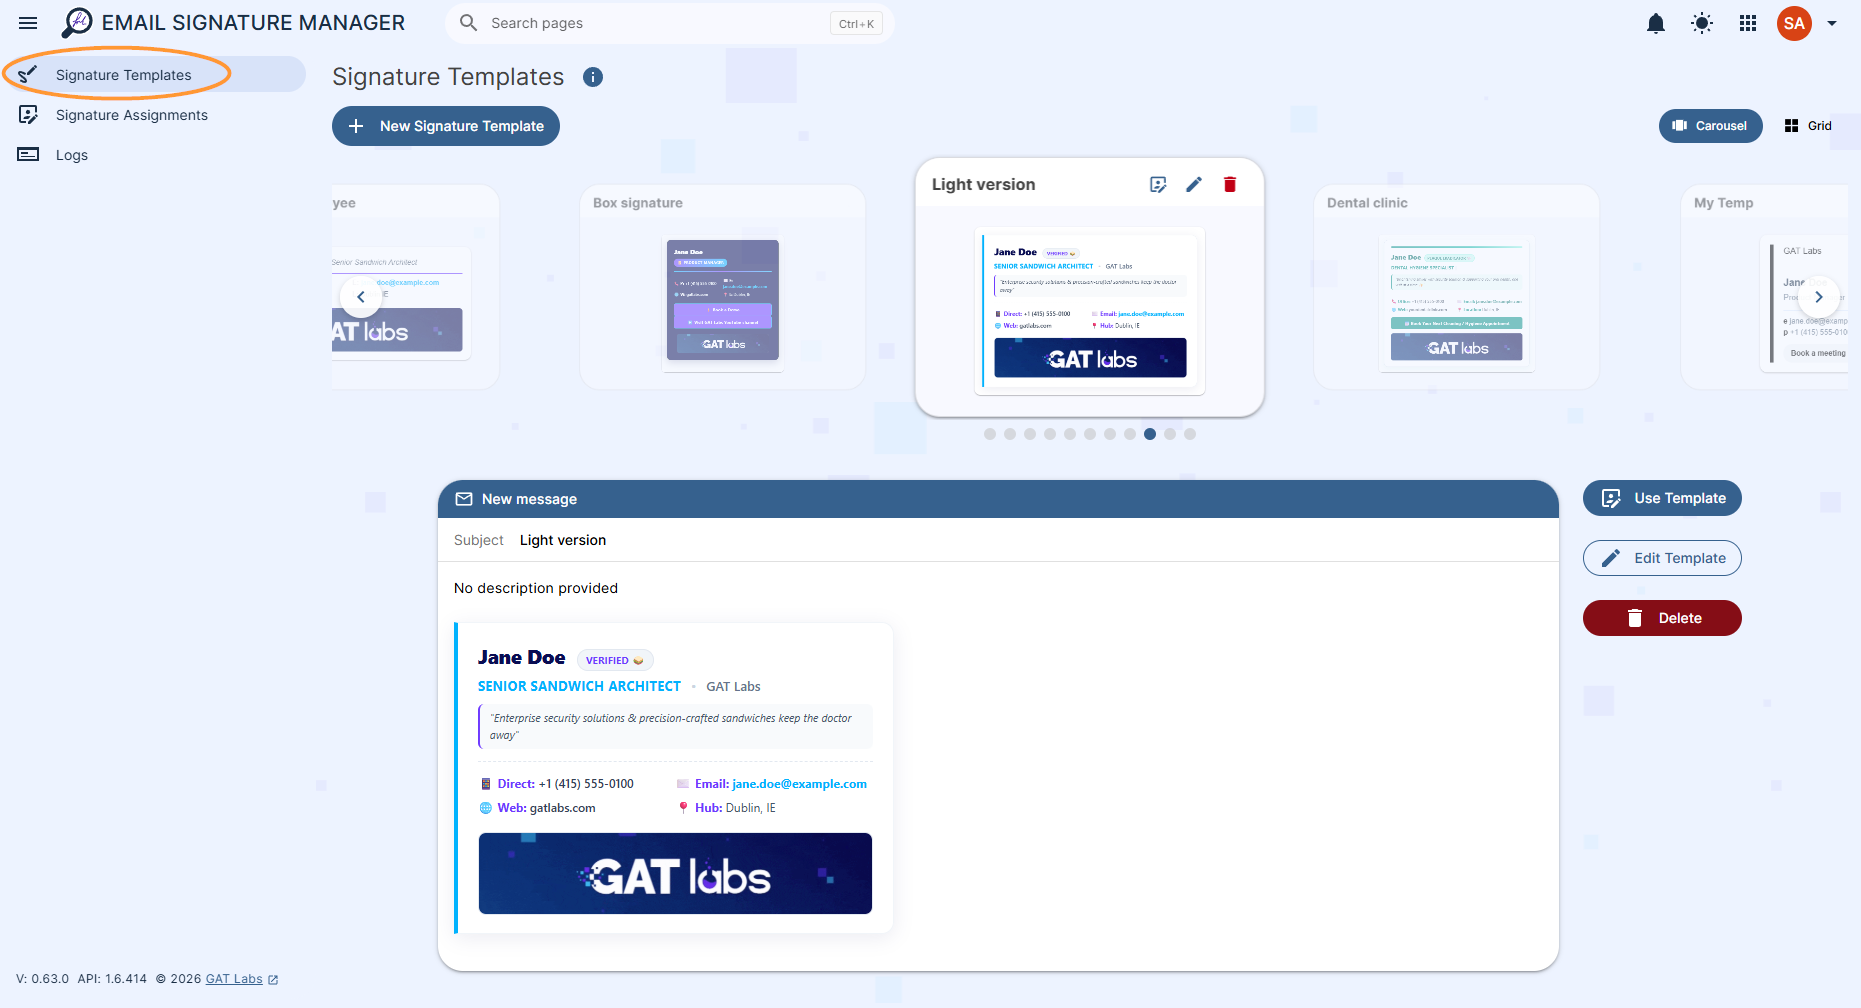
On the left menu, navigate to Signature templates > and click on the + New Signature template button
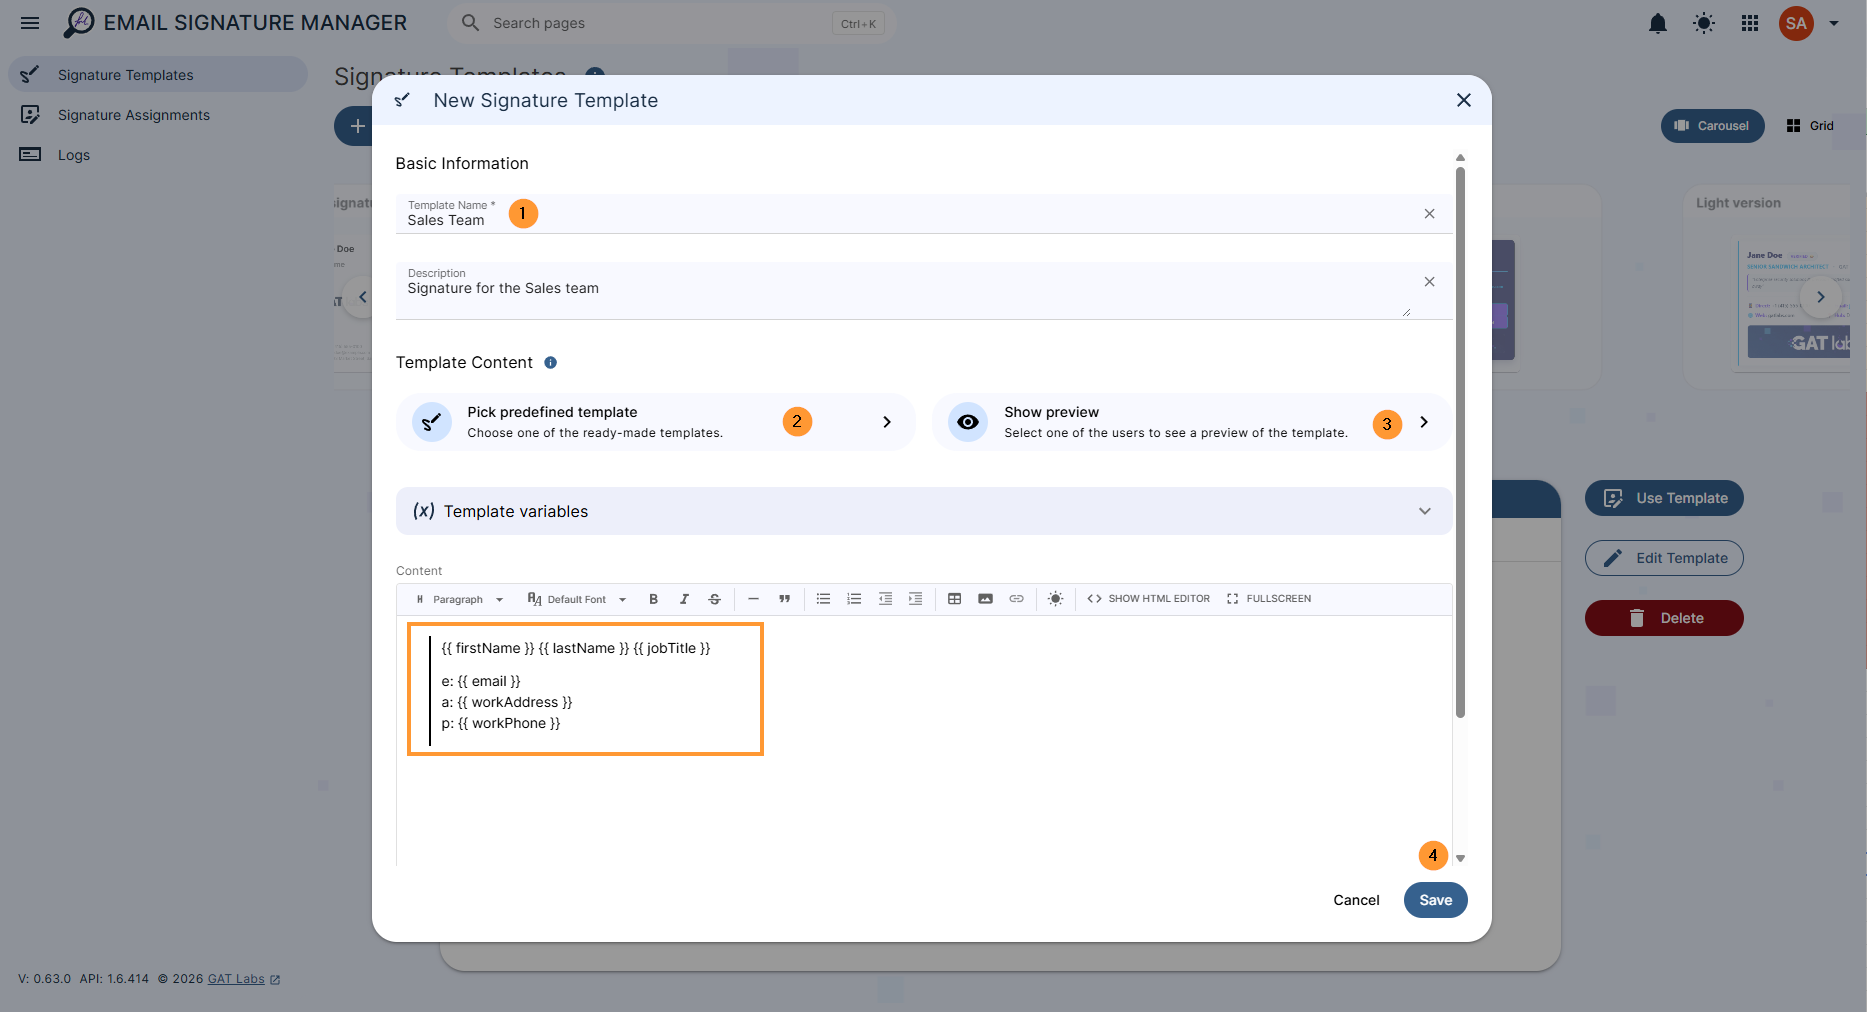
Next, fill in the Basic information
- Template name – enter a name for this template
- Description – enter a description for the template
- Template content – this is the design of the signature template
- Pick predefined template – Choose from any of our ready-made templates
- Show preview – Preview what the signature would look like, using the attributes from a particular user of your choice
- Template variables – Choose an attribute from theuser’ss account to include in their signature
- HTML editor – Use the HTML editor to create the signature
The following options are available when creating a signature template:
Pick predefined templates – select and pick a prepared template.
HTML signature #
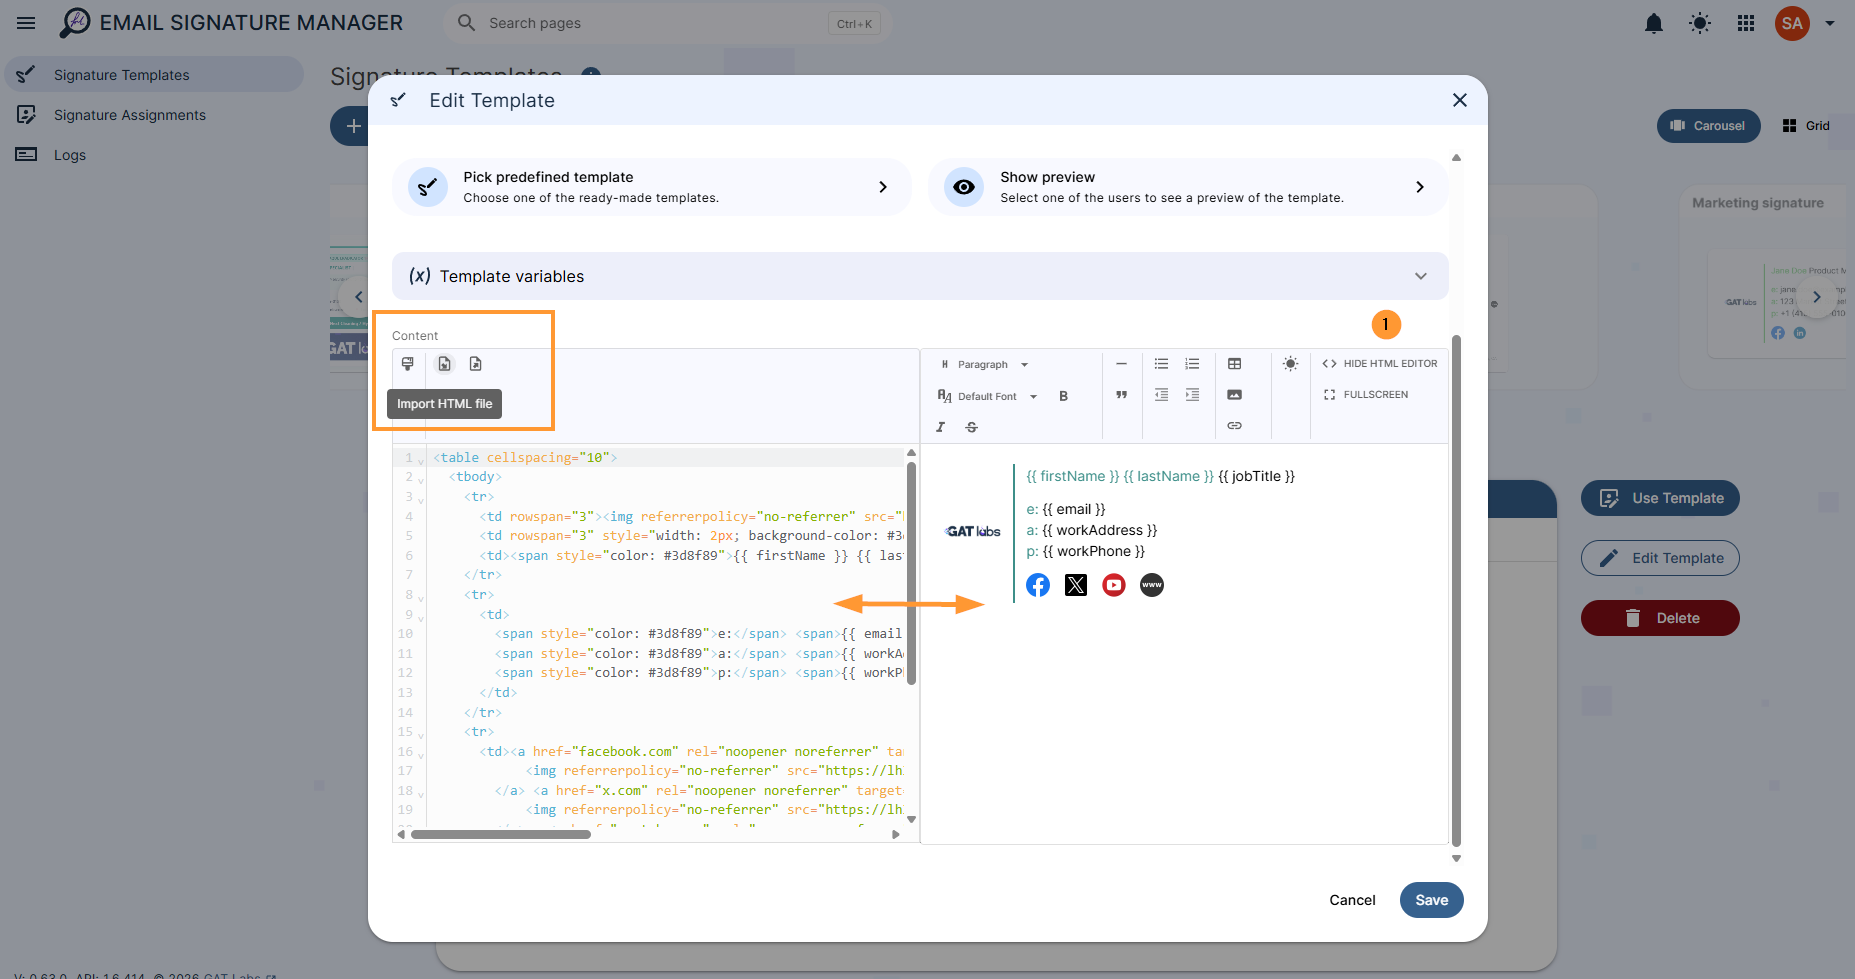
Admins can copy and paste HTML code from already existing signatures.
Click on and select the HTML editor under “Content” of the signature, and create the signature manually. You can import and export HTML files
You can copy and paste from an external resource and create the signature as you wish.
Click on Save when changes are applied.
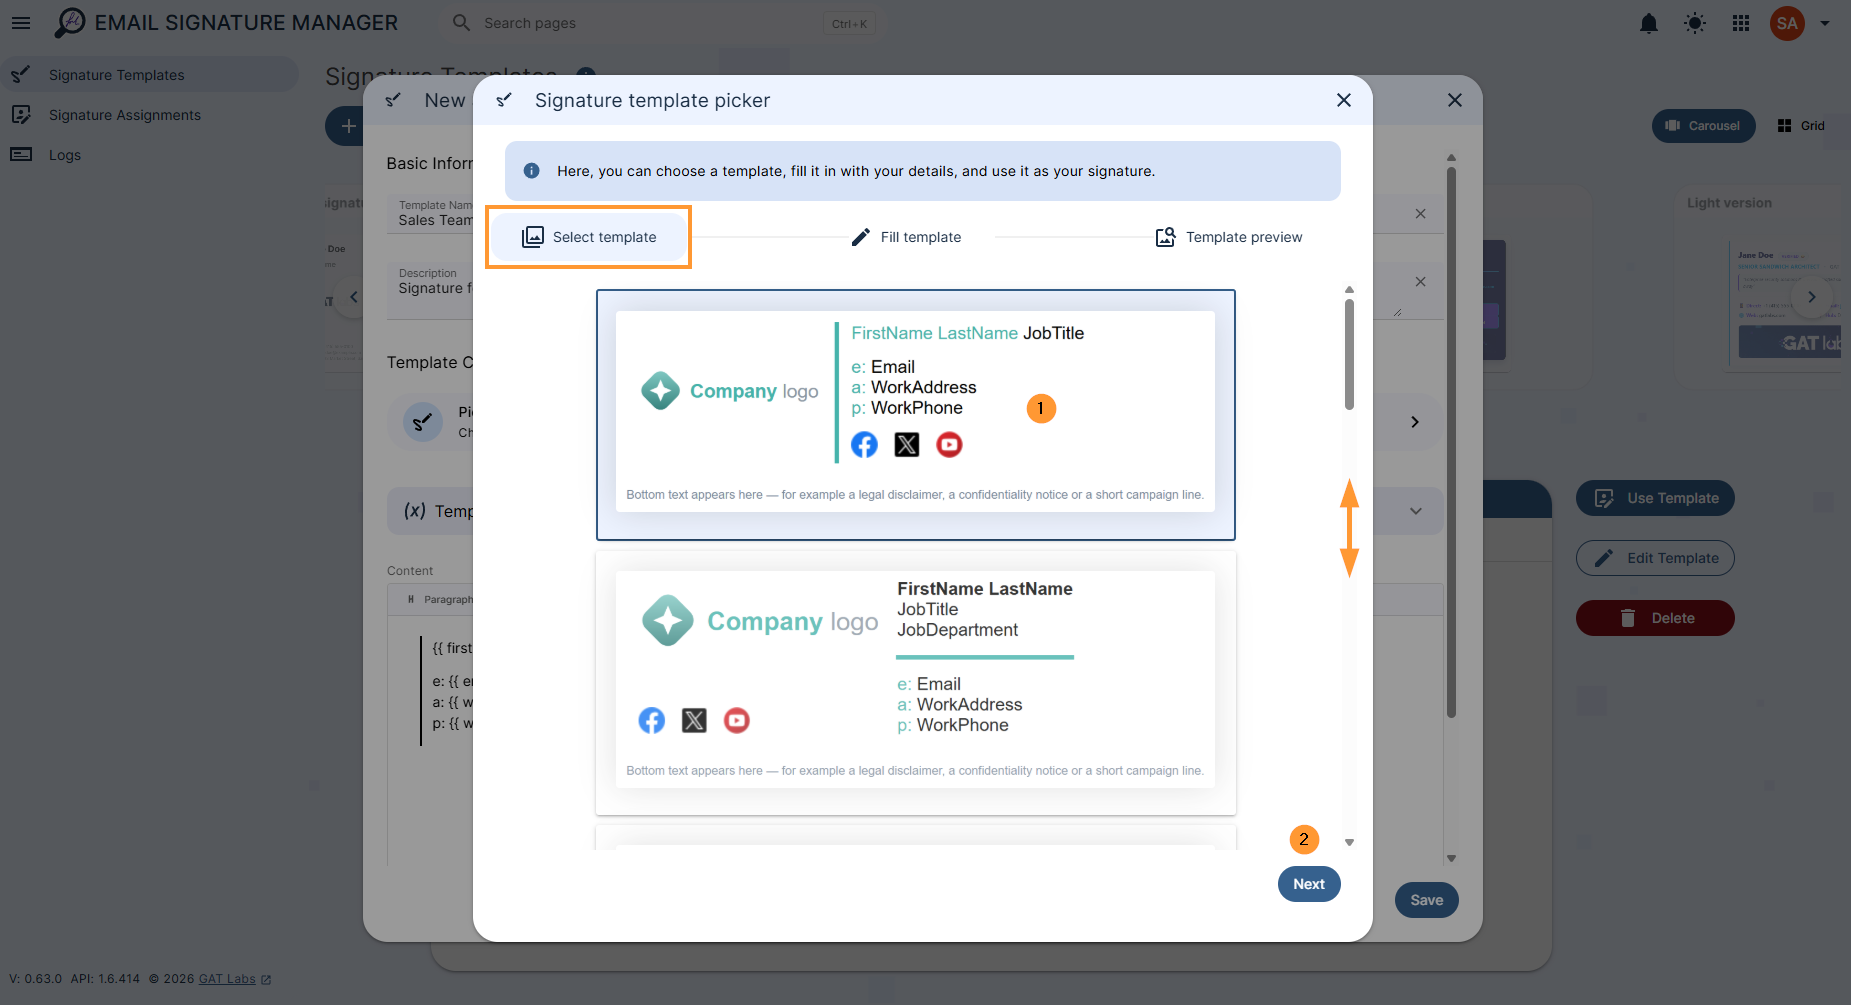
Select template #
In Select template, scroll down/up and pick any of the prepared templates.
Fill template #
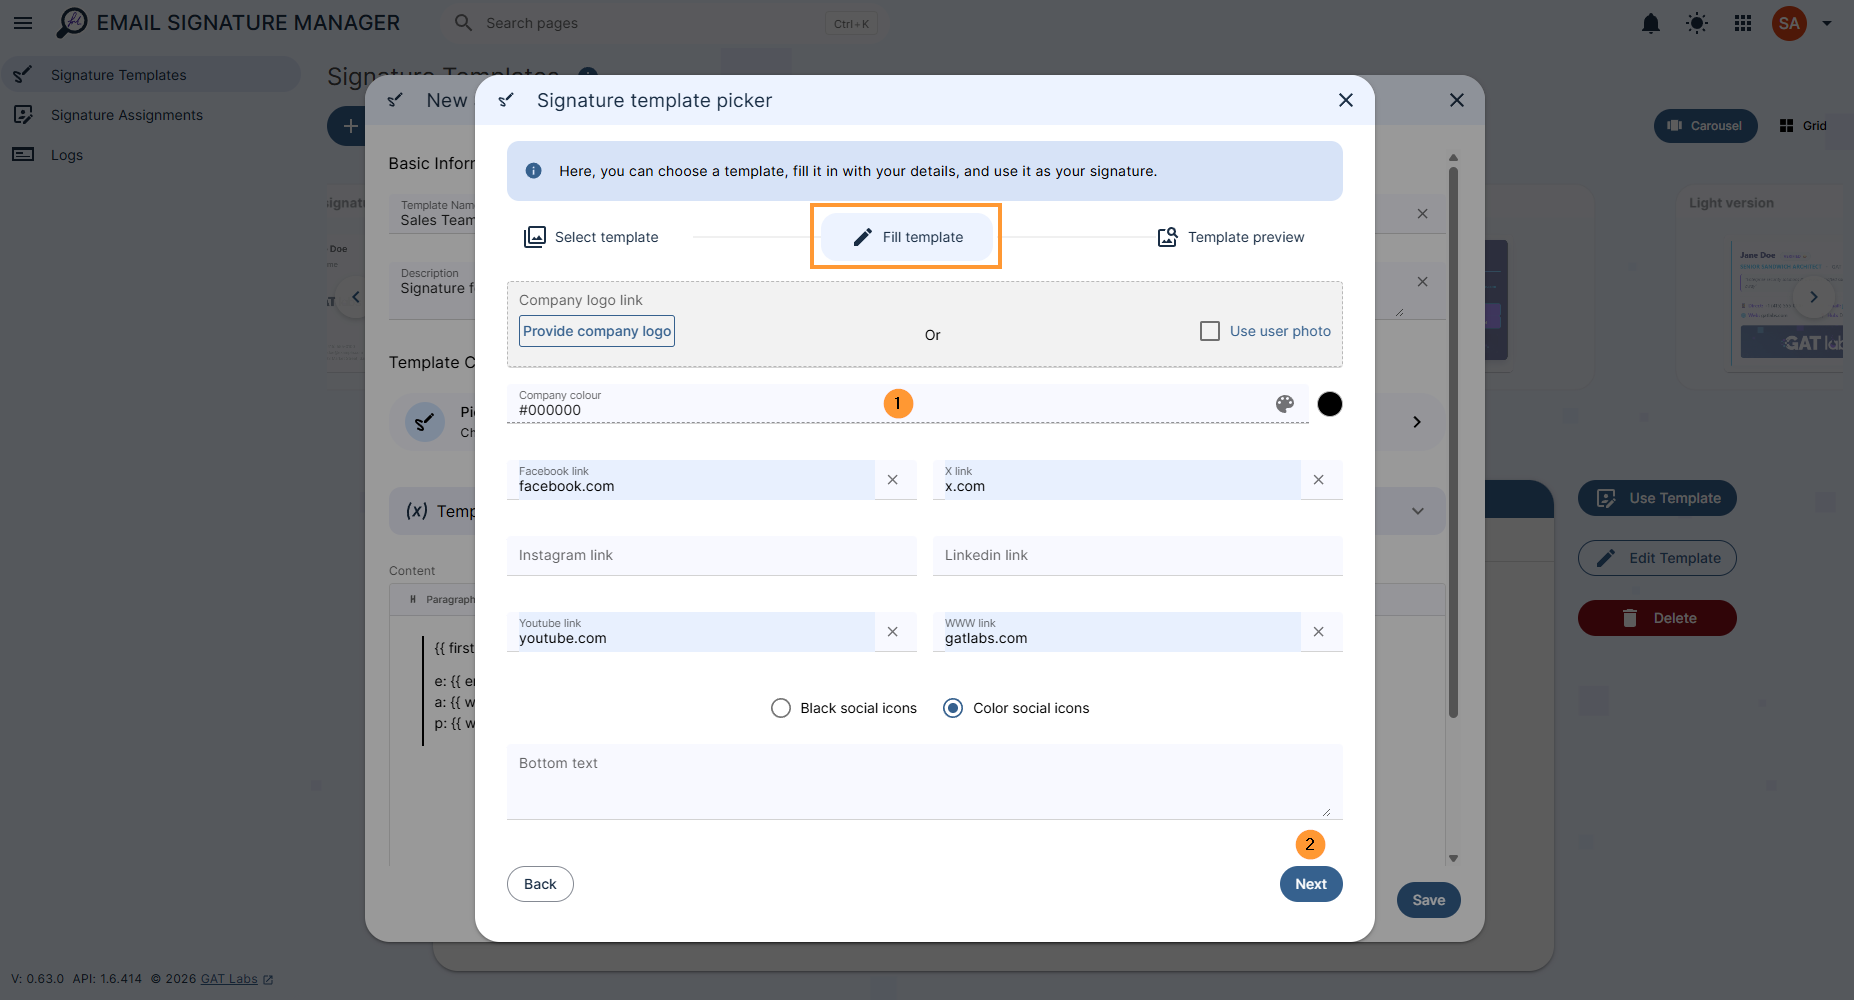
In the Fill template, add all the required details.
- Company logo link – enter the company logo or use the user photo.
- Company colour – choose and select the company color.
- Social media links – add the social media links needed
- Social media icons – choose default-color social icons or black social icons
- Bottom text – enter bottom text for the signature
- Next – click to proceed
Template preview #
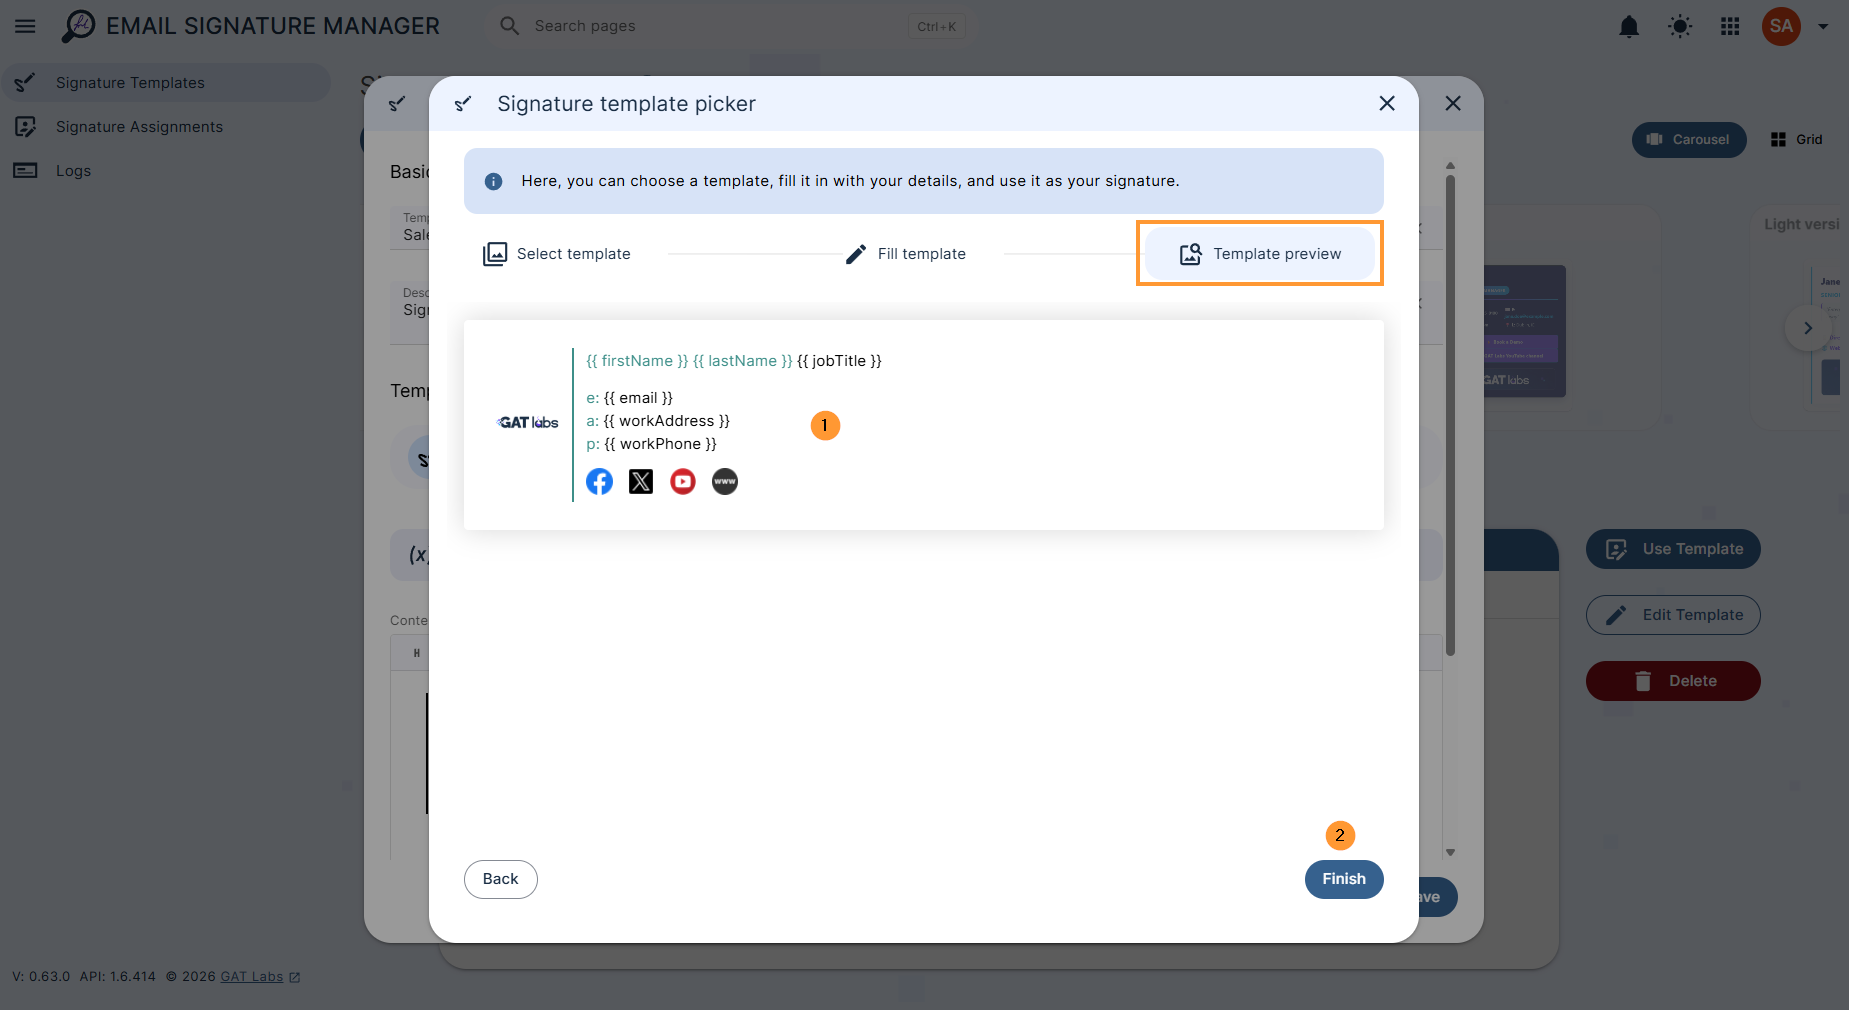
Preview how the Signature will look for the users.
Click on the Finish button
Add further edits #
- Use Template variables to further update the signature.
- Use the “Content” field to further update the signature
- Use the “Show HTML editor” to manually create or update the signature
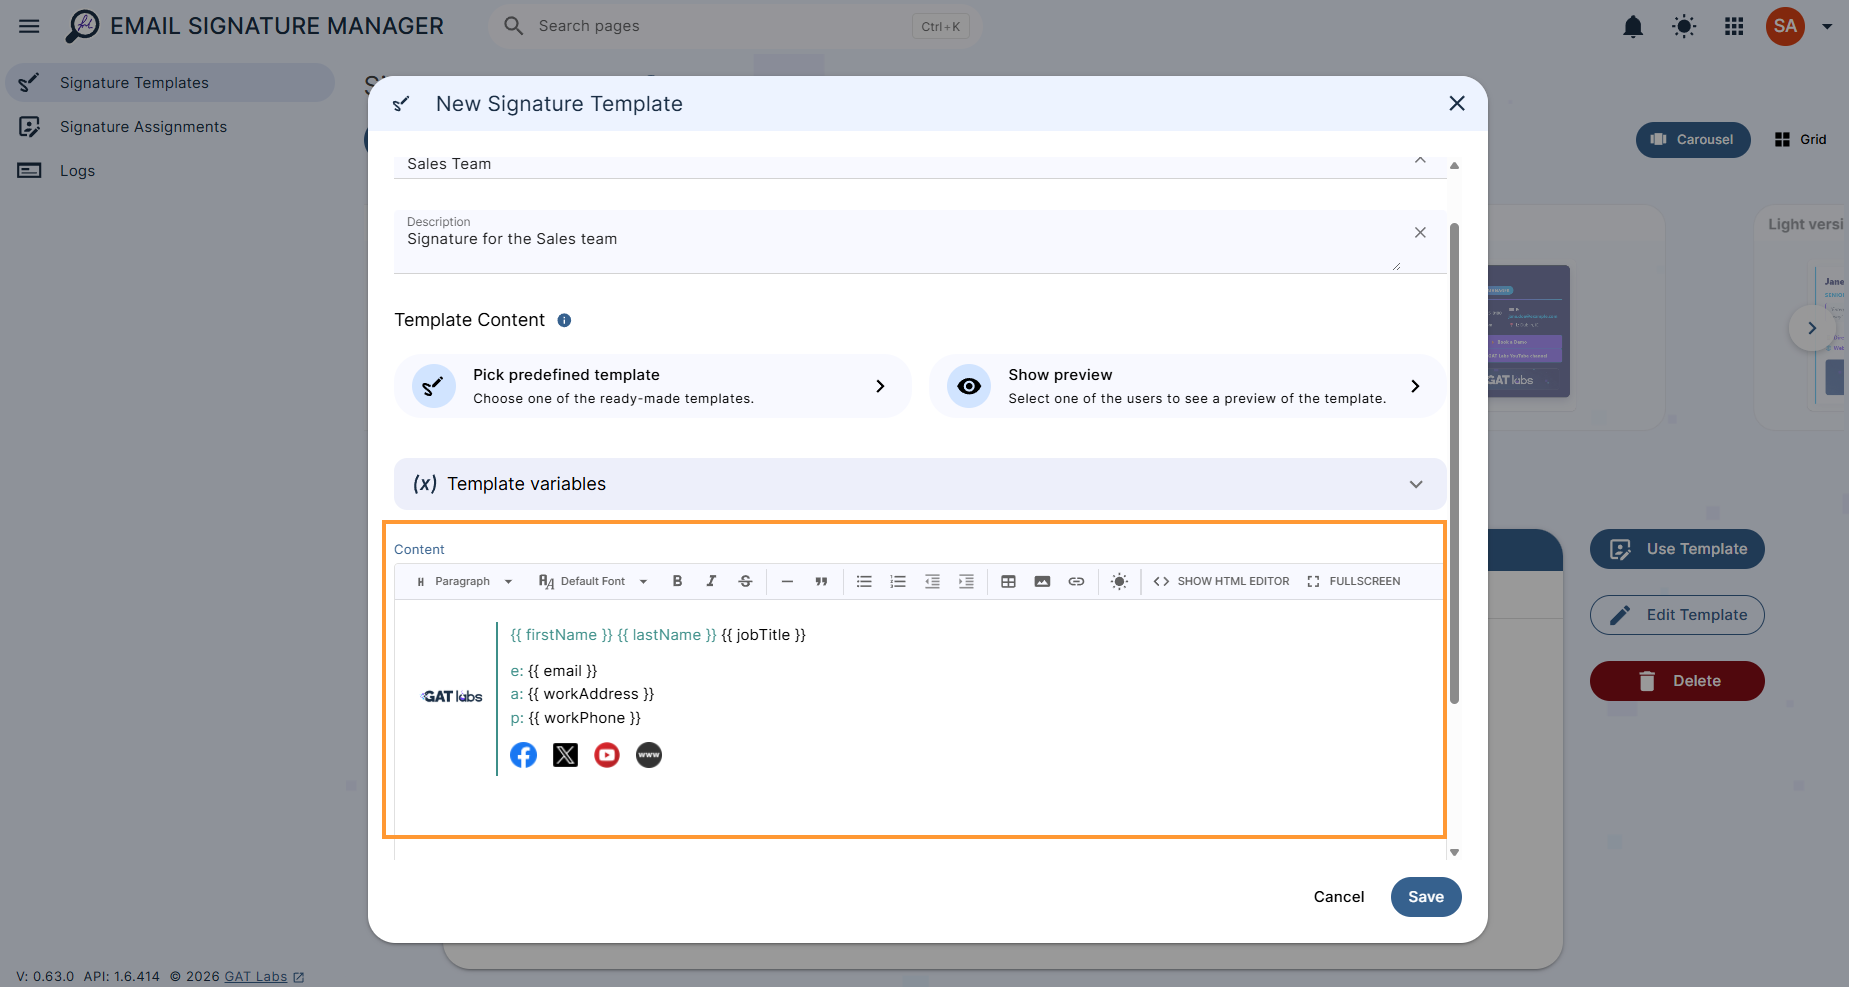
Click on the Save button to save the template.
Show preview #
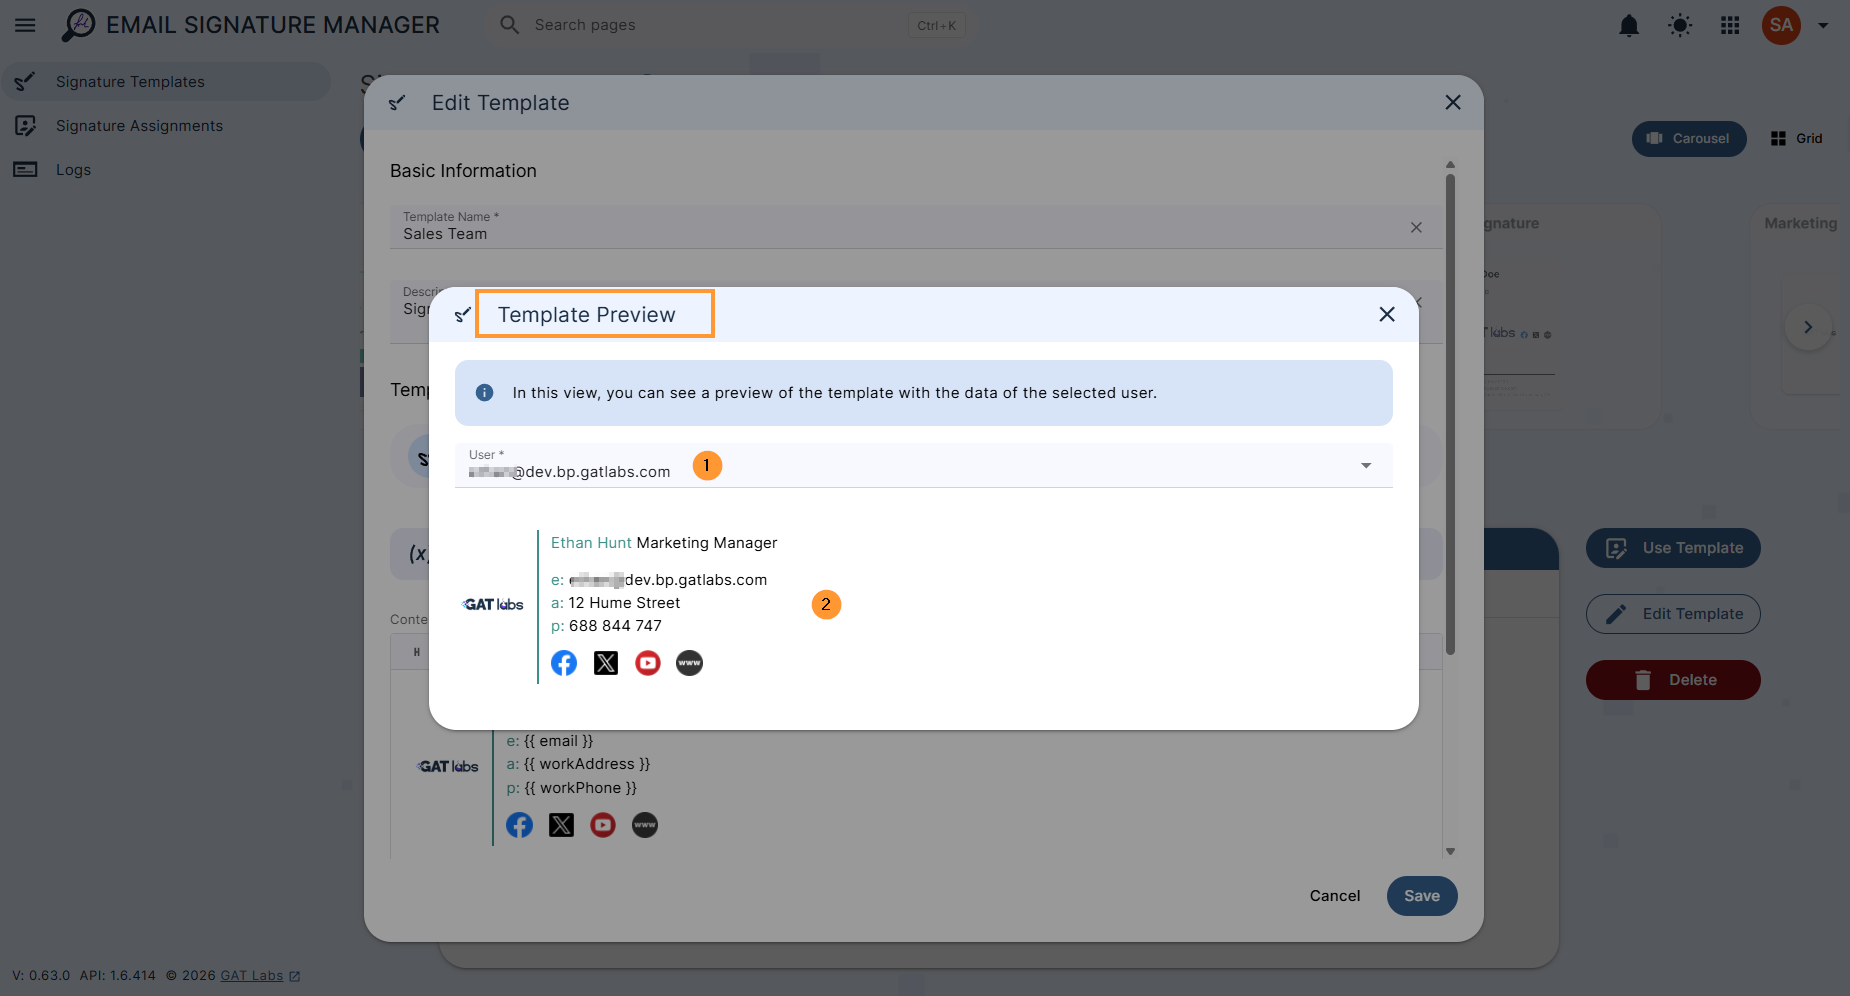
The Show preview will allow you to select a specific user from your domain and see how the signature would look for them, given the attributes on their account.
Click on “Show preview” to open a new field, and enter the email address of the user whom you want to preview.
Apply the signature #
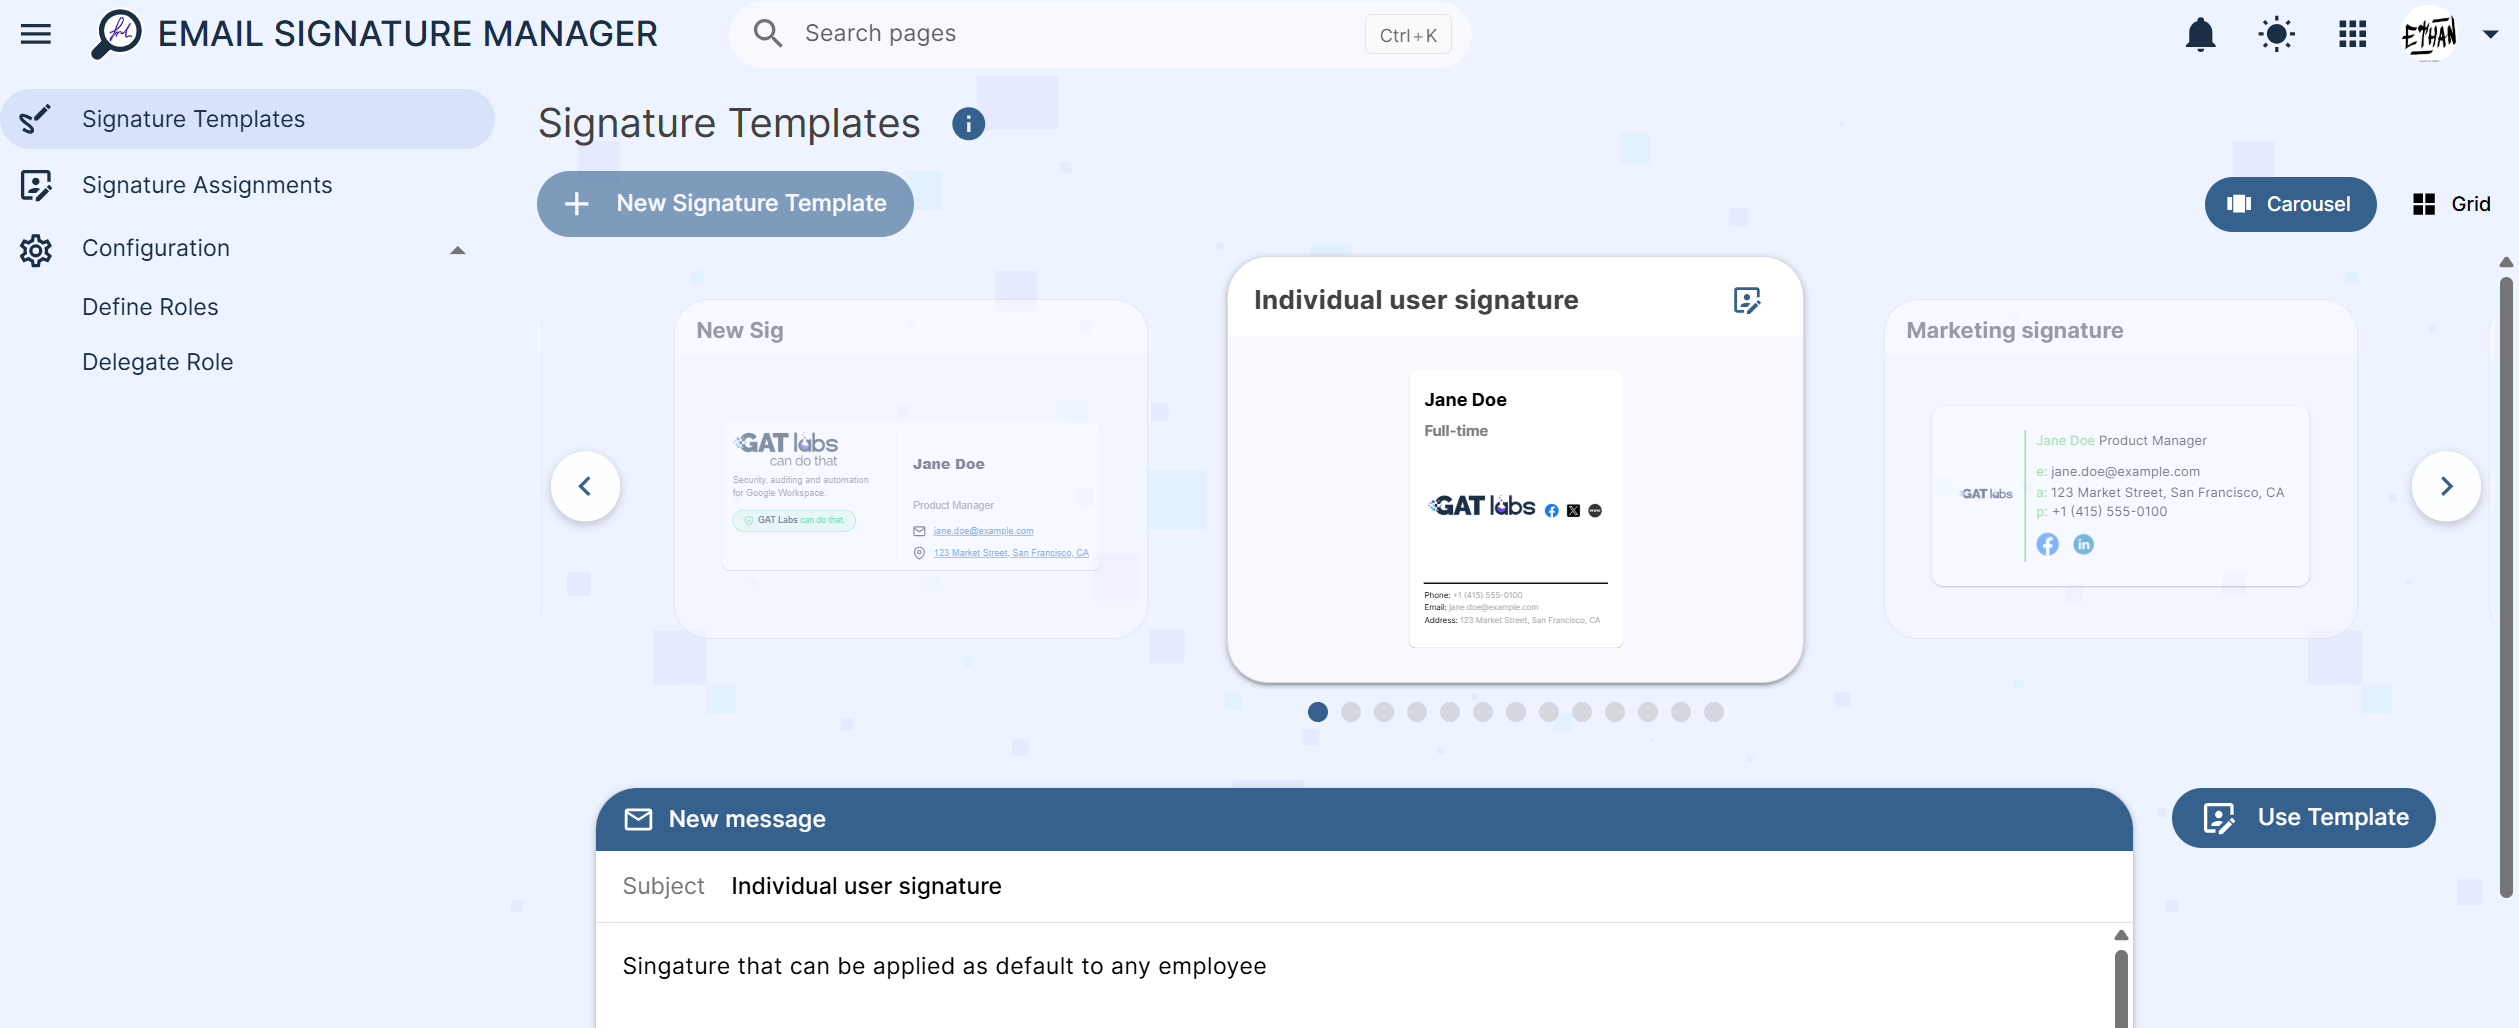
As the template is created, it can be easily applied to a user, group, or org. unit of users. In the signature templates, search for and select the template.
Pick the template you want and click on Use template
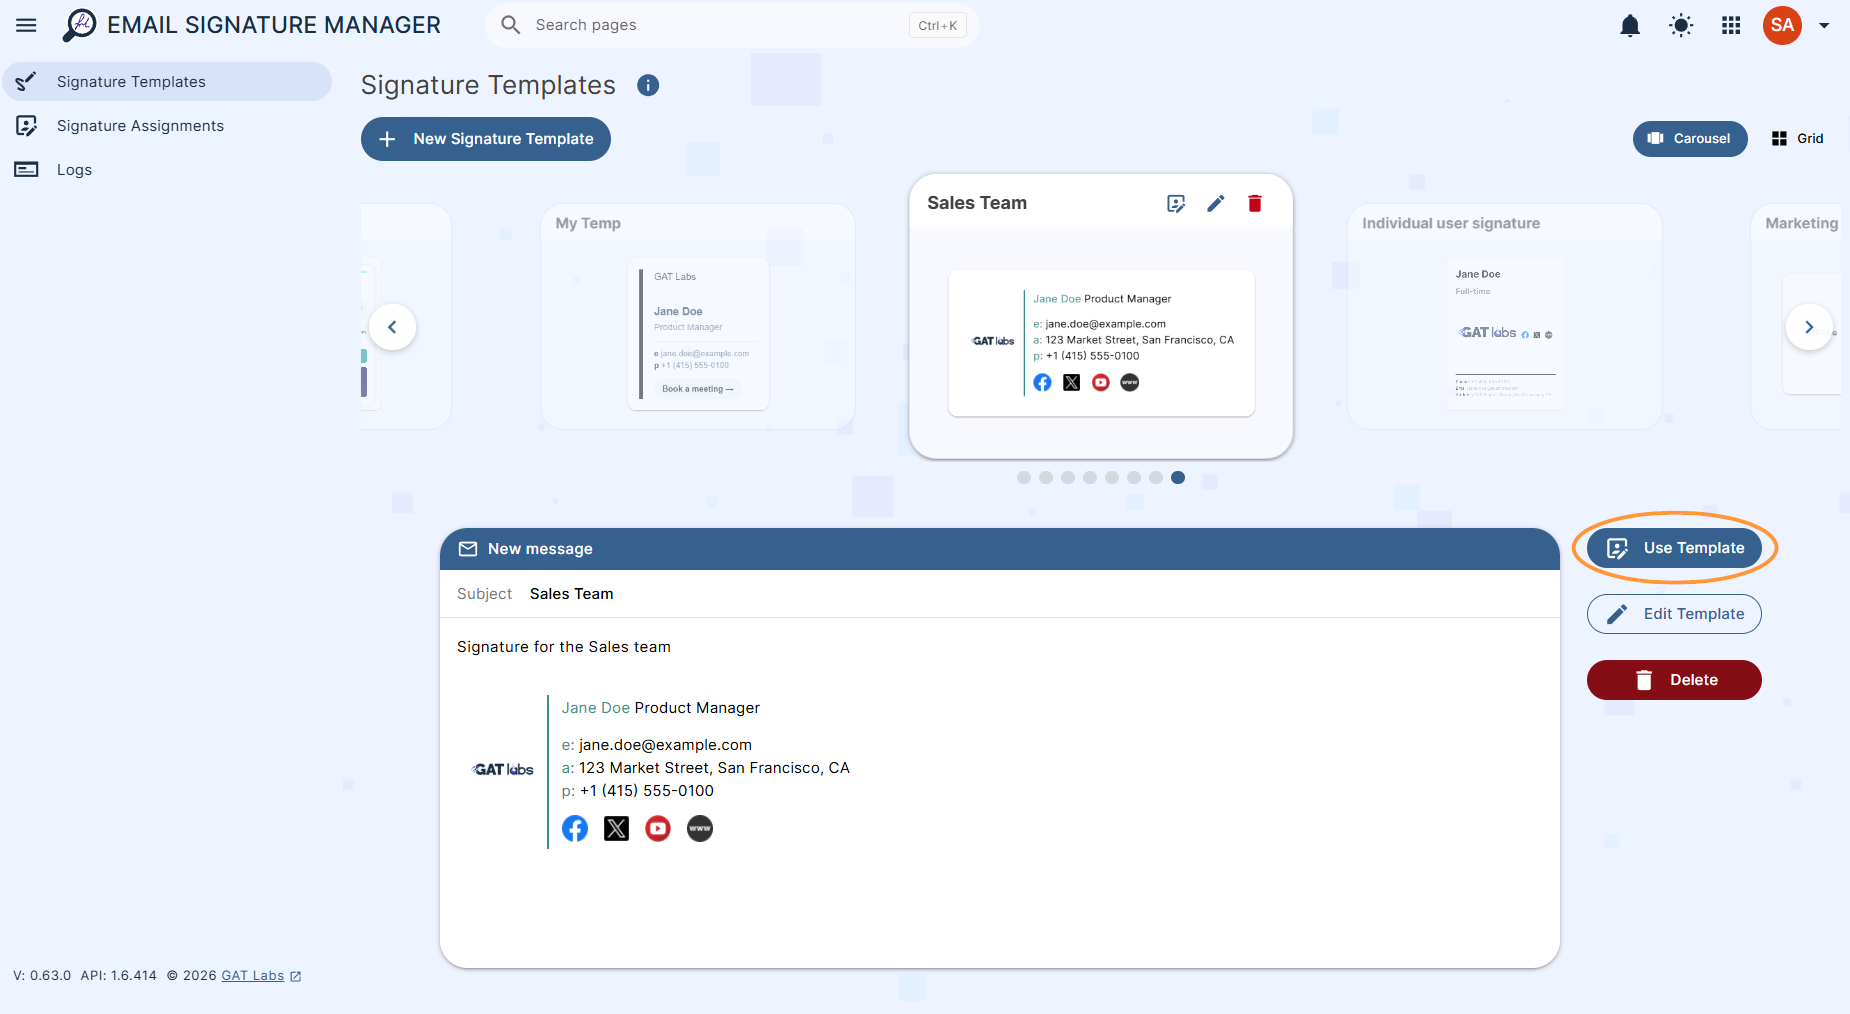
Fill in all the details for whom to apply the signature.
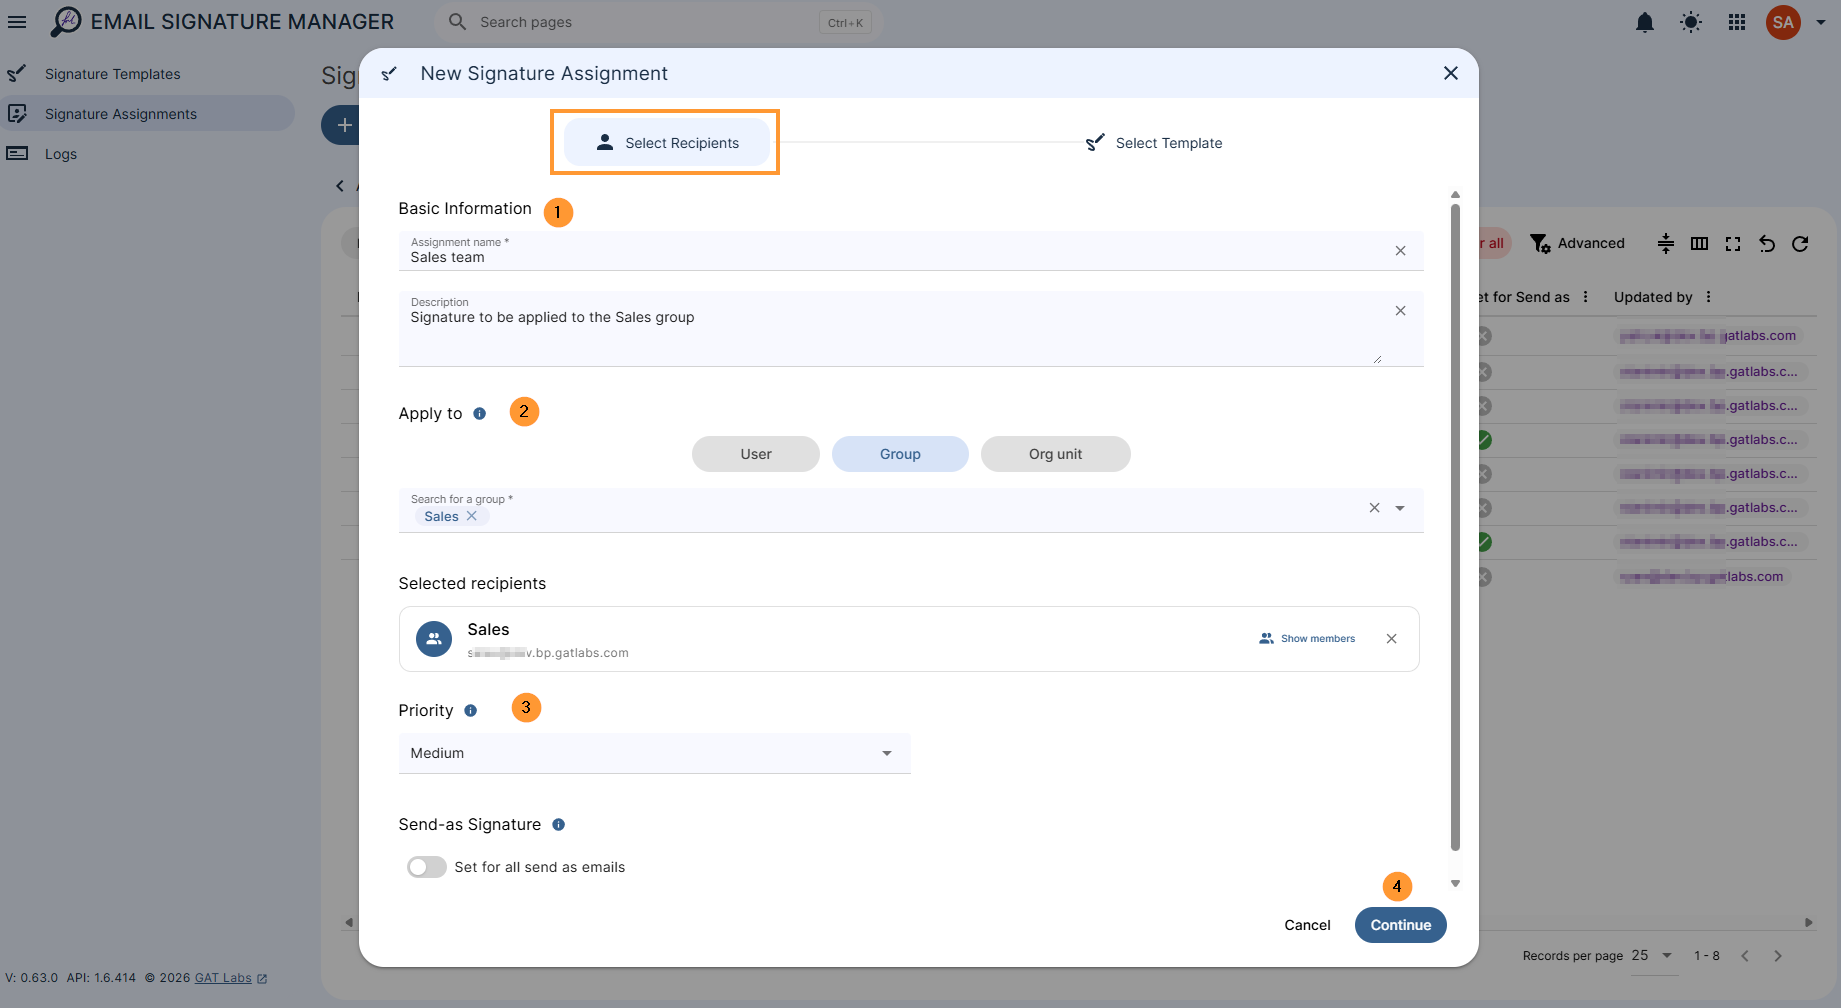
Select recipients #
- Basic information – fill in the required info
- Assignment name – enter the name for the signature assignment
- Description – (optional) – enter a description for the signature
- Apply to – Choose a single type for this assignment: recipients of the signature – users, groups, or organizational units.
- User – signature will be applied to the selected user
- Group – signature will be applied to all members of the selected group
- Org. Unit – signature will be applied to all members of the selected org. unit
- Click on “show members” to view the list of users included in the set list
- Priority – Select the order of signature application
- Higher priority assignments win when a user matches more than one.
- Defaults:
- High = 100 for users,
- Medium = 200 for groups
- Low = 300 for organizational units.
- Custom – Choose Custom to set your own number between 1 and 1000.
- Send-as signature – When enabled, this signature is also set as the user’s send-as signature in Gmail; otherwise, only the user’s primary email address will have this signature.
Select template #
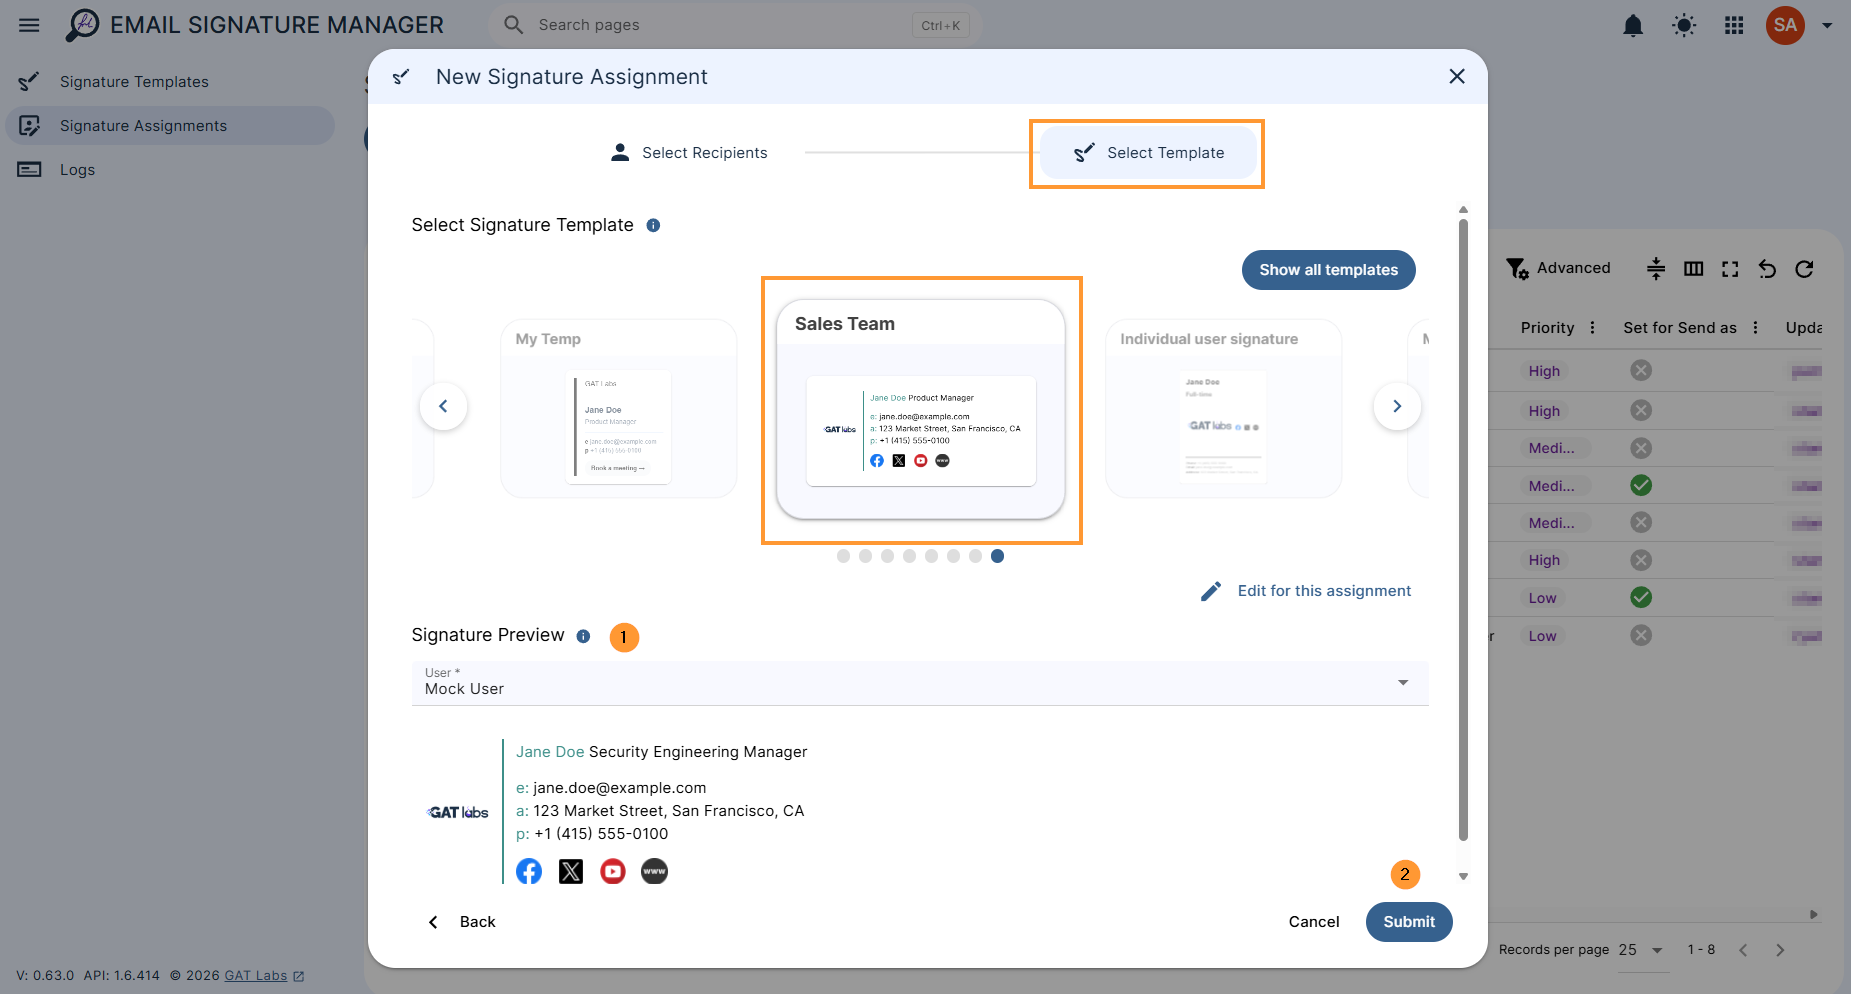
In “Select template”, the template will be selected.
- Select the template – pick the template
- Signature preview – Select a user to preview the signature with their real directory values.
- Submit – click to apply the signature template
Result of signature applied #
When the template and recipients are selected, the signature is applied and submitted; it will be automatically executed for all the selected users.
This is automated signature application
Automatic assignment of the signature #
By default, the signature will be applied and re-applied on a daily basis for all selected users automatically.
If an end user on your domain happens to modify their signature, Email Signature Manager will re-apply the assigned signature automatically.
If there is more than one signature applied per user, the priority set would be used to decide the signature assigned.
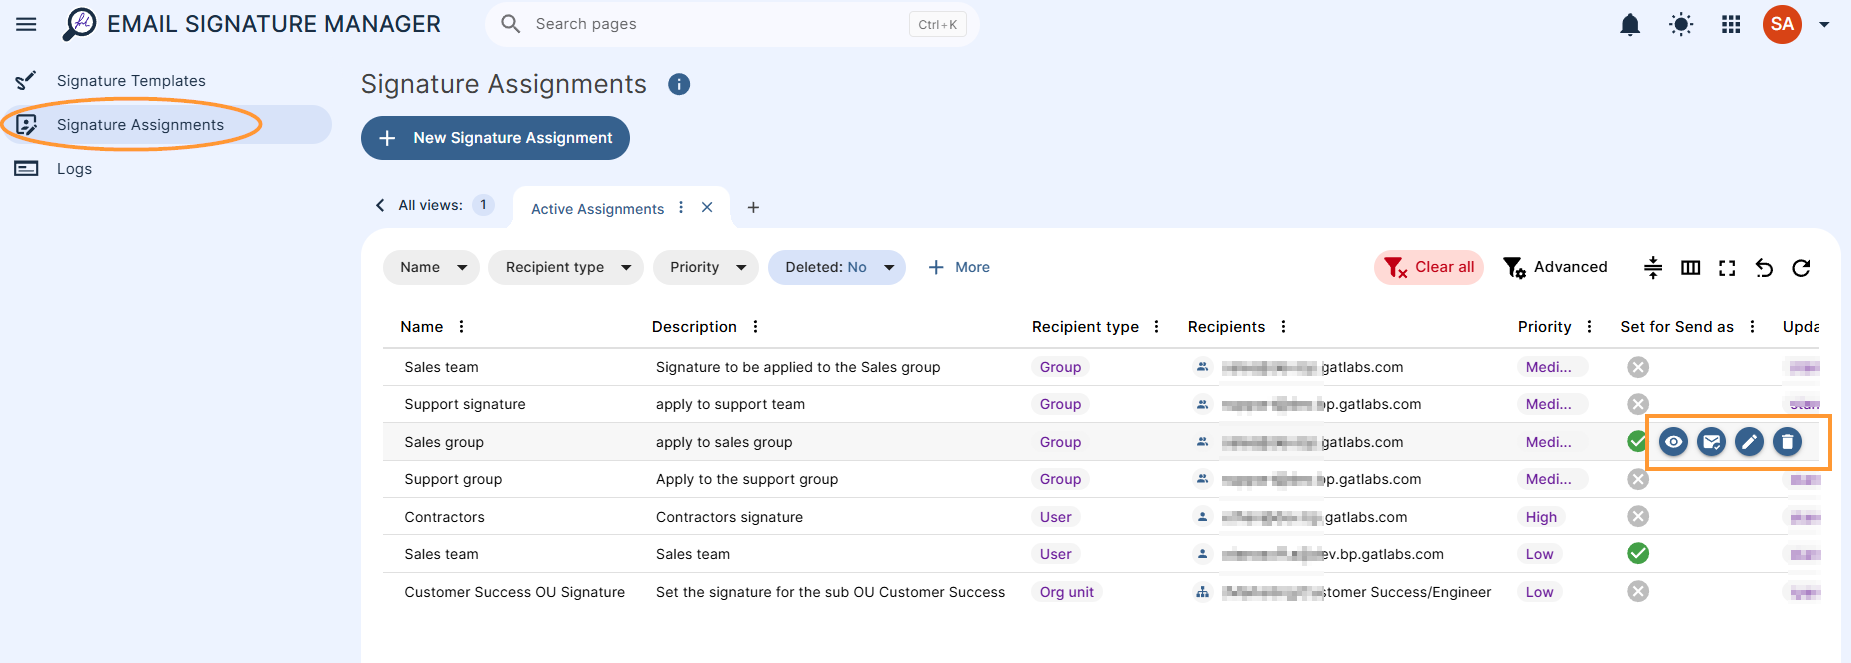
View all the signatures that are applied in the Signature Assignments section.
On the right side, you can take a few actions.
- Preview signature – In this view, you can see a preview of the template with the data of the selected user.
Manually trigger signature sync #
- Assign signature – click to force and assign the signature right away (not to wait for the automated run)
- Hover over the signature you want to apply and select the “email icon” and “assign signatures”.
- Use to test the signature
- Hover over the signature you want to apply and select the “email icon” and “assign signatures”.
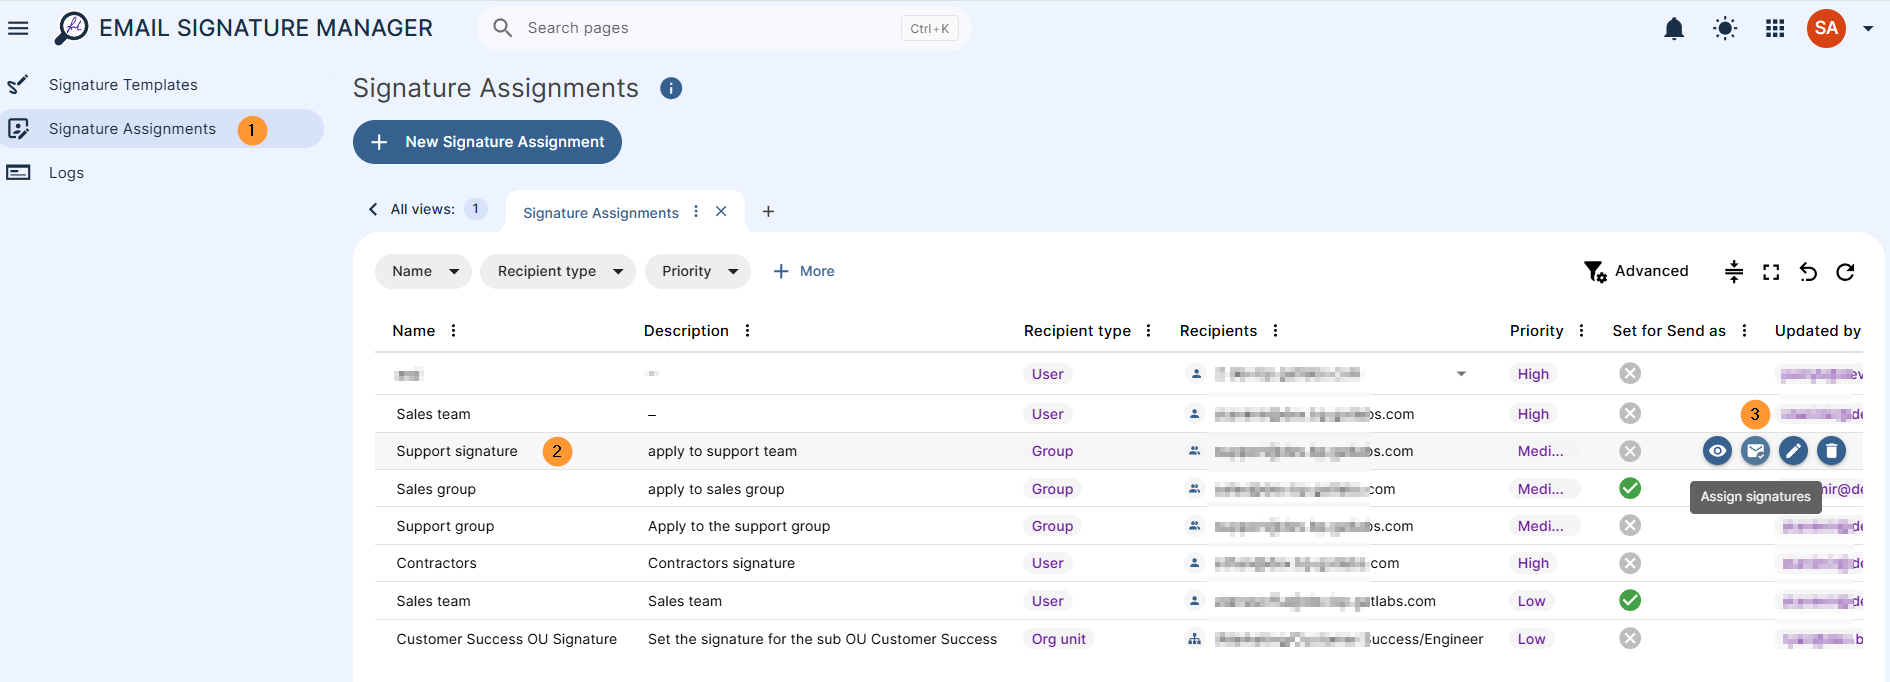
- Edit – click on the “pen icon” to edit the signature
- Delete – click on the “bin/trash icon” to delete the signature
Result for users #
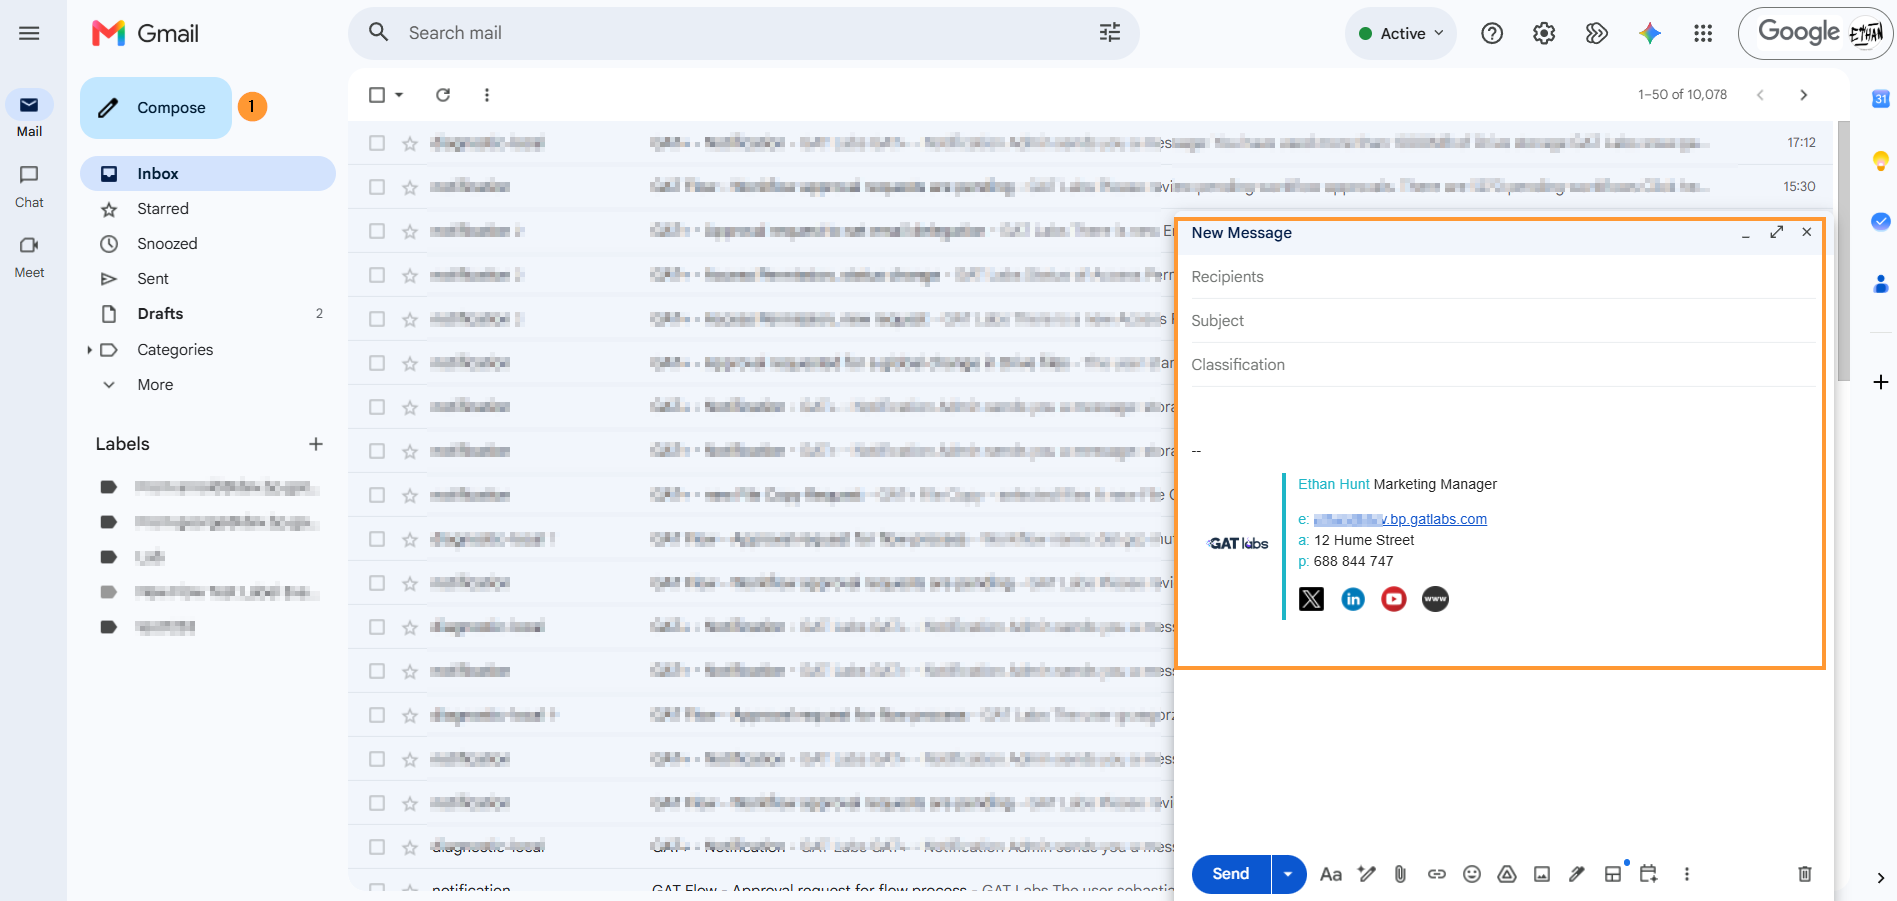
When the signature is run automatically daily, the end users will have it automatically applied to their accounts.
When composing a new message, the signature will be applied in the user’s Gmail.
Delegate Access to Email Signature Manager tool #
This will allow the delegation of the use of the Email Signature Manager to a non-admin account.
First, you need to define the role, then delegate the role
Define roles #
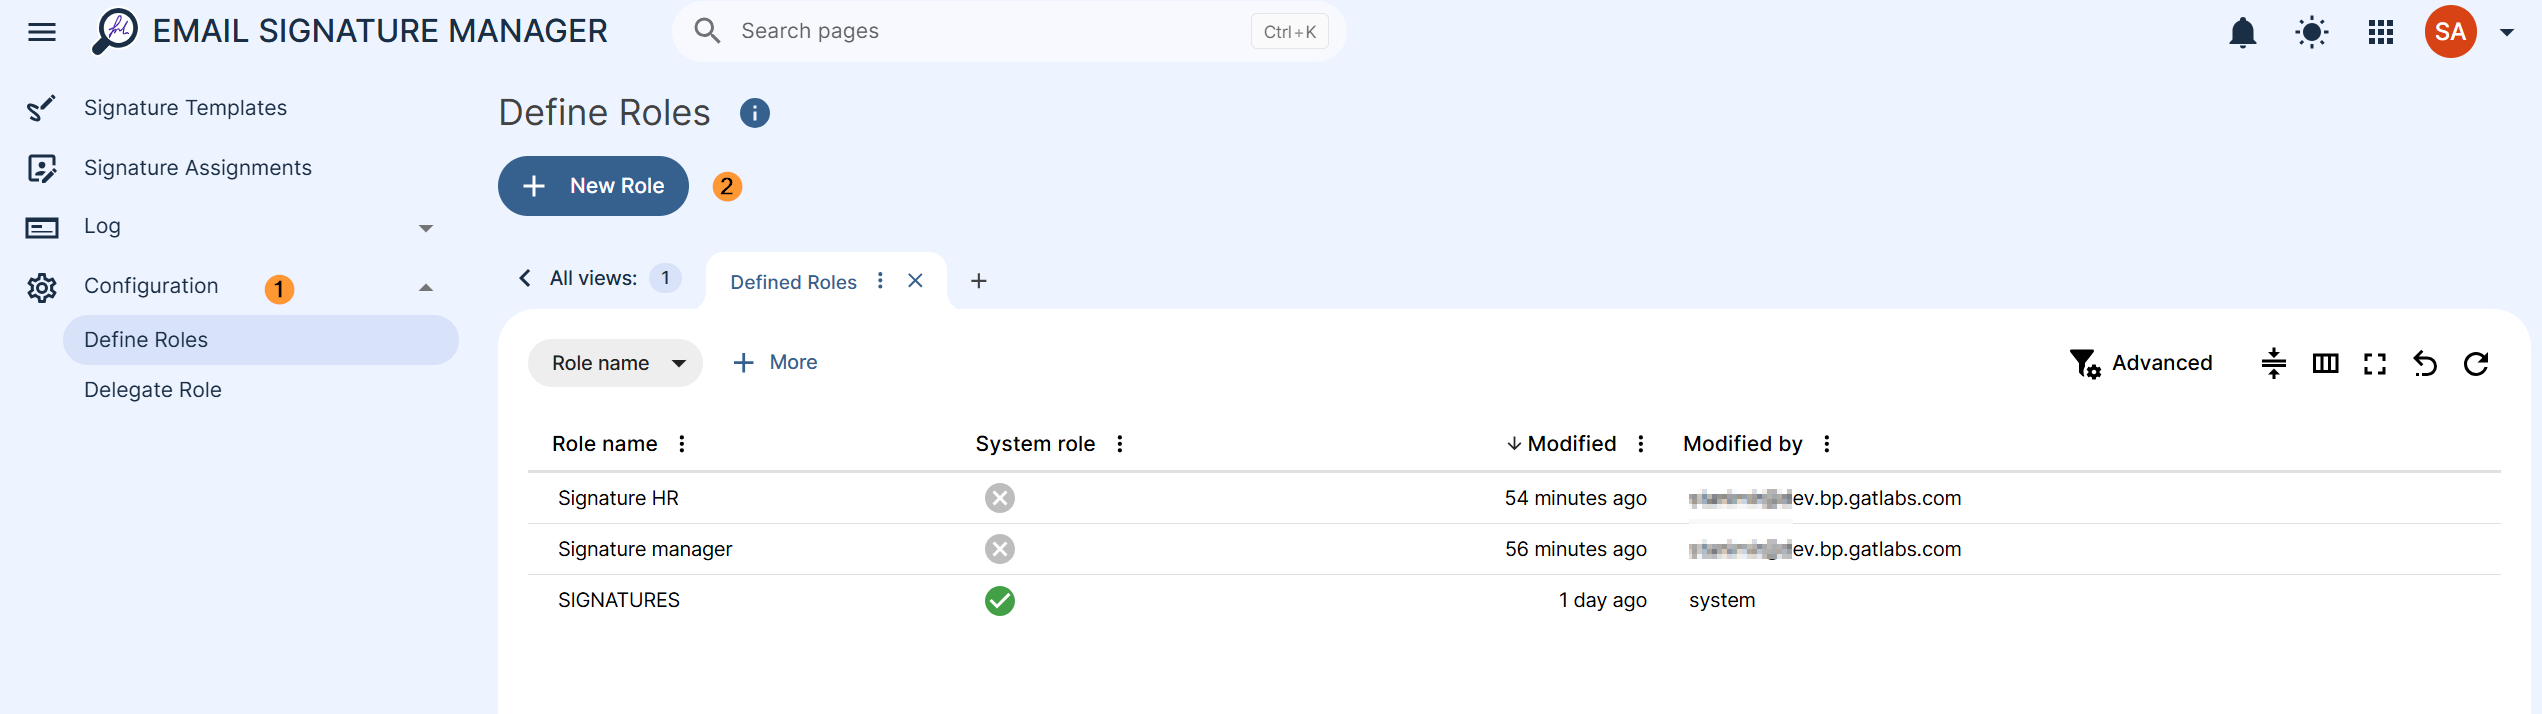
Navigate to Email Signature Manager > Configuration > Define Role
Click on New role and fill in the options
- Signature templates – The permissions that control the signature templates.
- View – The user can open the signature template list and the template preview.
- Create – The user can create a signature template and upload a template picture.
- Edit – The user can change a signature template and upload a template picture.
- Delete – The user can delete and restore a signature template.
- Signature – The permissions that control the signature assignments.
- View – The user can open the signature assignment list and the assignment status.
- Create – The user can create a signature assignment.
- Edit – The user can change a signature assignment and set the assignment active or inactive.
- Delete – The user can delete and restore a signature assignment.
- Apply now – The user can write the assignment signatures into the mailboxes of the target users.
- Clear signatures – The user can remove the signatures from the mailboxes of the target users.
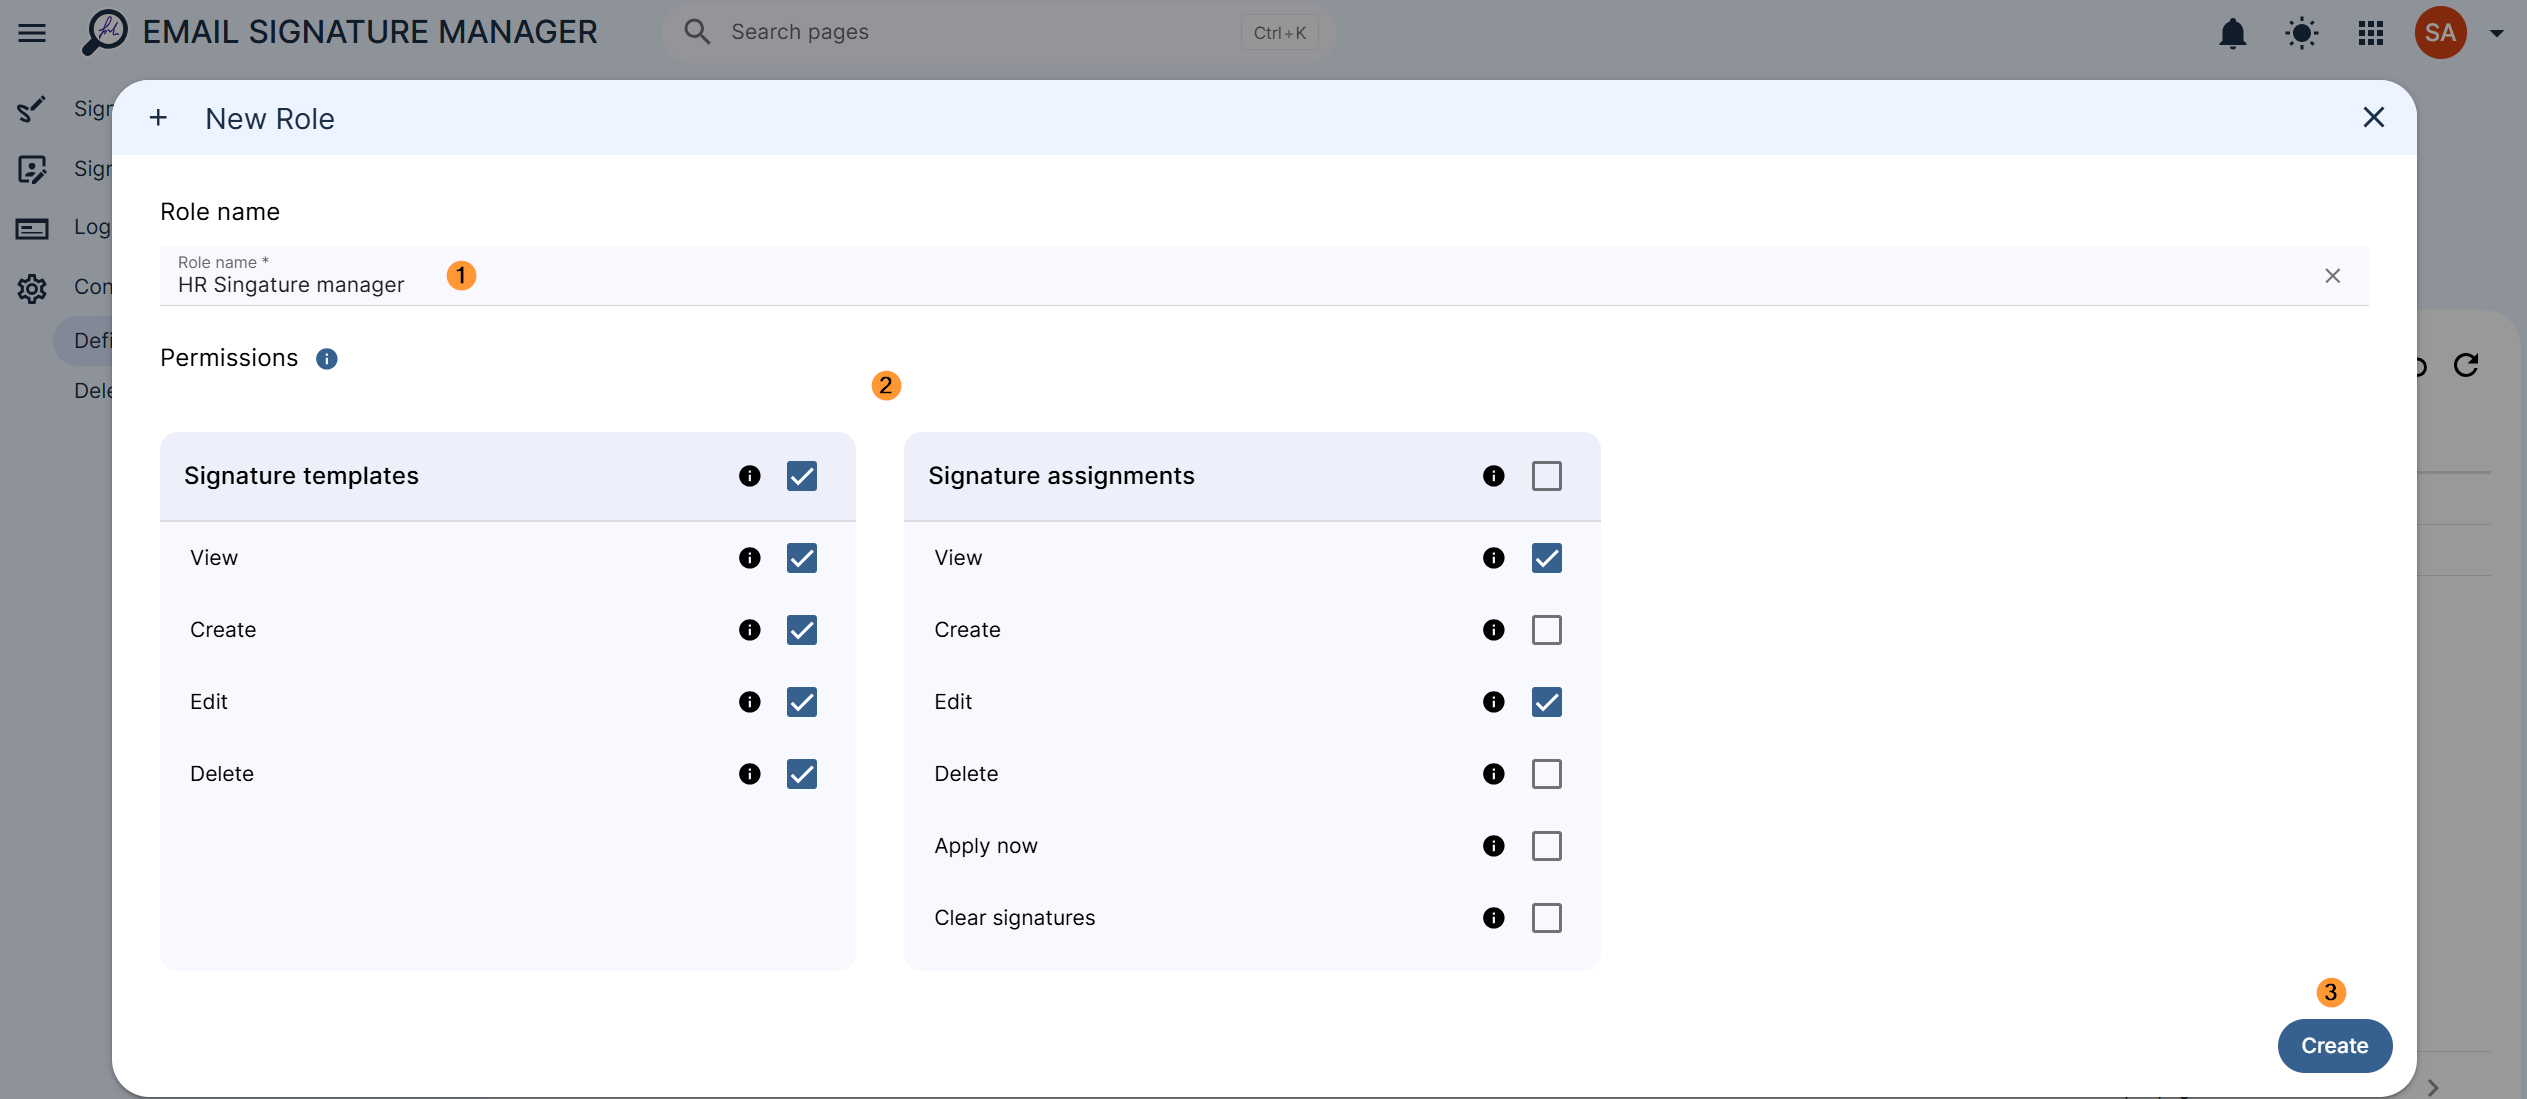
Click on Create to create the role
Delegate role #
When the role is defined, it can be simply delegated to any non-admin account in the domain.
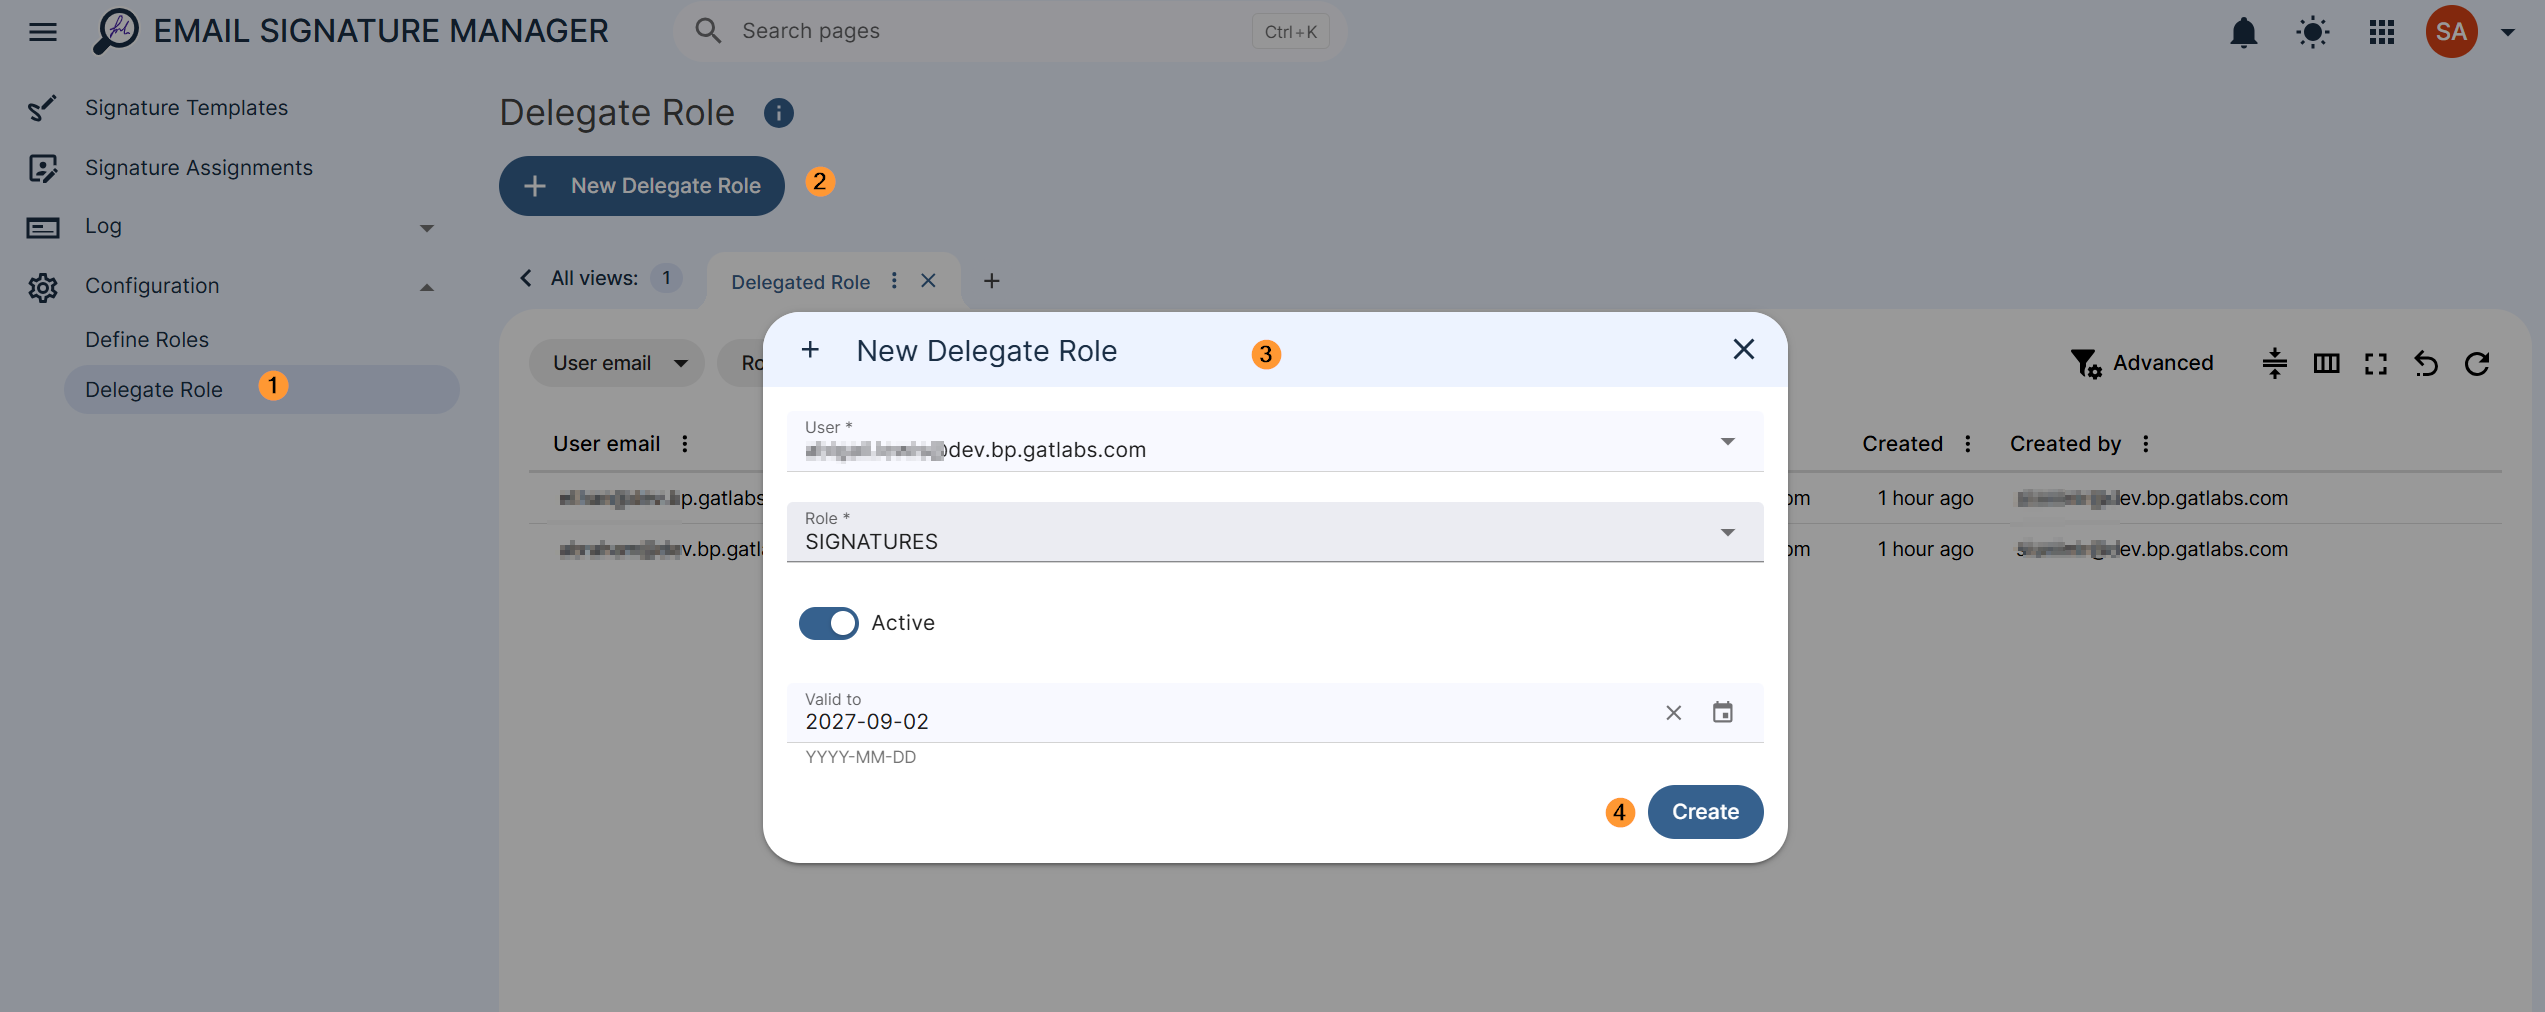
Click on + New delegate role
- User – select the user who will have the delegated role
- Role – pick the role
- Active – enable or disable the role
- Valid to – select and set the time for the validity of the role
- Create – click to create the role
Result for Delegated access #
When the Email Signature Manager access is deleted, the user will be able to log in to the tool and use it.
The access will be based on how it is set up.
Logs #
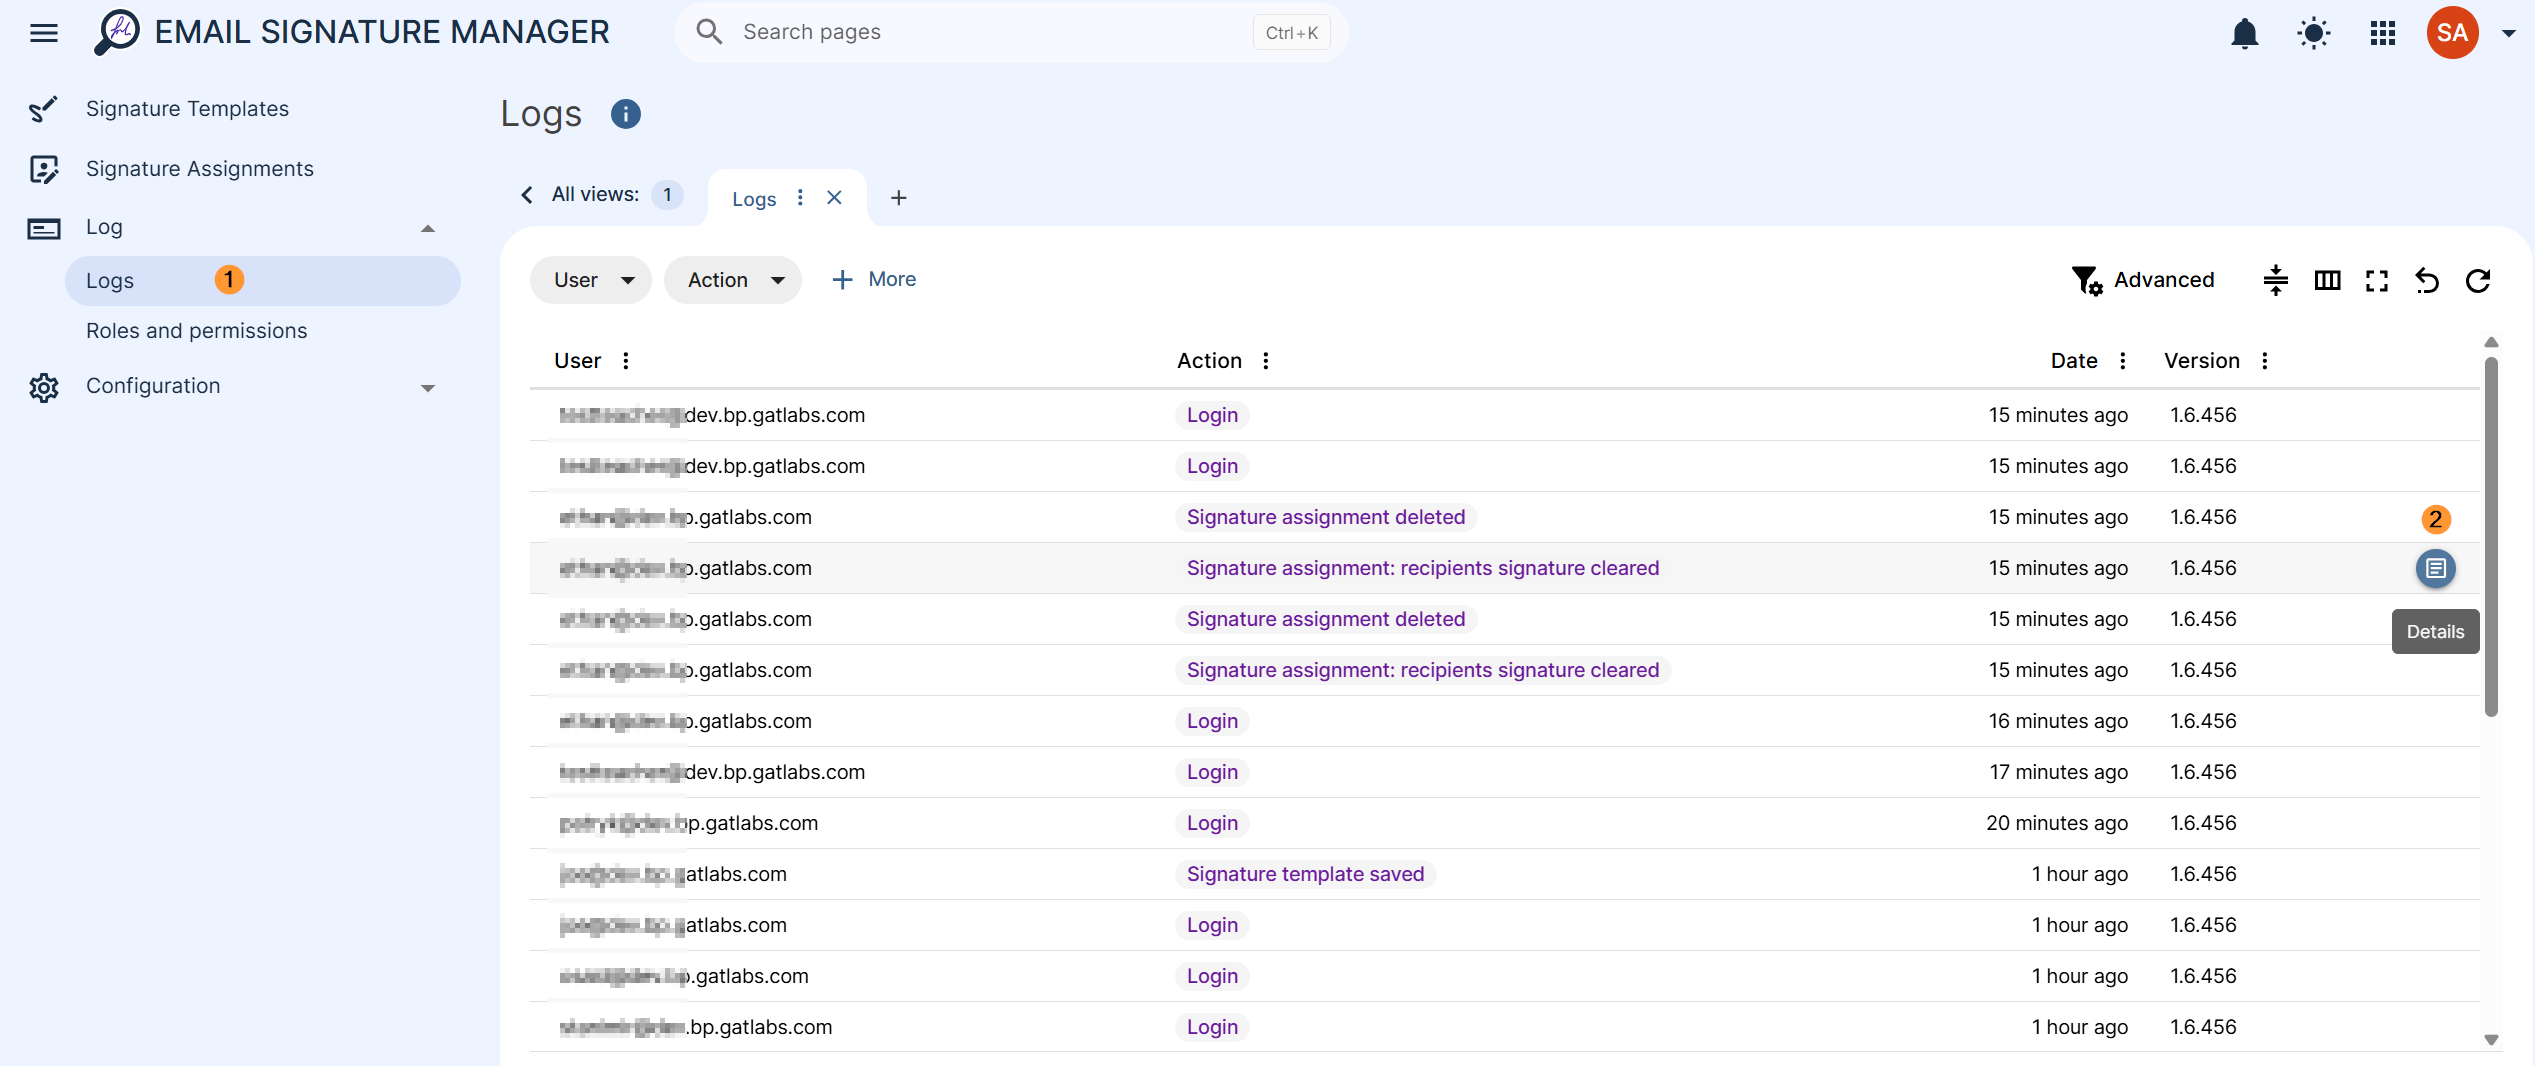
The logs show details for the user of the tool. It will show when and what signatures were applied, automatically or manually pushed by Admins.
Navigate to Email Signature Manager > Logs > Logs
View users’ activity as well as system activity when the signature was automatically applied
Hover over any action, then click the details button on the right.
Roles and permissions #
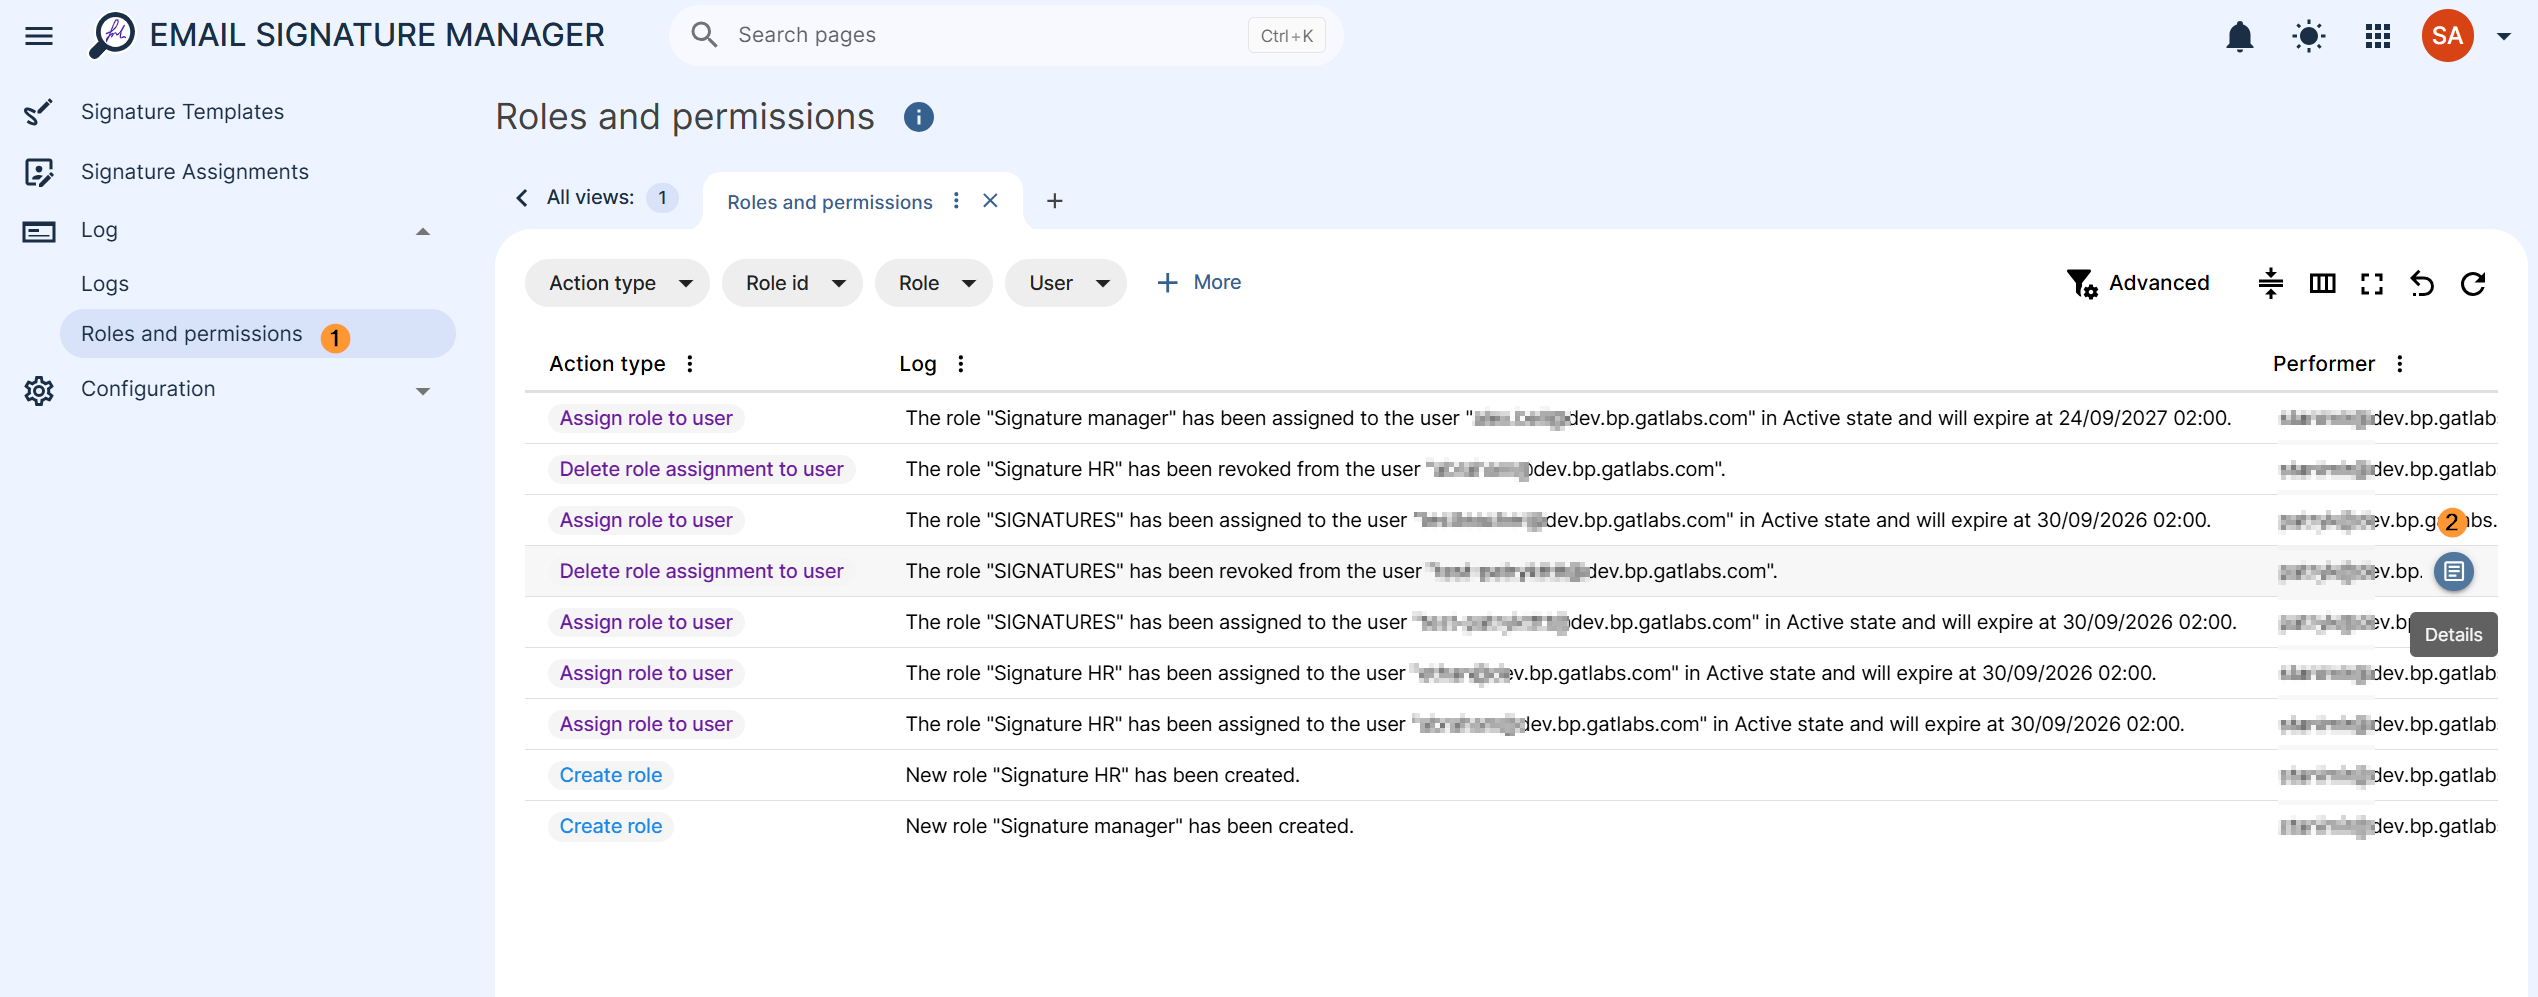
Navigate to Email Signature Manager > Logs > Roles and Permissions
View and audit roles and permissions added to users, and full details
Manage Your Email Signatures from One Dashboard #
By combining dynamic HTML editing with automated daily synchronization, the Email Signature Manager eliminates the manual hassle of deploying corporate signatures.
Whether you need to enforce a unified brand identity, update social media links, or manage complex multi-department assignments, this tool ensures your users’ primary and send-as emails always feature accurate, professional, and up-to-date signatures.
Take complete control of your domain’s email presence with automated signature management.
Frequently Asked Questions #
1. I saw the Email Signature Manager appear on my domain. Do I have to pay extra for that?
No, it has been released as a free tool for all administrators with the Essential Plus plan and upward. If you see it on your domain, you do not have to pay extra.
2. Can I apply a different email signature to different Google Workspace users?
Yes. Email Signature Manager allows administrators to apply email signatures to individual users, groups, or Organizational Units (OUs).
3. Can I create custom HTML email signatures?
Yes. You can create a custom HTML email signature using the HTML editor or choose from our predefined templates.
4. Can I preview an email signature before deploying it?
Yes. The ‘Show preview’ option lets you preview how the email signature will appear for a selected user before applying it.
5. Can I assign different email signatures to different users or departments?
Yes. Email signatures can be assigned to users, groups, or Organizational Units. If a user matches multiple assignments, the assignment with the highest priority is applied.
6. Are email signatures applied automatically?
Yes. By default, Email Signature Manager automatically applies signature assignments daily to the selected users.
7. At what time of day does the signature get assigned?
It will run roughly every 24 hours and is dependent on the time of the GAT+ scan that has run within the same time period, so it will differ slightly each time.
8. Where is the signature image saved?
It’s saved in your organization’s shared drive. The admin who first sets the signature will become the shared drive manager. This shared drive will be created automatically and will be public by default.
9. What if the admin leaves the organisation; will that break the signature?
No, the signature is stored in the organisation’s shared drive and made public for robustness.
10. What type of images are supported?
JPEG, JPG, PNG, and GIF image files are all supported.
11. I use a different signature manager tool; can I transfer my signature from there?
Yes, just paste the HTML from your previous signature into the HTML window in the Email signature manager when creating the template. Watch out for variables in the signature; your previous signature tool may use a different placeholder variable to display attributes on the user’s profile. Ask the GAT Assistant for help replacing the variables so that they will work with the Email Signature Manager, and it will fix that for you in a few seconds
12. I have some custom attributes on my users’ accounts; is there a way I can get a dynamic variable for those
Yes, you will see the variable for any custom attributes you have in Google Workspace readily available in the ‘Template variables’ dropdown window; just select the Custom Attribute section on the left-hand side.
13. I want my variable to be uppercase; is there a way to configure that?
Yes, the Liquid Templating language can be used to cover this case. Use {{ name | upcase }} to display the full name in all capitals, for example.
14. What happens if I add a variable to the signature and a user doesn’t have that attribute? Will that break the signature?
No, the attribute will simply be left blank on the user’s signature.
15. Can I omit a whole chunk of the signature if the user doesn’t have an attribute?
Yes, you can omit the whole line about their work phone number if they don’t have a work phone, using {% if workPhone %} Work Phone: {{ workPhone }} {% endif %}
16. Is there a limit to the number of signatures I can store and use?
No, you can store and use as many templates as you like.
17. Is there any way to outright stop my users from modifying their signature in Gmail?
Yes, GAT Shield can handle this case. You can find out how to do it here.


